The most expensive lesson I never learned

Sometimes it’s cheaper to let the pros do it.
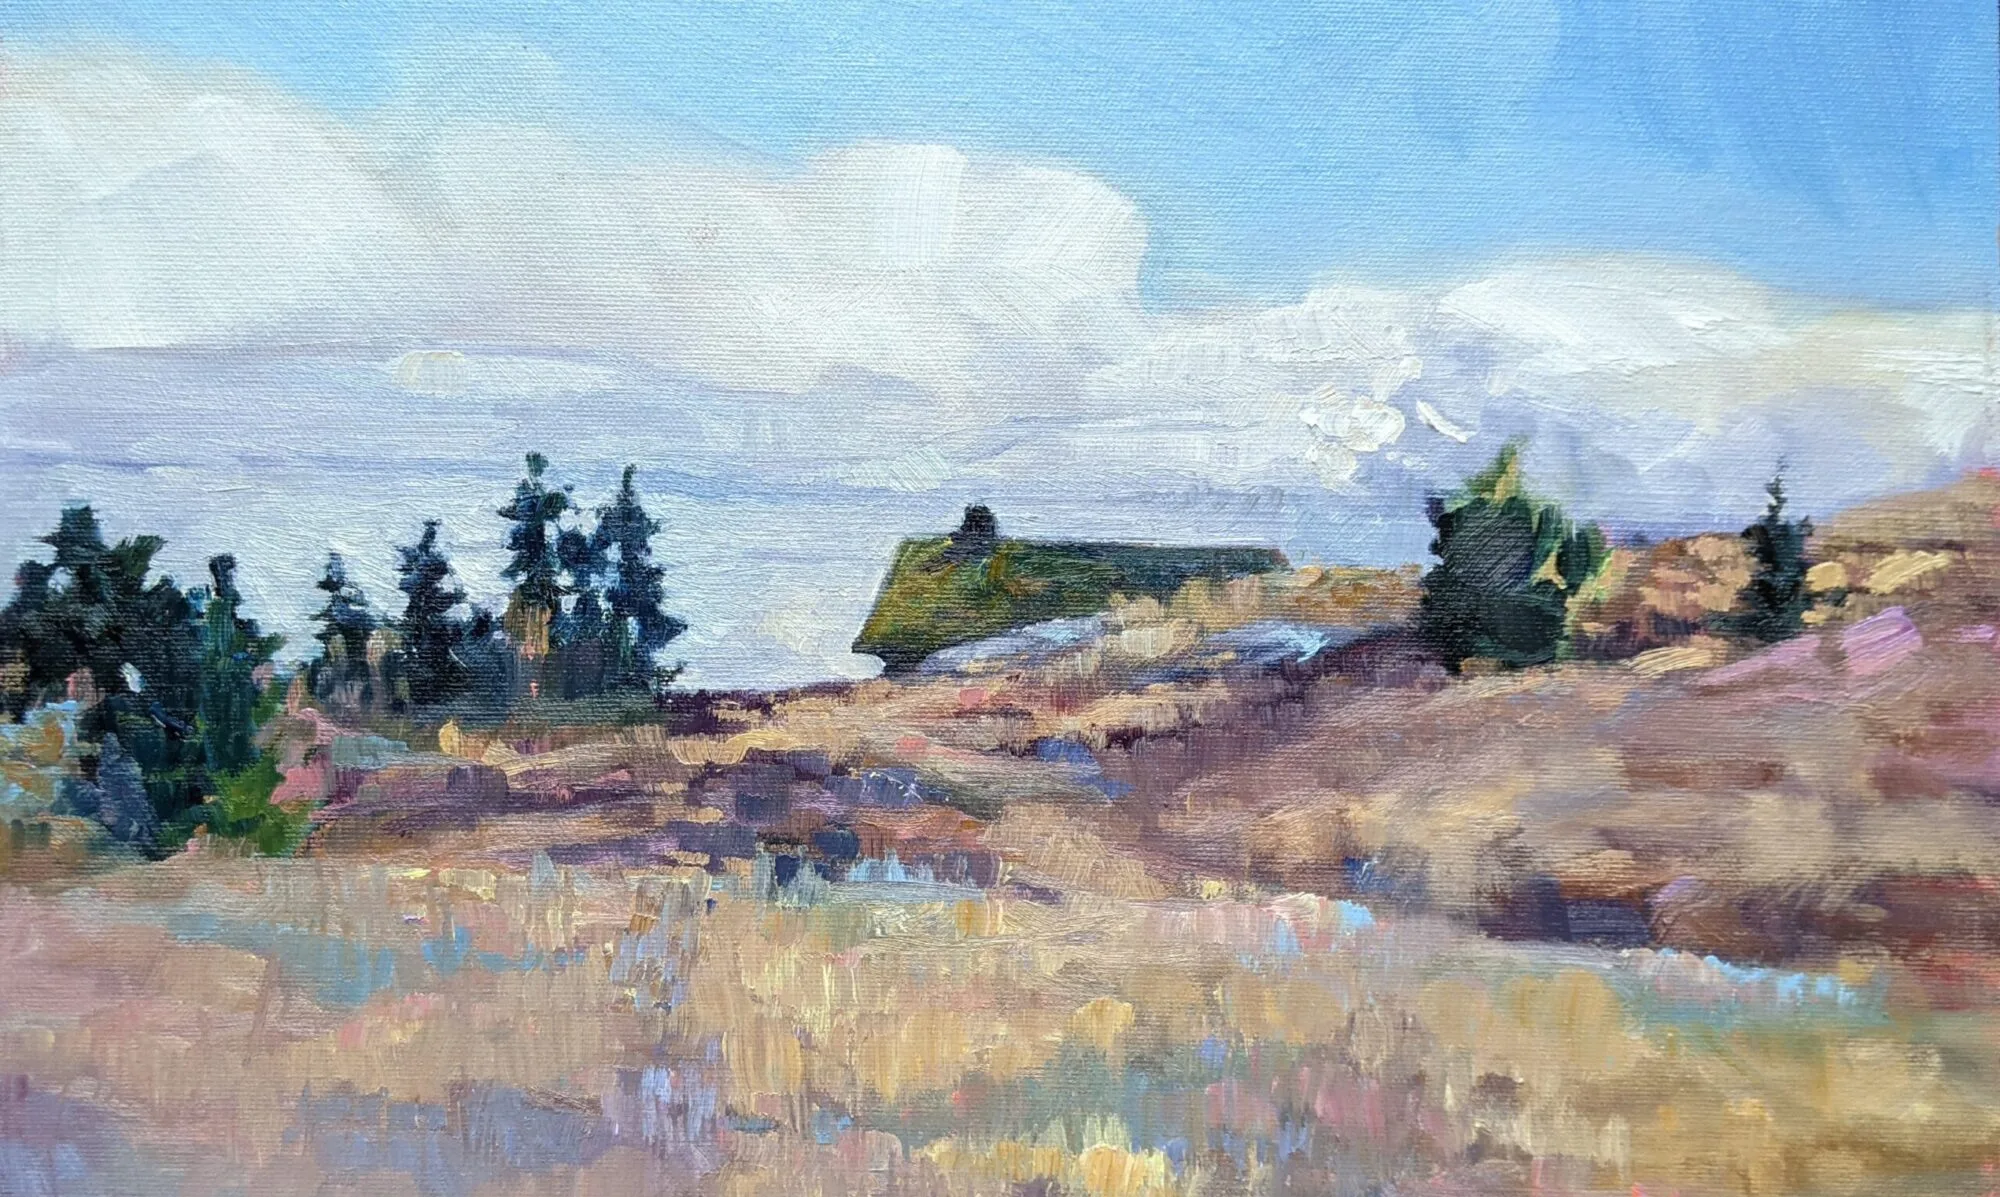
Clary Hill, watercolor, by Carol L. Douglas
If you ever work in watercolor or pastel, you know the framing cost for those media is much higher than for oils. That’s because they’re fussy and difficult to frame properly. I occasionally use both in the field but not for events; I can’t deal with glazing and spacers in the high-tension moments at the end of a show. The worst injury I’ve ever sustained as a painter happened when I was levering a large sheet of glass into a frame. It snapped under its own weight and sliced my hand. That kind of thing makes you cautious.
Last autumn I did a residency at the Joseph Fiore Art Center. The result was eight oils and eight watercolors, all 24X36. One of each will be on display at the Maine Farmland Trust Gallery starting next week; later this year the whole set will go to the Jackson Memorial Library. It’s difficult to find a frame that works well with both oils and watercolor, but after much searching I found it in a deep, shadow-box moulding from Omega. I ordered enough material for sixteen frames. It has been sitting in the corner of my studio for a month, waiting for me to find the time to start.
Clary Hill, oil on canvas, by Carol L. Douglas
If you’ve done a lot of framing you should be wincing by now at the cost of this venture. The moulding was $800 for the stock alone. I went out yesterday to find the proper glazing material for the watercolors. (It’s easier to find a picture framer than a chain clothing store in my neck of the woods, and that’s how life should be.) The glazing would be between $90 and $140 per picture, depending on what I chose. Each watercolor would also need foam core, mat-board and spacers.
But being professionals, they wanted the frame in hand before they started cutting into their expensive materials. I’d have to return with it this morning.
Glade, watercolor, by Carol L. Douglas
“Then what,” I asked, “would the cost be to assemble the whole thing right here?” The price they gave me was only marginally higher than the materials cost. Bam! I’m dropping off the test picture this morning and they can do the fiddly bits. If it looks as good as I expect it will, they can do all eight of the watercolors.
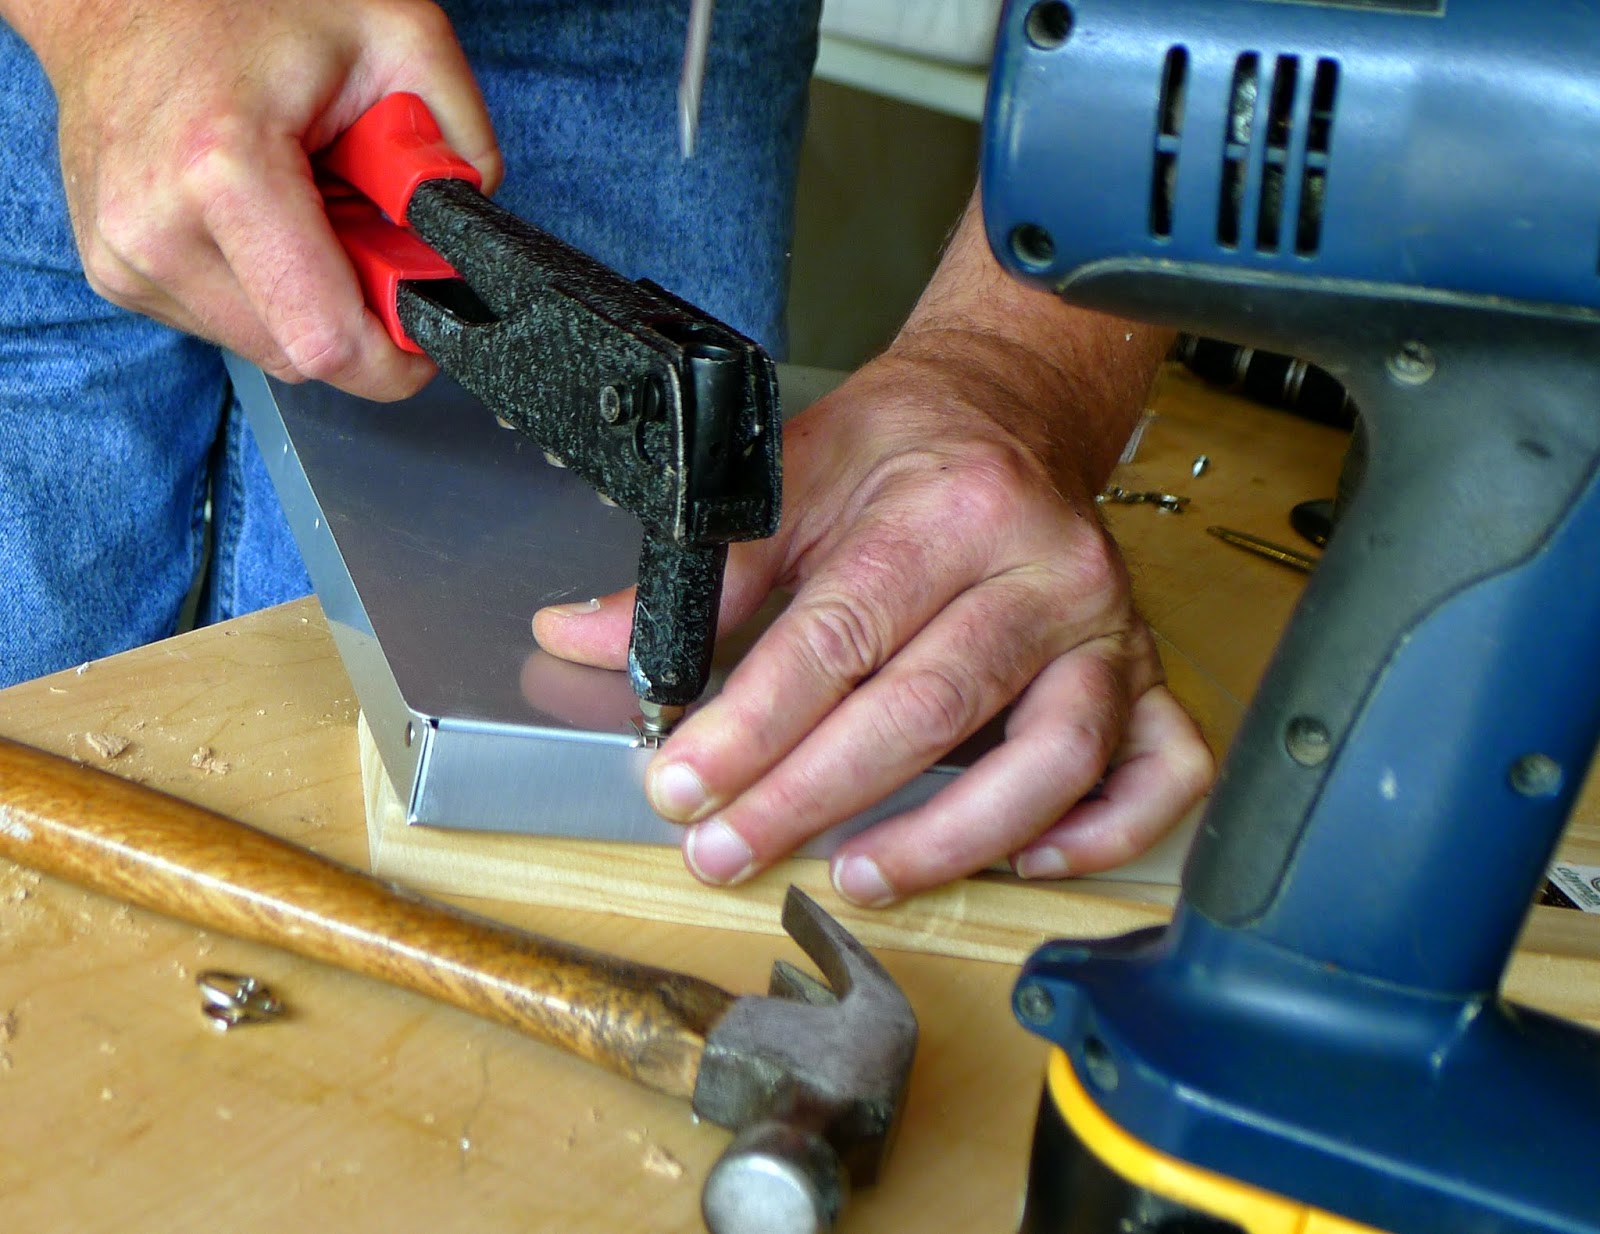
I can usually copy most things I’ve seen built, and I take pride in craftsmanship, but I’m always working with home tools. I don’t, for example, have a power stapler; I join corners with careful gluing and brackets. Their joiners and staplers don’t just make things faster; they result in tighter, neater work. And while making things is fun, it’s hardly what you want to do when pressed, as I am right now.
Float, oil on canvas, by Carol L. Douglas
I’m in a point in my life where my scarcest asset is time, rather than money. But it’s never occurred to me to hire out work I can do myself. Still, maybe there are times it’s better to let the pros do it.
“I need an admin,” I whined to my upcoming portrait client yesterday afternoon.
“Virtual assistants are the thing. And usually at an attractive fee, too,” she responded. How that works, I don’t know, but perhaps it’s time to find out.

Field testing my ultra-light pochade box

“Bluebell Hopyard,” by Carol L. Douglas, framed and ready to head out the the VB Brewery, where it will be for sale. $300.

Yesterday I wrote about buildingan ultra-light pochade box. When it was finished, I immediately took it out and field-tested it.

My pal and student Catherine Bullinger has wanted to paint at Bluebell Hopyard all season. This isn’t just a passing fancy: she and her husband run the VB Brewery in Victor and are committed to buying local supplies where possible.

Hops are tall and thin, kind of like my husband.
My back has been bothering me, so I elected to paint sitting down (which I only do infrequently). First mark in favor of the new easel: it works well from a seated position.
Hops are the weirdest darn crop. They have leaves like figs, are related to cannabis, and are perennial. The seed cones have been used to flavor beer since the 11th century.

The seed cones are what give the bitter overtones to beer.
Their bines grow up long, long supports—I would guess they grow 15-20 feet in the air. When the air is still, they stand like temple columns or Italian cypresses, but as soon as the breeze picks up, they dance. Finding a composition that caught the essence of their character was a challenge.
As we painted, the wind picked up. I have a tripod stone bag from my Guerrilla Painter easel, but I never needed to use it—the easel presented less of a sail surface than I expected.

Look at this beauty working!
My only complaint—and it’s manageable—is that the clip left a big unfinished area on the left side of the canvas. I corrected it easily enough, and I think I will use a different method of clipping next time.

The way I had it clipped, the left side needed work when it came off the easel.
The whole thing, including the tripod, fits in my frame backpack, which is a great advantage over my prior easel. Although I thought I’d miss the larger mixing surface, I think the 11X14 area worked just fine.

I will take it to Maine with me on Saturday, although I’ll have another easel as a backup.

Sorry, folks. My workshop in Belfast, ME is sold out. Message me if you want a spot on my waitlist, or information about next year’s programs. Information is available 
here.


Making my own super-lightweight pochade box

The finished project, more or less.
Last month Johanne Morin and I painted together at Kaaterskill Falls. She had an efficient, lightweight easel, and her pack was so easy to manage that I begged her for information on how to make one for myself.
The primary parts of Johanne’s easel are a Saunders 10519 Recycled Aluminum Snapak Form Holder and a Promaster T525P carbon-fiber tripod. I purchased the former from Amazon and the latter from eBay. Johanne also used a pochade-box mounting plate from Guerrilla Painter but since I didn’t have time to track it down, I improvised with a block of hard red oak.
I’m not experienced working with aluminum, but my brother Robert was in town yesterday. He helped me assemble the easel. This is how we did it:
This is what the Saunders 10519 Recycled Aluminum Snapak Form Holder looks like when it arrives.
We used a pair of pliers to remove the pin holding the long aluminum inside cover.
The other extraneous piece, inside the box, is best cut off because it shares a pin with the main hinge. Here we used a Dremel with a cut-off wheel.
The female flange adapter for the tripod was countersunk with a 1″ bit.
Then the hole was drilled and the piece cut down to size.
Countersunk and glued.
Pilot holes drilled through aluminum and oak.
The wooden block was dimpled with a drill to accommodate the screwheads. But here the flange is on the wrong side. If the collar faces the aluminum, screwing it tight on the easel locks the whole assembly. (We realized it and turned it over.)
Don’t have a die to countersink the aluminum? Use one of those stupid screwdriver bits that came in a kit—one you’ll never, ever use.
After we screwed the base plate in place, we needed to put a wire holders on the left in lieu of a support hinge. I have a gazillion d-rings for picture frames, so we used those, and popped them in place with a riveter.
Works just fine, and picture-hanging wire is great for holding it open, but I hate that glare.
So I masked and sprayed the inside of the box with red primer.

On the left, my current lightweight wooden pochade box and on the right, this aluminum box. No contest!

My investment for this project:

Used Promaster T525P carbon-fiber tripod: $163.43 on eBay.
Saunders 10519 Recycled Aluminum Snapak Form Holder: $35.27 on Amazon.
Female flange adaptor from my local hardware store: 75¢
Four 6X½ flathead screws: 44¢
One 27/64 drill bit: $9.88.

Tomorrow: how it works.

Sorry, folks. My workshop in Belfast, ME is sold out. Message me if you want a spot on my waitlist, or information about next year’s programs. Information is available here.