Monday Morning Art School: How to use medium

The actual process is simple, but it has to be done right to prevent chalkiness or cracking.
The Farm at Olana, by Carol L. Douglas
“How should I treat older, unvarnished paintings that have become chalky?” a reader asked me. “And for that matter, what kind of varnish do you recommend?”
Chalky paintings are best revived with varnish. My personal preference is Winsor and Newton Artist’s Matt Varnish. It’s easily removable by a conservator, provides UV protection, and it doesn’t shine. (If you want more reflection, they make both gloss and satin finishes.) As with all varnishes, it shouldn’t be applied for a year after the painting has been finished, and it should never be used as a painting medium.
But learning to use medium properly is a better protection against chalkiness. (If you’re new to oil painting, consult my basic rules of oil painting.)
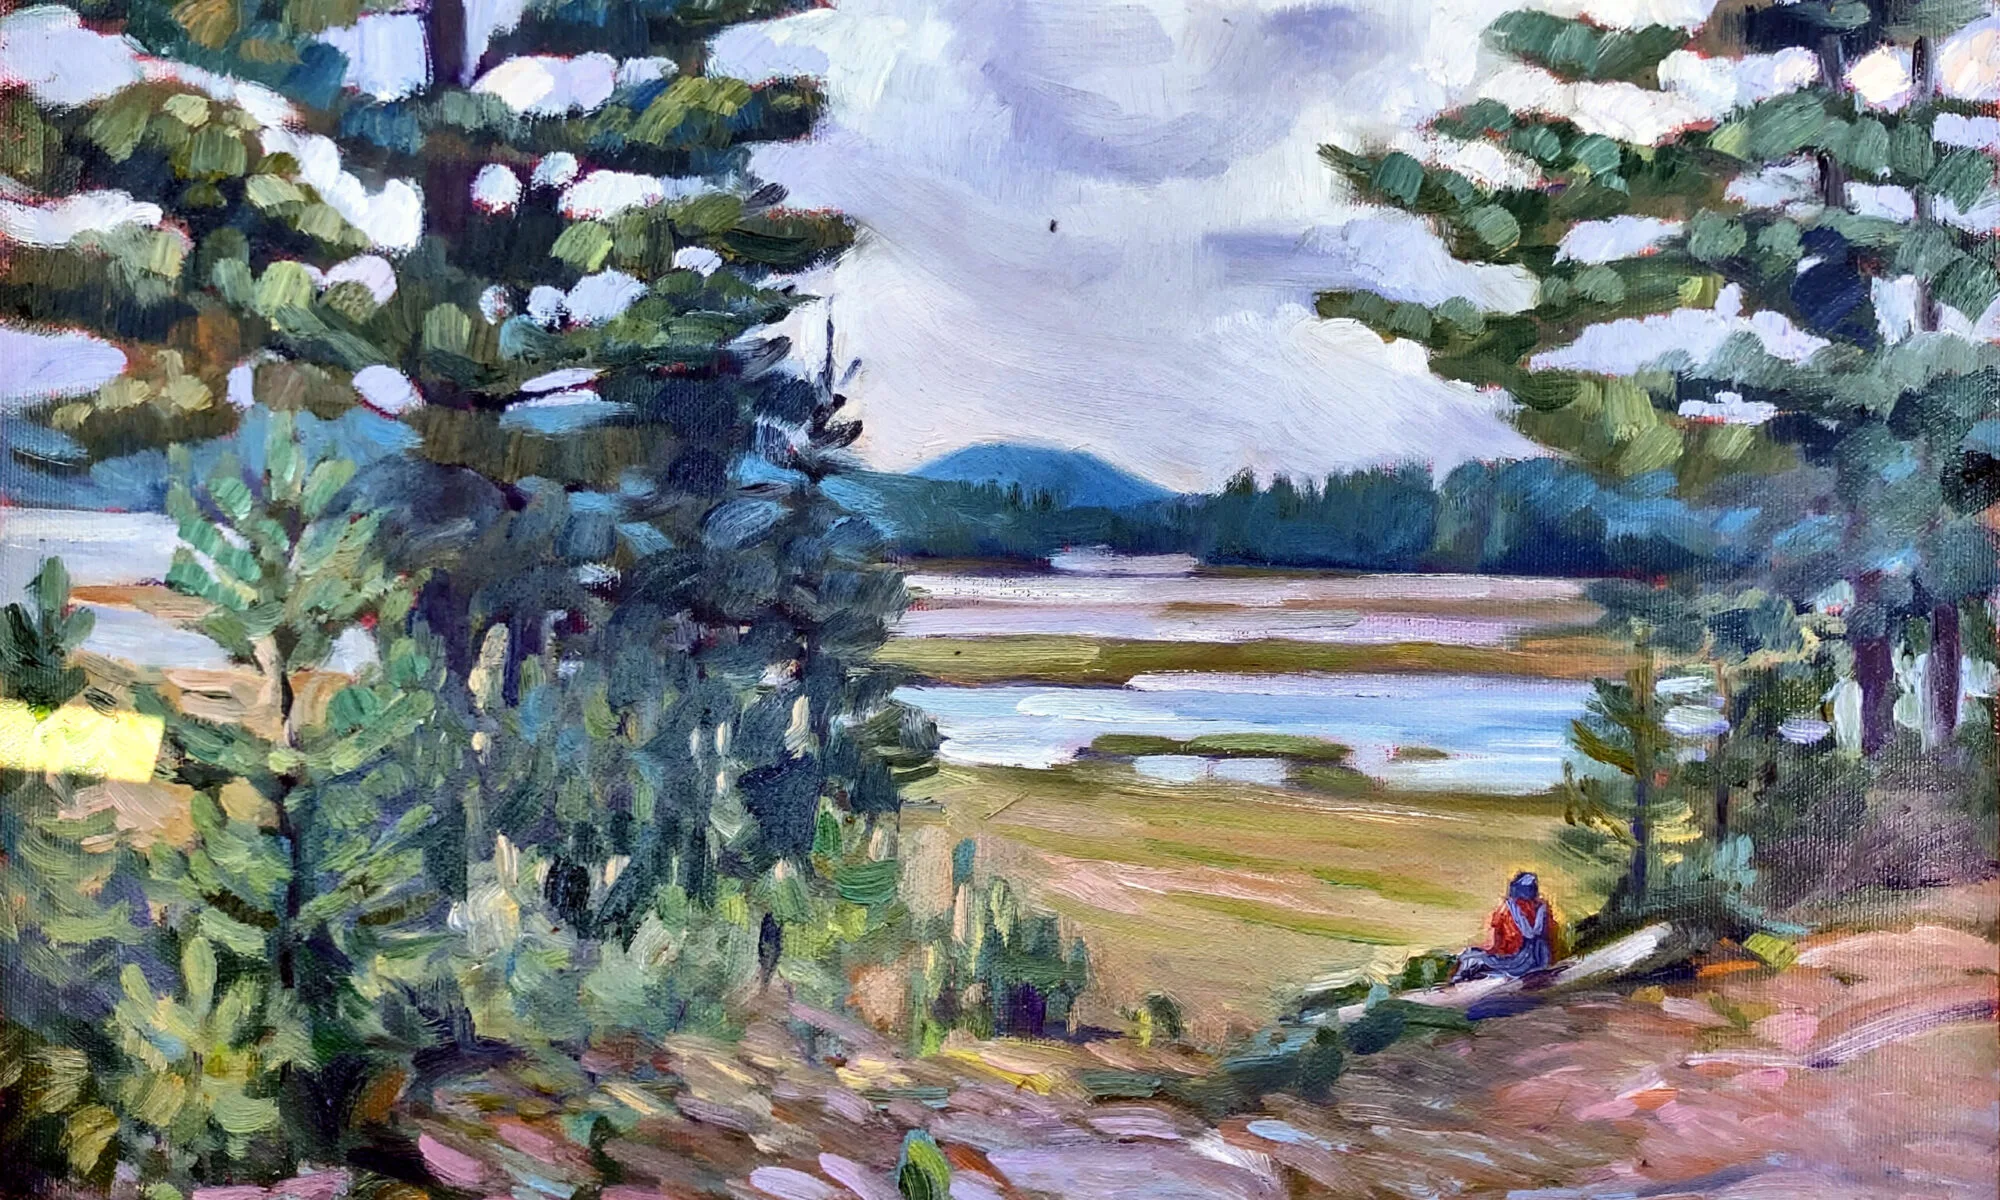
Mamaroneck River, by Carol L. Douglas, in its finished form right before it went on the auction block.
There are several families of oil painting mediums out there:
  • Traditional mediumsare made from a slow-drying oil (poppy, linseed, etc.) a resin, and a solvent, sometimes with a siccative like Cobalt Drier added to improve the drying time.
  • Alkyd mediums are made with a slow-drying oil reacted with an alcohol and an acid. They dry faster, making them suitable for multiple glaze layers, but they carry less pigment. They should never be used on top of traditional oil mediums.
  • Solvent-free mediumsdo not include any petroleum distillates. All unmixed slow-drying painting oils are inherently solvent-free, being plant-based.
  • Wax based mediums include cold wax and encaustic.

Mamaroneck River, when the second layer was done but the top layer hadn’t been started.
For field painting, I prefer a traditional medium: Grumbacher’s Oil Painting Medium II. It retards the drying time and allows me to work wet-on-wet longer. In particularly dreary conditions, I’ll use their Medium III, which has a drier. For studio work, I sometimes use their Medium II, because it dries to a matte finish. I buy this brand because I prefer a very thin medium. There are many good brands out there, and I would trust any medium made by a reputable paint house.
Grain elevators, Buffalo, by Carol L. Douglas is an example of a cold-wax medium painting. It gives tremendous latitude in effects.
Back in the last millennium, there was a popular recipe of linseed oil, turpentine, Damar varnish and a few drops of Cobalt drier. I stopped making it when I realized that so many 20th century masterpieces were degrading terribly. Chemists understand chemistry better than painters do.
The drawing layer is always done with solvent, whether in the studio or in the field. That’s Sandy Quang, back when she was my studio assistant.
Neither medium nor solvent is a substitute for good, open paint. If you’re poking a skin off your paint and extending it with solvent, it’s time to clean your palette and get new paints out.
The actual process for using medium in alla prima painting is simple: fat over lean. Your first layer—where you’re drawing the picture on the canvas, called the underpainting—is cut with a small amount of solvent only. Use too much and you’ll have muck above. Your middle layer should be as close to pure paint as you can get, applied thinly. Your top layer should be paint with a small amount of medium, and here’s where you can get as impasto as you want.
Clip this and paste it in your pochade box until it’s a habit.
Medium doesn’t belong in the bottom layers of a painting. The more oil in a layer, the longer the binder takes to oxidize. This keeps paints brighter and more flexible. However, oil also retards drying. Using too much in underpainting will result in a cracked and crazed surface over time.
Use too much medium and you’ll have a soup that dries to a plasticky finish. Use too little, and the paint will drag as you paint and cloud as it dries. I generally just touch the tip of my brush to the medium before mixing it into a brushstroke’s worth of paint.
This traditional method is tremendously variable and gives great control. Practice it.

Monday Morning Art School: the basic rules of oil painting

This weekend’s workshop was all oil painters. This gave me the opportunity to review some fundamentals.
Nicole Reddington’s painting ruthlessly subjugated detail for design, and was tremendously powerful for that. I wish I had more student work to show you, but I can’t find my camera!

Use enough paint

Using too little paint is a rookie error. Too little paint on your palette means you’ll try to stretch it with solvent on the bottom layers or medium on the top layers, and before you know it, you’re going to have a mushy, monochromatic mess on your hand. In the northeast, that soup usually assumes an unpleasant green tone.
Modern paints are formulated to use almost straight out of the tube. They may need a small amount of solvent for underpainting, or a dab of medium to create a juicy top layer, but too much of either ruins paintings.
In my weekly classes, I don’t let students touch painting medium until they have the steps of constructing a painting firmly in hand. That’s hard to do in a workshop, but remember that painting medium is a boost, not a crutch.
Sandy Quang’s painting of a downed tree.
Big shapes to little shapes
Stop thinking of your value sketches as something you must get through before you get to the fun of painting. They’re the most important part of the process, and they’re also a lot of fun.
I like to do lots of preparatory sketches before I start to paint, either in marker or in monochromatic watercolor. The abstract pattern is far more important than the details. In the early phases of a painting, you must relentlessly sacrifice detail to the good of the whole.  This is true whether the results you want are hyper-realistic or impressionistic.
The untrained eye looks at a scene and thinks about it piecemeal and in terms of objects: there’s a flower, there’s a path, there’s a tree. The trained eye sees patterns and considers the objects afterward.
Is there an interesting, coherent pattern of darks and lights? This pattern is the primary issue in composition.

Stop thinking of drawing as something you have to get through, and start doing your dreaming in a sketchbook.
Darks to light
In oils, it’s easy to paint into dark passages with a lighter color; the reverse isn’t true. Put down white paint too quickly, and you’re going to fight all afternoon to avoid fifty shades of meh.
This doesn’t mean oil painters don’t jump around after we set the darks; we can and do. But that dark pattern controls your paintings.
Don’t choose slow-drying or high-stain pigment to make your darks. The umbers are great because the manganese in them speeds drying. However, I don’t want to carry an extra tube just for this. I use a combination of burnt sienna and ultramarine.
A student’s palette… This is the color space in which the modern painter can work. It sizzles.
Fat over lean

Odorless mineral spirits (OMS) replaces turpentine as the modern solvent. This is different from medium, which is some combination of oil, drying agent, solvent and varnish. Paint with solvent in the bottom layers. Paint with medium in the top layers. As noted above, use both sparingly.
The more oil in a layer, the longer the binder takes to oxidize. This keeps paints brighter and more flexible. However, oil also retards drying. Using too much in underpainting will result in a cracked and crazed surface over time.
The makers of Galkyd and Liquin say their products are designed to circumvent this rule. However, we have no track record for these alkyd-based synthetic mediums, whereas we have centuries of experience layering the traditional way.
Even if we could change it, why would we want to? Underpainting with soft, sloppy medium gives soft, sloppy results. The coverage is spotty and thin. The traditional method is tremendously variable and gives great control. It just takes a little while to learn it properly.
Next up, a watercolor workshop aboard American Eagle, June 10-14, and my annual Sea & Sky workshop at Acadia National Park, August 5-10. Email me if you have any questions.

Better living through chemistry

Yes, the ‘fat over lean’ rule still pertains in oil painting.

Estuary Light, by Gwen Sylvester.
Gwen Sylvester’s Estuary Light, above, won this year’s Juror’s Choice Award at Wet Paint on the ‘Weskeag. It is a perfect application of acrylic paint: luminous, fluid, but not washed out into faux watercolor. The nominal subject—egrets—are just suggested in the midfield. 
Kay Sullivan and Gwen and I sat together to watch the auction. We are the last three years’ winners of the Juror’s Choice Award. The art world is one of the last strongholds of gender bias, intentional or not. To have three women winners in a row is an anomaly, and speaks well of this event.
A student at my workshop last week asked me whether the ‘fat over lean’ rule still applies now that we’re using odorless mineral spirits (OMS) instead of turpentine. It’s a great, complicated question. Turpentine is pine-tree essential oil. OMS are petroleum distillates. But before you rush back to using turpentine because it sounds “natural,” it is linked to a host of respiratory and other illnesses.
A lobster pound at Tenant’s Harbor, was my entry into Wet Paint on the ‘Weskeag.
I saw conservator Lauren Lewis at the auction. She told me the answer to Maureen’s question was still yes. That was all we had time for, so the rest of this explanation comes from the internet.
Solvents like OMS or turpentine dry through simple evaporation. The binder oils in paints are more complex; they cure by something called crosslink polymerization.
A polymer is a long chain formed by many little molecules that stick together. A crosslinked polymer network is a mesh of these chains that are woven together. Just as with fabric, woven threads are stronger than individual fibers. Crosslinked polymers can be very strong.
These crosslinked polymers also resist solvents better than simple chains. To dissolve a polymer, each of the long molecules must be surrounded by the solvent and dispersed. As the polymer gets larger and larger, it becomes more difficult to dissolve the polymer molecules.
Sometimes there are enough links to connect all of the polymer molecules into a single mesh.  When this happens, you can no longer dissolve the polymer molecules—they either float away as a single lump of paint or they don’t go at all.
You can’t reopen half-dry oil paints like you can half-dry acrylics. That’s because of crosslinked polymer chains.
Think about the last time you let your paint dry up on your palette. You can’t ‘open’ half-set oil paint like you can with partly-set acrylics. All the pigment is drawn into the lumps. That same tendency is what makes them so tough on the canvas, and why you want that oily layer on the surface.
Humidity often damages a paint film. This happens when water molecules surround the paint components and push them around. Crosslinks limit how much water can get into the film.
Speaking of humidity, I leave in a few minutes for Saranac Lake, NY, for the Adirondack Plein Air Festival. From there I go to Plein Air Plus in Long Beach Island, NJ. As I’m writing this, cool, damp air is rushing in my window. My house sits above Rockport harbor. The ocean is my air-conditioner. Why do I ever leave in the summer?

The Full Monty

You can learn a lot from videos, but the boring parts are edited out. It’s good to see our dithering.

It’s all about that green, by Carol L. Douglas.

The weather service was spot on yesterday. It dawned cold and drizzling. We wrapped our southerners in blankets and took shelter under the Schoodic Institute picnic pavilion. Every plein air painter has a few of these protected places tucked into the back of her mind.

Usually I like to schedule the rain on my third or fourth day, so my students have a chance to get down onto the shore and collect detritus to make a still life. This hadn’t happened.
I tend to avoid full demos, instead demonstrating one key process each day during lunch. That’s more about my own hyperactivity than anything else. I never could sit through an all-day demo. Still, you can’t take away people’s processes and not give them a viable option in exchange.
My happy painting crew.
It’s hard to paint from under that picnic pavilion. Traveling around the compass from the north, there is a restroom and a trash can, a chain link fence, a helicopter landing pad, and the mown edge of a woods. I find the restroom the most visually interesting, but settled on a gash in the woods where a service road cuts down to the park’s volunteer housing.
I started with developing an idea, and how I built it from what I saw. I did a sketch, a value study in watercolor and then slowly developed a painting through all its constituent steps, focusing on how to move from thin layers to fat layers at the top.
Oil paints dry at different speeds depending on the pigment. However, the more oil in the paint, the longer it takes to oxidize, and the more flexible the paint film is. That’s great on top layers, where you want an oily binder to prevent “sinking,” where the oils in the top layer settle into lower layers. It’s not so good in the lower levels, where flexibility means instability. Ignoring this practice can result in cracked, less durable, paintings.
By mid-afternoon, the skies were clearing. Photo courtesy of Jennifer Johnson.
Knowing that is one thing, but it’s kind of like making pie crust. Until you’ve seen it done, you don’t know what kind of consistence you’re really looking for. The best way to understand is to stick your finger in the paint, which I invited my students to do.
You can learn a lot from videos, but the boring parts are edited out. It’s good for students to see how many times we dither and change our minds.
Often in peninsular Maine, the weather can be very different in two nearby places. We drove to Frazer Point feeling hopeful. Sadly, it was still dripping. The parking lot was empty. Should we wait it out?
By evening, it was beautifully clear again.
As we talked, the wind shifted. The rain stopped and suddenly the visitors were back in swarms. It was fabulous painting, and some of us stayed almost until the dinner bell rang at six.
I went back to my room and took a hot bath to scrub the paint off. Many of my students went to a talk on bats. “Why didn’t they just drive?” asked my husband. It took me a minute, but then I laughed.

How to paint, in five easy steps

"Historic Fort George," by Carol L. Douglas

“Historic Fort Point,” by Carol L. Douglas
While it was fresh in my workshop students’ minds, I shot pictures showing the step-by-step progression of a painting. I took these while participating in the Third Annual Wet Paint on the Weskeag this past weekend.
The site I chose was the ruins of Fort St. George, overlooking Thomaston. Not much remains but a raised berm, but it is peaceful, pretty, and shadowed by oaks. I parked by Wiley’s Corner Spring and eyeballed the stream. It looked perfectly wonderful, but I have been fooled by drinking-water sources before. Putting caution before curiosity, I resisted and turned to hike the half-mile to the fort site. It was an easy trail, but I was glad I had my super-light pochade box.
I settled down on a rock outcropping, bracing my tripod below me on the uneven boulders.
My sketch. The problem with rocky outcroppings is that they can create an unbalanced composition. On a grey day, it's hard to use the sky to fix that.

My sketch.
The problem with rocky outcroppings along water is that they can create unbalanced compositions. All the weight is on the land side. On a grey day, there’s little sky action to counterbalance that.
I never use viewfinders of any kind. To me the most exciting part of painting is figuring out how to transfer all that grandeur into an arresting composition. The rest is just details.
After I had a composition,  I transferred it to my canvas. I copied my sketch rather than drawing from the view.

First draft of a drawing.
After I had a composition I liked, I transferred it to my canvas. I generally copy my sketch rather than drawing again from the view. After I have the major pieces in place, I go back and redraw to conform to reality.
My palette. I always mix my greens and tints before I start painting. It keeps the color clean.

My palette.
I always mix my green matrix and tints of my pigments before I start painting. It keeps my color clean. And, yes, I use a palette knife.
For more information on how I chose this palette, see the pigment and color theory posts here.
Next, I map in the colors.

Next, I map in the colors.
I’m mostly concerned with drawing accuracy and color when I do my underpainting. This is a color map made with thin layers of paint and a minimal amount of solvent. I want it as dry as is possible when I do the next layer. Odorless mineral spirits or turpentine dry faster than linseed, walnut or poppy oil.
If anyone suggests using medium or oil at this phase of your painting, back away slowly. One of the first mantras of painting is “fat over lean.” That means applying oily paint over less-oily paint to create a stable, elastic paint film that doesn’t oxidize. Paintings made this way last for centuries.
I am familiar with some teachers who encourage their students to coat the surface with medium and paint into it to create a sort of faux luminism. These paintings are drowning in oil and varnish, which will darken and crack over time. It’s terrible technique and should not be encouraged.
This is more or less the point at which I start using larger quantities of paint and medium. I used a filbert on this, about a size eight.

This is more or less the point at which I start using larger amounts of paint and add medium.
Start adding medium when you start adding paint volume. Go light on the stuff. It can makes an unmanageable soup very quickly. I use a larger brush than you would expect. In the painting above I used a #8 filbert throughout, only pulling out a larger flat to smooth down some surfaces.
As I headed back to the Kelpie Gallery to turn in my finished painting, I took one more long look at Wiley’s Corner Spring. Oh, heck, I thought. Why not live dangerously? The water was smooth and sweet, and created no aftershocks.
Surprise, surprise! The finished piece won the "Juror's Choice" award, which is the top prize.

The finished piece won the Juror’s Choice award. If I’d expected that, I’d have pressed my blouse.
That was important, because by the time you read this, I should be most of the way to Montreal, from whence I am flying to Edinburgh. I plan to do some simple watercolor sketches along the way, but until I return, keep on painting… and go light on the medium, for heaven’s sake!