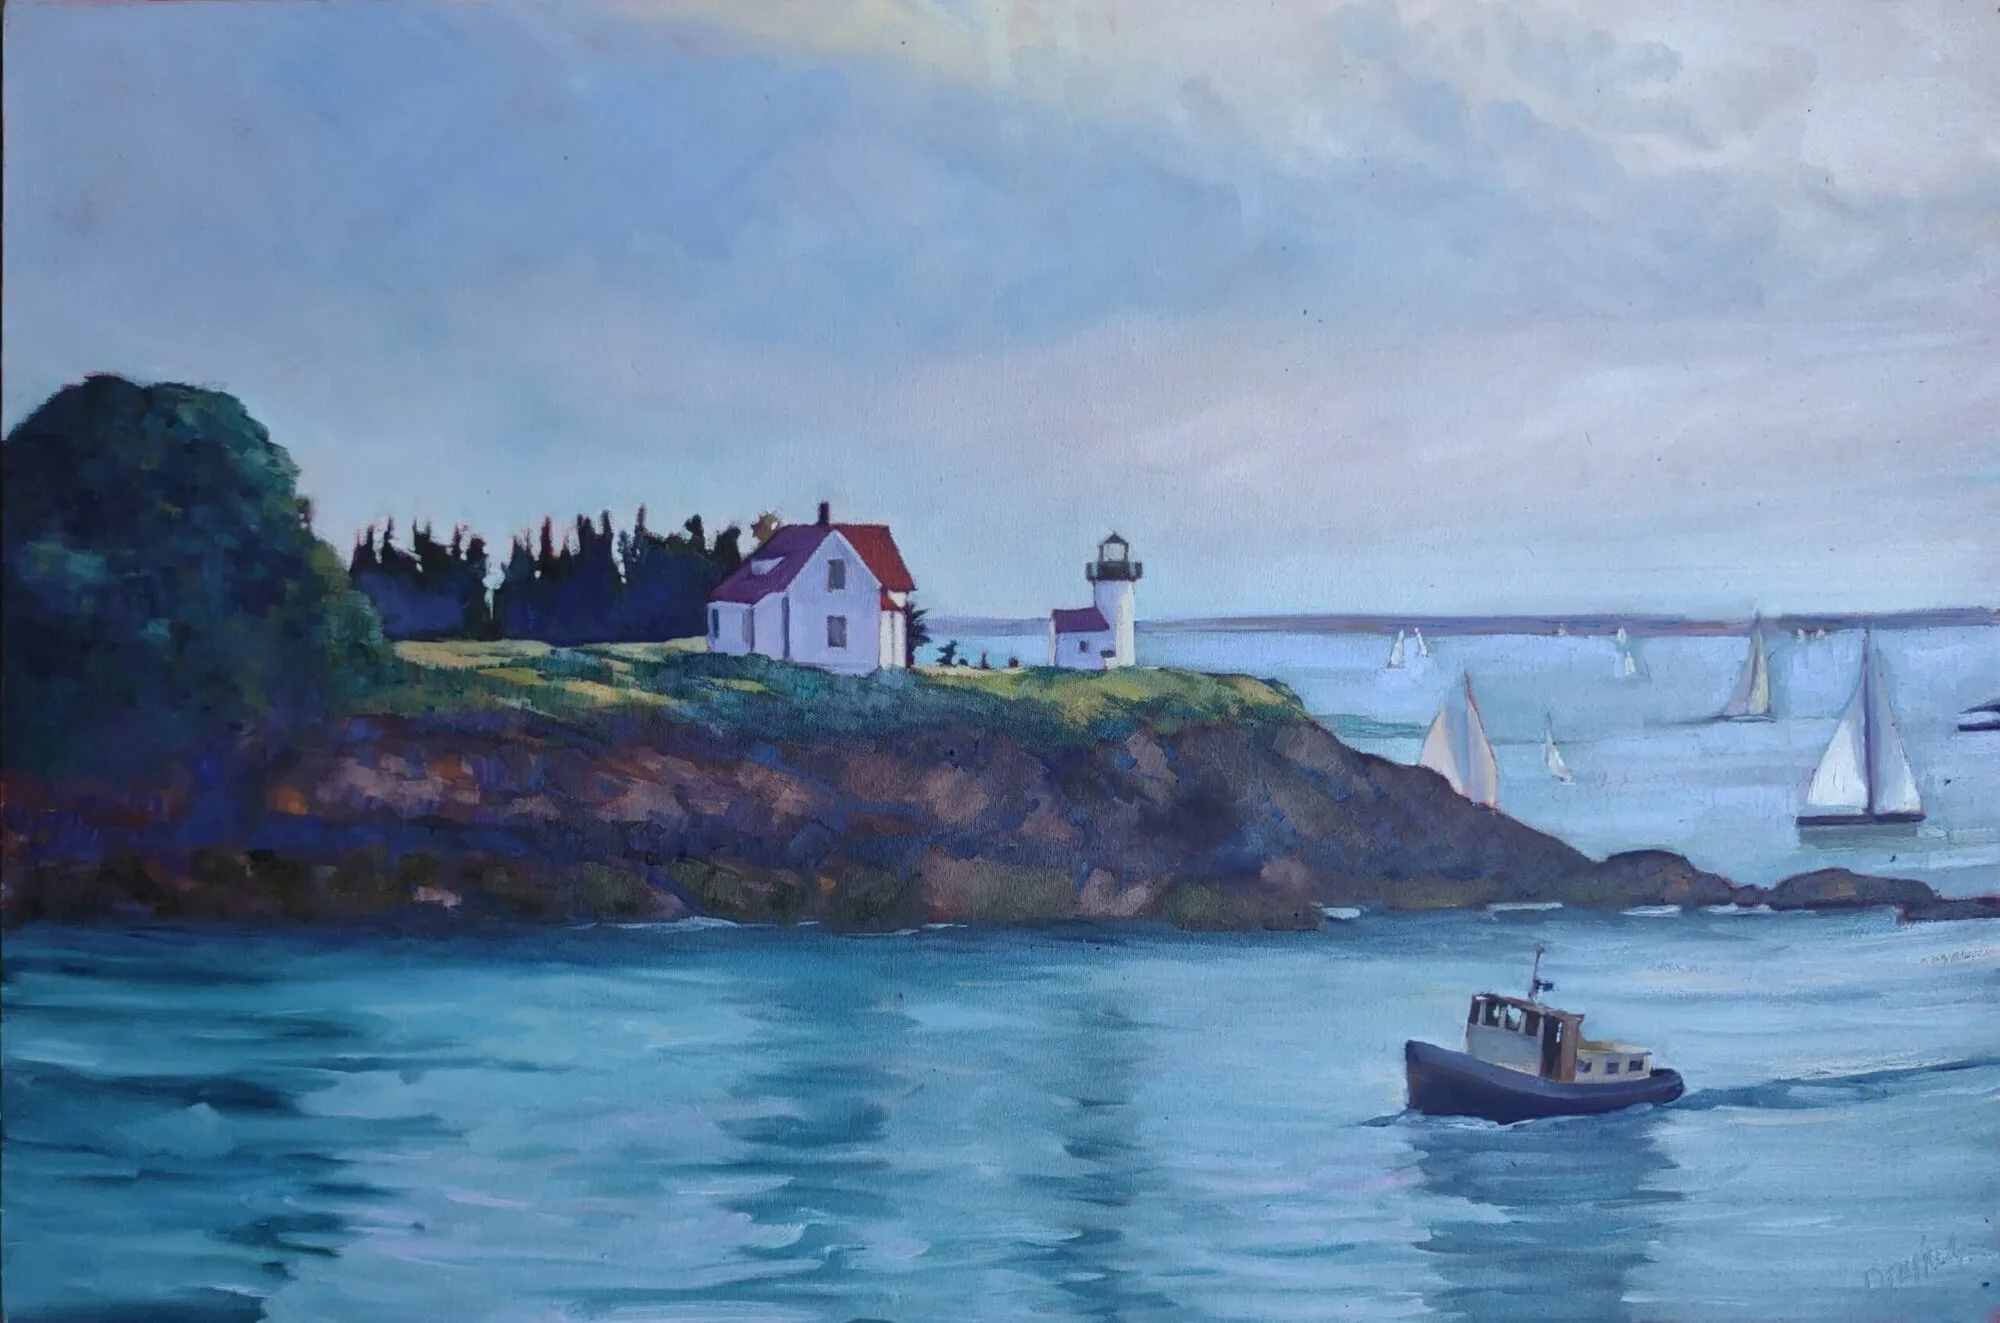
Monday Morning Art School: get to that color fast

To paint with assurance, you need to be able to mix colors effortlessly. These tips will help you get there.

Peppers, by me. Cool light, warm shadows.

Start with an organized palette. I paint with my pigments moving from blues on the left through reds and yellows, followed by the three earth pigments to the far right. White is at the bottom. My particular system isn’t what’s important. But always put paints in some kind of logical order and in the same spot.

These basic rules make mixing easier:

  • Never try to paint with hardened paints;
  • Squeeze out enough paint;
  • Put out every color, regardless of what you think you’ll need. Every painting should have a broad range of colors in it, regardless of the subject;
  • Put out more of each color when you use it up, not when you think you’ll need it again;
  • Start mixing each color with the closest match on your palette, and adjust from there;
  • Add small amounts of paint as you adjust the mixture.
Jamie Williams Grossman‘s lovely painting and palette in the Hudson Valley style, showing color strings. Photo courtesy of the artist.
A color string is a set of premixed paints, usually modulated with white or another light color. Artists sometimes mix a series of these starting from each base color. In the Hudson Valley, you’ll sometimes see artists working from vertical palette boxes containing a slew of these premixed colors.

I use a simpler variation of that idea. I make mid-tone tints of each pigment. Different pigments may look the same when squeezed out of the tube, but there the similarity ends. Knowing how a pigment works when tinted with white is critical. Moreover, these tints become the backbone of a bright finished painting. 

A matrix is a color string in 3-D.

In watercolor, the equivalent is tonal steps, or how the pigment acts in different dilutions. You can’t premix them, but you should understand them.

Before you lift a brush, premix three colors for each major object:

  • A light tone, the color of the lightest side of the object;
  • A mid-tone, which is the local color of the object;
  • A dark tone, which is the deepest color.

These should be fairly close in value. For the extremes, you’ll use your global shadow and highlight colors.

In the example at top of the page, the light is cool—you can tell by looking at the tray. There is a warm dark shadow, a ‘true’ mid-tone, and a cool light color for each pepper. The tray is black. Since the shadows are warm, they’re a reddish black. They were made by tempering burnt sienna with ultramarine blue. The highlights are pale blue.

Start by getting the value right first. That’s usually the most difficult part. You can’t raise the chroma of a paint, so if you get it too neutral, set it aside and start again. If it’s too intense, mix in a bit of its complement.

My palette, diagrammed by Victoria Brzustowicz. I generally don’t use red in landscape painting.

Black has a role in painting, but it’s not in making grey. If you need grey, make one by mixing two complements. Greys are never totally neutral in real life; they always have overtones of color. Start by figuring out what that is. Then start from that color, and add its complement until you hit the perfect neutral note.

Once you’ve mixed your color ‘puddles’, look at them as a whole. How do they go together? Which do you want to emphasize?

Keuka Lake, by Carol L. Douglas. Available.

I use a green matrix for painting foliage. Otherwise, greens can be oppressively monochromatic in high summer. Remember those tints I had you mix? You can use them to modulate these greens into hundreds of different shades. Just use blues and violet tints to drive the greens back in space, and yellows and oranges to bring them forward.

By thinking through color relationships before you start painting, you can keep them consistent and unified. As time goes by, you’ll learn to do this intuitively. However, when I muck up a painting, it’s almost always because I haven’t really thought the light and color structure through.

This was originally posted in 2020.

The four steps of landscape drawing

Being technically accurate frees up your subconscious mind to analyze and interpret what you see.

Main Street, Owls Head, 16X20, oil on gessoboard, $1623 unframed.
Observation

I once took an artist on a long loop to see all my favorite painting sites here in midcoast Maine. “But there’s nothing to paint,” she wailed. She was suffering an extreme case of sensory overload. We all experience this to some degree when we’re forced to buckle down to work. We’re asking ourselves to choose one subject among an infinite number of possibilities. And the obvious and iconic may not make the best (or most interesting) painting.

We all want to jump quickly into painting, but the better path is to spend some time relaxing and looking. I prefer to do this with a sketchbook and a lawn chair. If you’ve spent 10 minutes just drinking in the beauty, and then do four thumbnails of different scenes, you haven’t ‘wasted time.’ You’ve saved yourself immeasurable amounts of work on mediocre paintings, by answering the following questions:

  • Where does the visual strength in this composition lie?
  • How can the picture plane be broken into light and dark passages?
  • How can I crop my drawing to strengthen the composition?
Belfast Harbor, 14X18, $1594 framed.

Measurement

At some point, you need to get precise. Fast, loose painting rests on a base of good drawing. If you haven’t been taught to measure with a pencil, start here, hereand here.

People tell me all the time, “I can’t draw a stick figure.” It depresses me, because drawing is a technical exercise, and anyone can learn it, just as they learn to write or do arithmetic.

I recommend the book Sketching from Square One to Trafalgar Square, by Richard E. Scott. It’s a comprehensive introduction to drawing from observation. Books and classes that focus on the interpretive side of drawing are not useful for the artist who needs to get things right, so before you sign up, make sure that teacher, video, or book is actually teaching drawing, not some form of self-analysis with a pencil.

Beach erosion, 8X10, oil on canvasboard, $522 unframed.

Interpretation

Being technically accurate, oddly enough, frees up your subconscious mind to analyze and interpret what you see. We all paint through the filter of our own experience, values and aspirations. That’s why one artist will edit out the power lines and trash cans on a street scene, and another will focus on them.

But there’s a deeper level at which this happens, and that’s in the colors, forms and shapes themselves. They’re tied to your subconscious. Within the rubric of ‘good composition’ or ‘good taste’ are infinite variations. What you perceive is highly individual, so your interpretation will also be individual.

Marshall Point, 12X9, oil on canvasboard, $696 unframed.

Reiteration

The first three phases are all essentially input—identifying, measuring, and analyzing the subject you’re painting. The final business of producing a work of art is collecting all that input and restating it on your canvas or paper. If you’ve done the first three steps conscientiously, this last step should be relatively relaxed and free. It should also go quickly. Your own ‘handwriting’, in the form of brush or pencil work, will be unfettered and loose.

Mixing beautiful greens

The rookie error for summer is to paint all foliage using the same basic color. You lose more points if it’s sap green.

Bracken Fern, by Carol L. Douglas, 9X12, oil on canvasboard, $869.

This weekend, the mercury climbed to 70° F., which forced the “wall of green” into budding. New England is now in her summer raiment, although it will get a bit deeper and more solid. It’s time to talk about mixing pretty and varied greens.

Michael Wilcox published a famous watercolor pigment guide called Blue and Yellow Don’t Make Green. It’s where I first got the idea to add back the banned black.

Mixed greens. Almost a salad.

His point was that there are many routes to the same destination, and that to really mix colors, you need to understand what pigments you’re using, not work from trade names for colors. Consider sap green, for example—a staple of many plein air painters’ toolkit. It’s really a convenience mix. The same is true of Hooker’s Green in watercolor.

The single-pigment (‘true’) greens available are chromium oxide green, viridian, and cobalt green. Chromium oxide green is a lovely, heavy, natural green. Unfortunately, it outweighs everything it’s mixed with. Viridian and cobalt green are lovely, but expensive. Beware viridian hue—it’s just another phthalo in disguise.

Chart courtesy of Victoria Brzustowicz

The rookie error is to paint all your greens using the same hue, modulating lighter or darker for highlights and shadows. You’ll have much more life in your trees if you know all the different ways you can get to leafy green. One of the most useful greens is black plus cadmium yellow lemon (or Hansa yellow).

The best way to navigate the colors of foliage is to avoid greens out of a tube altogether. A system of paired primaries gives you more options, avoiding the acidity of phthalo, the weight of chromium oxide green, or the soul-sucking darkness of sap green.

In my experience, bad paint mixing causes paintings to go wrong faster than anything else. Constantly over-daubing to modulate the paint color distorts the original drawing and makes a grey mush. If you’re confident of the color, you can apply it fast and accurately.

I make my greens on a matrix, which I’ve shown you both mixed and on a chart. Note that blue/black pigments are much stronger than the yellows. You need about half the amount of blue or black as you do yellow.

Swatches by Jennifer Johnson

First mix greens according to the chart, and then modulate your resulting greens with tints (meaning a mix of white and a color). The specific tints are unimportant, but the most useful one for landscape is a mix of white, ultramarine and quinacridone violet, making a pale lavender. It is great for atmospheric perspective.

Your assignment is to hit paint swatches as closely as you can. 
The second exercise involves stopping at your local hardware store for a few paint swatches. These are Benjamin Moore brand, but you should be able to find similar ones elsewhere. There are two off-whites: one cool and one warm. There’s yellow, green, and two soft blues. Your assignment is to mix until you think you’ve hit the exact color. Then put a dot of it on the card to see how close you got. (If you’re working in watercolor, the dot goes on paper instead.)
Detail of Jennifer's chart, above.

I also have my students make neutrals using combinations of ultramarine blue with burnt sienna and raw sienna. I use ultramarine blue and burnt sienna as my standard dark-neutral, because it can go to the warm or cool side depending on how it is mixed. Raw sienna plus ultramarine is my go-to starting point for granite and the sands of our northern beaches.

My 2022 workshop schedule can be found here. That includes the beautiful red rocks of Sedona, urban painting in Austin, TX, June and September workshops aboard schooner American Eagle, mountain vistas in the Berkshires, and our ever-popular Sea & Sky at Schoodic in Acadia National Park.

Respecting the picture plane

I was momentarily surprised, because I’m subsumed into the cult of the picture plane and my correspondent isn’t (yet).

The Alaska Range, 12X16, oil on canvasboard, $1159 unframed

In 1960, art critic Clement Greenberg coined a phrase, “the integrity of the picture plane.” What he meant by picture plane is the slice of space in which the image hangs. There’s three-dimensional reality behind it and in front of it, but for our purposes, all that exists is what’s on that screen.

Since then, an enormous amount has been written supporting or refuting Greenberg’s thesis (which is interesting, wordy and doesn’t concern us here). His critics countered that the artist can do whatever the #$% he wants with the picture plane. (Hey, it was the Sixties.)

But for practical painting purposes, that rectangle of space remains paramount. It has its own life, separate from the things that are depicted on it. It has primacy. That’s why we design paintings to look good in that rectangle, after all.

Blueberry Barrens, oil on canvas, 24X36, $3188 unframed.

I was recently asked, “which do you paint first, the foreground or background?” The question momentarily surprised me. That’s because I’m subsumed into the cult of the picture plane and my interlocutor isn’t (yet).

The answer is: “Neither. Both.”

The primacy of the picture frame overrides the relationships between foreground and background. In modern alla prima painting, objects and non-objects alike are tesserae placed in a mosaic. Background and foreground are developed together because they’re equal parts of the same visual illusion.

Downdraft snow, oil on canvasboard, 9X12, $696 unframed.

That doesn’t mean there isn’t an order of operation to oil painting:

  1. Dark to light (to prevent hopeless muddying of color);
  2. Big shapes to small shapes;
  3. Fat over lean (the amount of solvent/oil you’re using in each layer);

Just as there is a general order of operations of watercolor painting:

  1. Underwash;
  2. Broad washes;
  3. Detail
Parrsboro at Dawn, oil on canvasboard, $869 unframed.

But those orders are based on the working properties of paint, not on aesthetic or compositional issues. There may be practical reasons to deviate from these orders, but they were worked out because they give you the best results in the fastest time.

Nowhere does the relative importance of one object in the painting take precedence over another. We dart around the painting and finish it to one level, then to the next, then to the next. We think about passages of light and dark and how they interact to drive the eye. The subconscious mind will generally take care of the detail anyway, returning to those passages and poking at them until they’ve achieved some level of finish.

Monday Morning Art School: scaling up a painting

It may seem time-consuming, but with big paintings it saves a lot of work in the long run.

My watercolor sketch. It’s gridded on a piece of plexiglass laid over the drawing.

On Friday I wrote about losing my painting reference and going to great lengths to find substitutes. The human mind being so fickle, writing that post made me suddenly realize what and where my original reference was. I came downstairs to my studio convinced that I would wipe out the interloping boats and go back to my original drawing.
I drew the mast positions in with charcoal and a straight-edge before starting to paint. That way their angle will match my sketch.

However, when I looked at the canvas again, I realized it wasn’t that bad. Different from my original intent, certainly, but not bad. I walked the dog and pondered. By the time I was home again, I’d determined that I should just paint both iterations. It was possible to differentiate them enough to make two different works out of them, both speaking to the flying sensation of sailing.

That meant gridding up a second version. This time I decided to go with the original aspect ratio of the sketch, rather than cropping it. I liked the yawl I’d truncated the first time around.

Straight lines, curves–it doesn’t matter. Just find the point at which they intersect the grid, mark those points, and work from there. I usually do this in monochrome but since I was working from a watercolor sketch, I just massed color.

I have a projector, but I find that gridding is more accurate and takes less time. Knowing how to do it is imperative for large projects, but it can be surprisingly useful in small paintings, too. Whenever you have trouble going from your thumbnail to the canvas, gridding is your go-to answer.

Boats v.2, laid out 24X36 in just a few hours. Later today I can actually paint them.

I realize many artists are math-phobic, but there are times when a bit of arithmetic can save you a world of pain.

First, work out whether the aspect ratio of your sketch is the same as the canvas. This is the proportional relationship between height and width. Sometimes this is very obvious, such as a 9X12 sketch being the same aspect ratio as an 18X24 canvas. But sometimes, you’re starting with a peculiar little sketch drawn on the back of an envelope. You can use a trick you learned back in elementary school.

Remember learning that 1/2 was the same as 2/4? We want to force our sketch into a similar equivalent ratio with our canvas.

Let’s assume that you’ve cropped your sketch to be 8” across. You want to know how tall your crop should be to match your canvas.

Write out the ratios of height to width as above.

To make them equivalent, you cross-multiply the two fixed numbers, and divide by the other fixed number, as below:

Use your common sense here. If it doesn’t look like they should be equal, you probably made a mistake. And you can work from a known height as easily as from a known width; it doesn’t matter if the variable is on the top or the bottom, the principle is the same.

The next step is to grid both the canvas and sketch equally. In my painting above, my grid was an inch square on the sketch and 4″ square on the canvas, but as long as you end up with the same number of squares on both, the actual measurements don’t matter. You can just keep dividing the squares until you get a grid that’s small enough to be useful. For a small painting, that could be as simple as quartering the sketch and the canvas. I use a T-square and charcoal, and I’m not crazy about the lines being perfect; I adjust constantly as I go.

The last step is to transfer the little drawing, square by square to the larger canvas. I generally do this in a dark neutral of burnt sienna and ultramarine. On Friday, however, since I’d already done a grisaille and a watercolor sketch of the subject, I just transferred large blocks of color. It may seem time-consuming, but with big paintings it saves a lot of work in the long run.

Hard-earned ease

It’s a paradox: we achieve looseness by mastering the small, precise details of our craft.

Tom Sawyer’s Fence, oil on canvas, Carol L. Douglas

Painting students often express the desire to paint more loosely. That’s not easy to attain. Painter Tom Root described it best when he called it “hard-earned ease,” likening it to a ballet dancer with bloody feet.

It’s paradoxical, but dancers achieve grace and fluidity by practicing a bone-aching number of precise movements. It’s the same in painting: we achieve lyricism by mastering the small details of our craft.

That starts with drawing. It’s shocking how many people try to be painters without mastering this basic skill, and how many teachers let them get away with it. Drawing is the basic reverse-engineering process of art. It’s how we analyze an object before we rebuild it on canvas.

Clouds over Whiteface, oil on canvasboard, Carol L. Douglas

You can’t develop fluid style if you can’t draw. You will flail around, guessing where things are, and then overstating everything with excessive, tight brushwork. You won’t be able to express depth or distance if you haven’t explored where depth and distance start and stop.

Conversely, if you take the time to learn to draw, your painting has room to be looser. In my class on Tuesday, a student drew a complex Anasazi pot with astounding fidelity. She was able to put the pot down in a few brushstrokes because she’d already done the hard business of figuring it out with her pencil.

Best Buds, oil on canvasboard, Carol L. Douglas

Drawing is actually easy. It doesn’t require ‘talent’; it’s for the most part a mechanical measuring process. There are many good books on the subject, and I’ve also gone into it extensively; just go to the search box to the right on this blog and type in “how to draw.” The investment is minimal; a mixed-media Strathmore Visual Journal is around $5 at our local job lots store. Use any #2 pencil with an eraser. Anything else is just refinement.

The second requirement for fluidity is process. For some reason, the arts have a reputation for attracting non-conformists, but I don’t know a single successful painter who doesn’t repeat a process with every painting. These have variations, but the components—at least in painting—are nothing new. The basic order of operations has been set in stone for centuries; only the materials get updated.

Bracken Fern, oil on canvasboard, Carol L. Douglas

If you want to find your true authentic voice, start by mastering the process. For most of us, the easiest way to do this is with a teacher, but there are fine videos and books out there as well. Practice your process so many times that it becomes second nature. Then—and only then—you will find your own, loose brushwork emerging.

Notice that I said nothing about style. It’s important, but elusive. It emerges when one has done the grunt work of developing good technique. Don’t try to pin it down too early, or you’ll box yourself into something you can’t grow past.

I’m off to Tallahassee on Sunday to teach my last workshop of the season. Next year’s dates (so far) are now on my website. Here’s hoping that 2021 is a better year for all of us!

Monday Morning Art School: painting evergreens

Your assignment this week is to paint an evergreen, using one of the great masters as your muse.
Herdsmaid, 1908, Anders Zorn. You could identify the species of trees in this painting, but it’s short on detail.

Last week, I wrotethat there are as many ways to paint water as there are moments in the day. The same is true of painting evergreens.

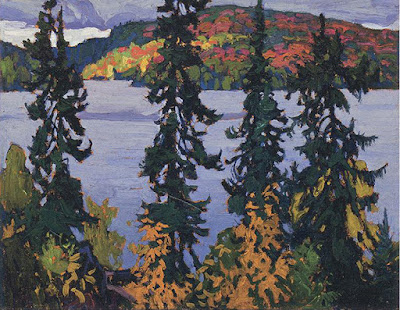
We can look to the painters of the great northern landscapes for guidance on evergreens. Swedes Bruno Liljefors and Anders Zorn, Tom Thomson and the Group of Seven, the Russian Peredvizhniki, and the northeastern painters from Winslow Homer to Andrew Wyeth are all worth studying.
Winter landscape at dawn, 1900, Bruno Liljefors. If the evergreens are in a supporting role, they’re often painted as a single mass.
Spend an hour searching their work on the internet along with the key words “spruce,” “pine”, or “evergreen.” You’ll notice that most of these artists handled the subject differently depending on whether they were in the studio or painting en plein air, or if the trees were the main subject or incidental.
After the bath, 1895, Anders Zorn, courtesy Nationalmuseum. The evergreens are nothing more than a few brushstrokes, but they’re perfectly realized.
Anders Zorn often used evergreens behind his pulchritudinous nudes. The contrast between his perfectly-observed trees and cookie-cutter models is striking. The Herdsmaid (1908) is probably the best evergreen painting ever executed. It’s all about the young trees, but Zorn never overstates the detail. Instead, he allows his brush to wash softly over the darker background, suggesting the softness of pine needles.
That apparent artlessness rests on a solid ground of observation. Zorn (and Wyeth) were able to be specific but loose because they drew and observed endlessly from nature. Each species of tree has a specific design. There are no shortcuts to knowing and understanding them. If you want to be able to paint trees, you must first draw them—a lot. Observe their branching structure, their needles or leaves, their bark, and where they like to grow.
Spruce Gun, watercolor, 1973, Andrew Wyeth, private collection
But trees are also forgiving; when you understand their structure, you can fearlessly mess with their form. While Wyeth’s tree in Spruce Gun looks perfectly natural to us, it’s also stylized to give a dynamic boost to the gun.
North Woods Club, Adirondacks (The Interrupted Tete-a-Tete), watercolor, 1892, Winslow Homer, courtesy Art Institute of Chicago. The trees are simple silhouettes, but they work because they’re accurate.
Either watercolor or oil are perfect for the organic character of trees; they can be schooled into great detail or allowed to wash with great softness across the canvas or paper.
It’s easy to become overwhelmed with detail in a tree, but it’s best, instead, to concentrate on overall values and colors instead. Start with the large shapes and concentrate on a few details at the end. After all, when we notice trees at all, we generally perceive them as masses, rather than as individual details. The exception is when someone is interacting with the tree, as in Mary Cassatt’s Child Picking a Fruit.
Isles of Spruce, silkscreen, c. 1943, Arthur Lismer. While the contrast between background and foreground is high, the values within individual trees are quite close.
How do we create form in trees? The same way we do with any other subject, by creating a pattern of light and dark. Our first question ought always be, “where is the light coming from?” The second question should be, “Is the light cool or warm?”
Start with a drawing. This is where you can get carried away with the gothic intricacies of the structure, and get them out of your system. Make sure that the height and width relationship is accurate. Also double-check that you have branches on all sides of the trunk, not just to the sides. Some will come directly towards you. While these are difficult to draw, they’re what anchor the tree in space.
Dusk, 1900, Isaac Levitan, courtesy State Tretyakov Gallery. Depending on the light, evergreens may be represented with no green at all.
I’ve written before about working with a green matrix; you can use it as successfully with evergreens as with deciduous trees. Let’s assume you’re drawing in early morning and the light is golden. Make the shadows cooler and darker and the highlights warm and light. It’s possible that the only true greens in your tree will be in the midtones or highlights. But avoid excessive value jumps; making the highlights too light can end in visual chaos. It’s usually what’s happened when someone complains that they’ve gotten lost in the detail.
Montreal River, c. 1920, Lawren S. Harris, courtesy McMichael Canadian Art Collection. The Group of Seven painters were interested in trees as screens.
Unless you’re painting a deciduous tree in the dead of winter, the branches and trunk are secondary to the masses of foliage. 
Your assignment this week is to paint an evergreen, either from life or a photograph. Before you start, find a masterpiece from one of the artists I’ve mentioned above, and study his paint application carefully. Try to emulate that in your painting.

Monday Morning Art School: why this subject?

Create clear priorities and a compelling reason for people to engage with your painting.

Lobster fleet at Rockport Harbor, by Carol L. Douglas

With modern cameras, you can snap a view and think through why you liked it later, cropping and manipulating the photo to enhance the subject. When drawing, you have to set pencil to paper somewhere. Pause at that point, because it’s usually what interests you most about the subject or idea. Why have you chosen it? What first attracted your eye? It’s bound to be one of the following:
  • The subject matter;
  • Patterns of lights and darks;
  • Abstract shape(s);
  • Atmosphere, tonal values or lighting effects;
  • Beautiful line;
  • Color;
  • Symbolism.
Bracken Fern, by Carol L. Douglas.

By purposefully noting what you notice, you create clear priorities for your painting. This makes you less likely to include every detail. Not slavishly recording everything is one secret to becoming looser as a painter.

This is where a habit of sketching comes in. Imagine you’ve just stumbled down to Camden Harbor for the first time. It’s beautiful—and overwhelming. There are swank yachts and luxury cruisers cheek-by-jowl with old wooden schooners and family sailboats. How do you sort this into a pattern?
Tricky Mary in a Pea-Soup Fog, by Carol L. Douglas
You could take your camera and shoot a thousand images, intending to assemble them into a painting in the studio. That’s not likely to produce a great painting. Instead, sit down at a bench and sketch what interests you—not one drawing, but a series of quickies. Usually, you have more time than you realize, and it behooves you to do this in gentle stages. Getting the subject and composition right is the most important part of painting.
After you’ve had time to think with your fingers, you can return to the subject that most interested you, and reduce and reframe the subject into its basic elements.
What you’re looking for is a compelling reason for someone to want to engage with your painting. That is as varied as there are people, but certain things ought to be present:
  • Energy;
  • A pleasing pattern of light and dark;
  • A strong focal point, supported by line and contrast.

If they’re not, then go back to the drawing board before you touch paint to canvas. A weak composition is one thing that you can’t fix along the way.

Sea Fog, by Carol L. Douglas is available through Folly Cove Fine Art, Rockport, MA.

Sometimes, things happen in nature that are too quick to allow for this careful set-up. I occasionally chase them, and doing so has about a 50-50 chance of succeeding. Atmospheric effects are the easiest, because they cover the canvas. People are the most difficult.

When I’m smart, I do the chasing with pencil and paper and transfer my drawing to canvas. A few weeks ago I was down in the North End Shipyard with Ed Buonvecchio. The crew of the Stephen Taber took a break in the spring sunshine, seated on the spruce planks that line the shipyard. Beautiful and poetic, they’d have made my painting. But instead of drawing them, I went right to paint. The result was terrible. At my age, I should have known better.

Don’t be so quick to judge

If it’s not love at first sight, maybe it’s because you’re doing something right.

Captain Linda Striping, oil on canvasboard, by Carol L. Douglas
One of my old painting pals frequently scrubs out paintings that she feels are going wrong. “Look, I’ve saved a good board,” she’ll say. My surplus plein air paintings, if stacked in one pile, would be about the same height as me. They’re almost all on expensive boards, so I see her point. Nevertheless, I think scrubbing out is generally a terrible idea.
Art growth is all about taking risks. The bravest paintings are sometimes the ones you hate as you’re doing them. That’s particularly true if your experiments are about mark-making. Most of us would rather have someone else’s brushwork; ours is somehow too self-revelatory. That’s not to say that mark-making can’t be taught or learned. Just like handwriting, it starts with general rules and ends up being very individual.
Sea Fog, oil on canvasboard, by Carol L. Douglas
I have a student who paints lyrically until he reaches the top layer in his paintings. Then he feels the need to apply a higher level of finish. It squeezes the energy right out, and obscures his basic ebullience.
(This is not, by the way, the same thing as ‘overworking.’ That’s a bogeyman used to scare beginning painters into not figuring out how to finish a painting. Paint is far more forgiving than most people think, and nothing on your canvas is so precious as to be irreplaceable.)
Scrub a painting out or obsessively overpaint, and you may murder a new idea before it’s even hatched. I’ve lost count of how many times I have set a painting aside in disgust, and then looked at it a few years later and realized it was very good. That’s one reason I keep all those surplus plein air paintings.
Captain Doug on the ratlines, oil on canvasboard, by Carol L. Douglas
We’re not good judges of our own work as we’re doing it. The disconnect between what we’ve envisioned and what actually happened is too pronounced. You may set out to paint the iridescence of lustreware, and fail miserably. You are so focused on that failure that you never notice that the color, structure and paint handling in your work is simply stunning. That’s where a teacher can be helpful, and why positive criticism is so useful. But time itself is a great healer. It allows you to stop seeing the painting from inside your own head.
All this assumes that you have a painting protocol that you follow, one which includes significant design steps. A poorly-designed painting is really the only thing you can do that’s unsalvageable. Your process ought to include thumbnails, notan studies, paint studies, or value drawings. Many people waste lots of time producing mediocre paintings because they’re too impatient to design carefully. But if the design is good, you have to work hard to wreck a painting.
Tricky Mary in a Pea Soup Fog, oil on canvasboard, by Carol L. Douglas
Still, you often can’t tell until the end whether you’re going to pull it off or not. RebeccaGorrell once told me, “I was really unhappy with it till the last half hour—a good recurring lesson.” She’s so right. Paintings sometimes gel after a long hard fight. The only way you’ll know is by continuing to slug it out.

Monday Morning Art School: what I learned from losing 50 pounds

I rapidly gained a hundred pounds after my first cancer in 1999. It’s taken me this long to get serious about getting rid of it. As I reach my halfway goal, I realize that much of the discipline of losing weight is the same as the discipline of learning to paint and draw.
Peppers, by Carol L. Douglas
Being self-taught has its limits
After each of my pregnancies, I used Weight Watchers and exercise and bounced back. That didn’t work with my post-cancer weight. I tried many diets without success. The only solution the medical establishment offered was bariatric surgery. I’d seen too many mixed results to consider it.
I switched PCPs, and my new nurse-practitioner had a different idea. “Try this,” he said, and handed me a book. I’d have dismissed the plan as unsound had it not come from a medical professional.
When I first took classes at the Art Students League, Cornelia Foss looked at my work and said, “If it were 1950, I’d say ‘brava,’ but it’s not.” I’d still be painting derivatively today if it weren’t for her. Sometimes, a trained guide is necessary.
Dish of butter, by Carol L. Douglas
It takes longer than you ever believed possible
My weight loss seemed fast in the beginning. Now, it’s much slower, but it is still there. The same thing happens when you start to paint. Many people quit dieting when it gets tough, and they quit painting then, too. The secret of success is to maintain your discipline through these parched times, because that’s when you’re making real improvement. If it’s going to be meaningful, change is incremental.
Weight Watchers works for millions of people because it registers these incremental changes and encourages you through them. Painting teachers do the same thing. However, if you quit, you’ll make no progress at all. I started this diet in February; I thought I’d be down a hundred pounds now. I’m not, but I wouldn’t have lost a single pound had I not done it. While I didn’t meet my self-imposed goal, the last nine months have not been wasted in self-recrimination, either. 
Home made wine, by Carol L. Douglas
Chaos is not helpful
I realized that my travel schedule had stalled my weight loss, despite my faithfulness to the plan. Then I started to look at my painting in the same light. All these road miles were not helping my painting, either. There’s tremendous value in travel, both as a painter and a person, but months on the road are corrosive. Most improvement is going to happen in your own studio.
Acrylic paints, by Carol L. Douglas
The method isn’t the issue
The method I’ve used to lose this weight is Haylie Pomroy’s Fast Metabolism Diet. It isn’t for everyone. But I’ve come to believe that the method is far less important than your own self-discipline.
The same is true in painting. There is no inherent superiority to alla prima oil painting, although it’s what I practice. One can paint beautifully indirectly in oils, or in acrylic, gouache, or pastel. Mastery comes from within, not from the pigment.
There’s a spiritual element
I believe that God loves me and wants me to be happy, so I can work through the lean times without losing my courage. I can afford to take risks and be intrepid. That’s true in dieting, in painting, and in my business model. If you lack courage, you need to take a long, hard look at why that is.
Toy monkey, by Carol L. Douglas
Ultimately, it’s all about you
I have a friend who’s unsure how she can embrace a radical diet when so much of her family life revolves around food. Likewise, I have friends whose family commitments mean they have to cut back on their painting time. I have lived both those realities, and I am not downplaying them.
But in the end, it’s all about you. Families are remarkably resilient when they realize how much it means to you to succeed. If you’re conflicted about whether your art or your diet are ‘worth it,’ that conflict will spill over to your home and play itself out in your relationships.
My own children survived my tofu lasagna, and holiday dinners with nudes on the walls. They grew up with a working mother in a working studio, and they’re accomplished, good citizens. There’s no reason to sacrifice yourself on an altar of ‘how things should be’ or listen to your own self-destructive thoughts. Yes, you can do this.