Monday Morning Art School: Draw a face, yours or others

Have trouble drawing people? Here’s a way to get a good likeness in a hurry.

Robbie, by Carol L. Douglas

We’re going to be doing self-portraits in my classes during the next two weeks. We’ll be using mirrors, but this is a technique that works with pictures of yourself or others, from the live model or from photographs. It’s not mine, of course; it is a process that came from the late portrait painter Daniel Greene.

Most artists don’t have trouble drawing individual features. They run into trouble hooking all those parts up into a plausible whole. Sadly, a person’s likeness starts with the overall structure of their head, not with the details. This is a fast and easy way to measure features so you get them straight. The hardest part, I think, is that I’m showing you in words and pictures instead of in person. But if you take the time to practice it, your portrait drawings will improve.

This is a repeat of a blog post from 2018. It’s based on an old photo of Sandy Quang I found on my laptop. In real life Sandy is almost always laughing. However, I’m not sure that the American selfie grin is the best thing to immortalize in paint.

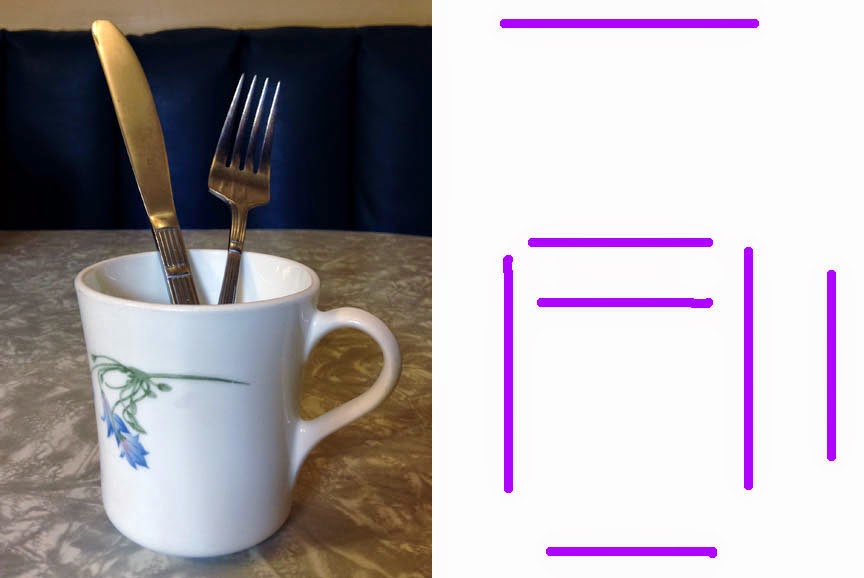
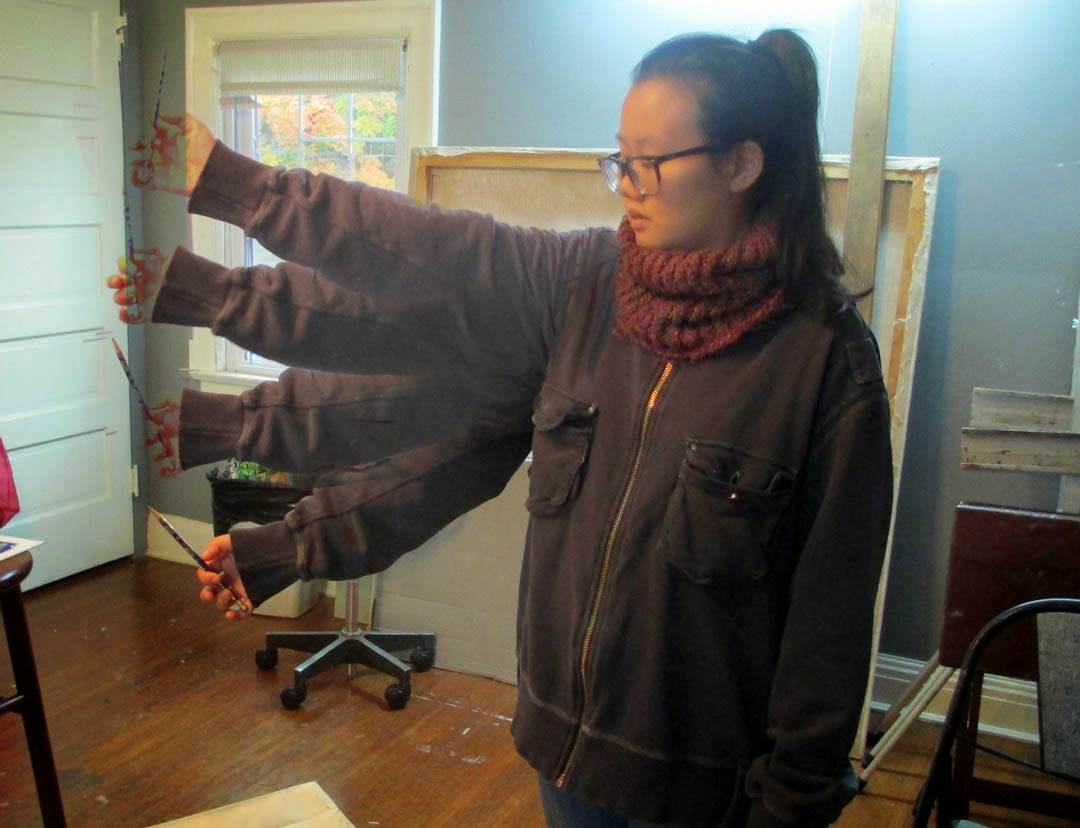
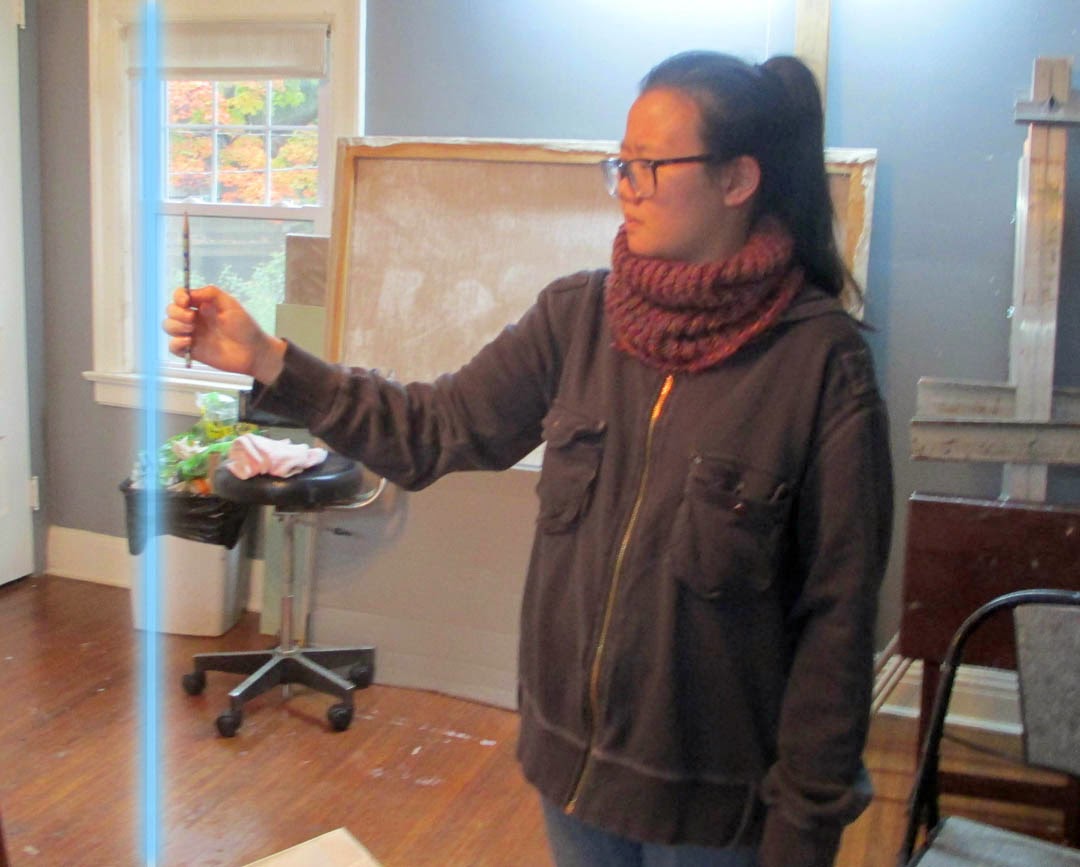
If you don’t remember the rudiments of measuring with a pencil, please brush up here and here before you start.
I start by drawing a line indicating the angle at which the head is cocked.

The second line goes right through the eyeballs. This is not absolutely perpendicular to the center line, but it’s usually close. Remember, you are measuring a 3-D object onto a 2-D surface. It’s easy to mistake these lines for a grid. They’re not; they’re just measurements.
From there, go on to measure the remaining distances as shown above. Eventually, you can add a line for the eyebrows and the bottom of the bottom lip, but I find them confusing at this early stage.
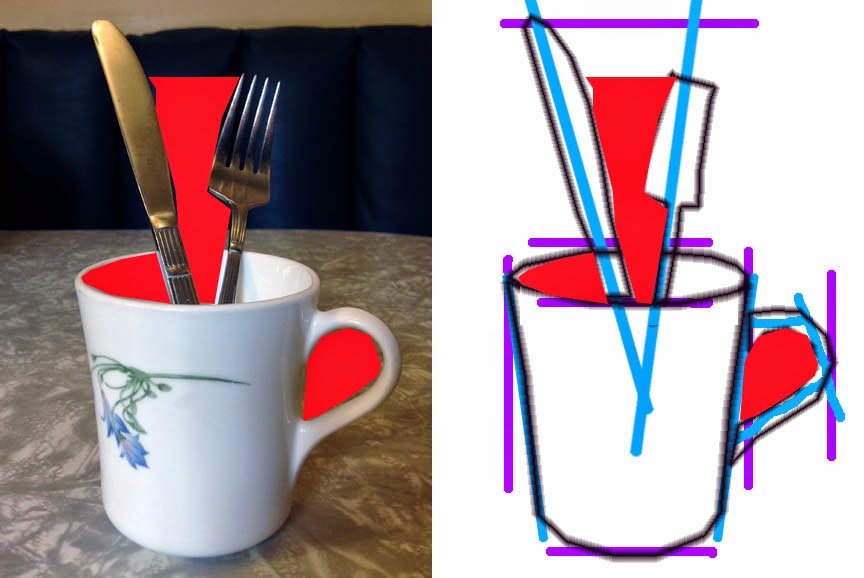
The angle from the bottom of the nose to the pupils is the most important measurement in the face. Check, double check, and then place dots where it intersects with your eyeball line.
Next, draw lines from the bottom of the nose through the center of the pupils. You should create a triangle from eyes to bottom of nose. That’s the most important measurement you’ll do, and the most confusing.
Why are we using an angle instead of straight measurements on the eyes? This is the most important dimension in a human face, and angles allow us to double-check our work. A triangle is a shape, and that’s just easier for the brain to process than a line. That’s why I use angles to measure whenever I can. (Brush up on angle-drawing here.)
Unless the model is looking right at you, each eye is not the same distance from the center line. Check and double-check.
This triangle is the most important measurement in the whole face.

Then draw lines down from the center of the eyeballs to the corners of the mouth. In most people, the mouth is about as wide as the pupils of the eyes, but Sandy’s mouth is narrower than her eyes.

I did the drawing freehand but added this because it’s so difficult to understand from just words.

My last measurement is from the center line to outside of her ear. Conveniently, it’s about the same distance as from her hairline to the bottom of her nose. Remember, all measurements are relative. “It’s slightly less than two noses long,” is how we measure in drawing.

I managed to drop her ear too low at this point; I corrected it as I went. There are always fine corrections to be made. To me, that refinement is the best part of drawing. It’s like doing a puzzle.
Having made all those measurements, I was ready to rough in the overall features. I drew the nose and chin as volumes. (The angled line from the nose was to figure out my ear error.)
The drawing guides are superfluous after this point. Time to erase them and start having freehand fun.
Block in the mass of hair. Your eye perceives shapes and sizes differently depending on value and the color, as we learned here. That dark shape is important.
Refine the features, erasing and redrawing as time allows.
Because I was working with a #2 pencil on a cheap sketchbook, I waited until the end to add the shadow masses. Otherwise, they’d smear.
Throwback Sandy, by Carol L. Douglas

We are taught to draw the human face in ‘perfect’ terms: the eyes are halfway down the head, the tear ducts line up with the edges of the nostrils, the face is divided into thirds, etc., etc. In fact, human faces are infinitely varied. 
These ‘perfect’ laws fall apart especially fast when the subject isn’t white. For example, everything you learned about drawing eyes falls apart with an Asian person with no epicanthic fold. It’s far better to start with what’s really there.

This is a system that works, but you’ll need to practice it a few times before it feels comfortable. 

The four steps of landscape drawing

Being technically accurate frees up your subconscious mind to analyze and interpret what you see.

Main Street, Owls Head, 16X20, oil on gessoboard, $1623 unframed.
Observation

I once took an artist on a long loop to see all my favorite painting sites here in midcoast Maine. “But there’s nothing to paint,” she wailed. She was suffering an extreme case of sensory overload. We all experience this to some degree when we’re forced to buckle down to work. We’re asking ourselves to choose one subject among an infinite number of possibilities. And the obvious and iconic may not make the best (or most interesting) painting.

We all want to jump quickly into painting, but the better path is to spend some time relaxing and looking. I prefer to do this with a sketchbook and a lawn chair. If you’ve spent 10 minutes just drinking in the beauty, and then do four thumbnails of different scenes, you haven’t ‘wasted time.’ You’ve saved yourself immeasurable amounts of work on mediocre paintings, by answering the following questions:

  • Where does the visual strength in this composition lie?
  • How can the picture plane be broken into light and dark passages?
  • How can I crop my drawing to strengthen the composition?
Belfast Harbor, 14X18, $1594 framed.

Measurement

At some point, you need to get precise. Fast, loose painting rests on a base of good drawing. If you haven’t been taught to measure with a pencil, start here, hereand here.

People tell me all the time, “I can’t draw a stick figure.” It depresses me, because drawing is a technical exercise, and anyone can learn it, just as they learn to write or do arithmetic.

I recommend the book Sketching from Square One to Trafalgar Square, by Richard E. Scott. It’s a comprehensive introduction to drawing from observation. Books and classes that focus on the interpretive side of drawing are not useful for the artist who needs to get things right, so before you sign up, make sure that teacher, video, or book is actually teaching drawing, not some form of self-analysis with a pencil.

Beach erosion, 8X10, oil on canvasboard, $522 unframed.

Interpretation

Being technically accurate, oddly enough, frees up your subconscious mind to analyze and interpret what you see. We all paint through the filter of our own experience, values and aspirations. That’s why one artist will edit out the power lines and trash cans on a street scene, and another will focus on them.

But there’s a deeper level at which this happens, and that’s in the colors, forms and shapes themselves. They’re tied to your subconscious. Within the rubric of ‘good composition’ or ‘good taste’ are infinite variations. What you perceive is highly individual, so your interpretation will also be individual.

Marshall Point, 12X9, oil on canvasboard, $696 unframed.

Reiteration

The first three phases are all essentially input—identifying, measuring, and analyzing the subject you’re painting. The final business of producing a work of art is collecting all that input and restating it on your canvas or paper. If you’ve done the first three steps conscientiously, this last step should be relatively relaxed and free. It should also go quickly. Your own ‘handwriting’, in the form of brush or pencil work, will be unfettered and loose.

Monday Morning Art School: anyone can draw

Drawing is a series of actions, rather like dance. It can be learned, just like any other process.

Teachers sometimes tell their students to hold the pencil fully outstretched. I disagree, because moving it up and down and sideways makes you move in an arc, as Sandy demonstrates, above. 

Drawing starts with measurement. Get that right, and everything else is just details.

1. Put yourself a few feet from the object you want to draw. Make sure you’re comfortable.

2. Hold your pencil between your thumb and fingers as shown. Most art teachers tell you to do your measurements with your arm completely outstretched; I prefer to have my arm loose and to visualize an imaginary plate glass window I’m running my pencil along.

Instead, hold your pencil loosely and comfortably, as if there were a plate glass window along which you were running the pencil. You will have to recheck your measurements frequently, but you should be doing that anyway.

3. Close one eye and focus on the pencil.

4. Holding your pencil upright and straight, align the point of your pencil with the top of the vase.

5. Slide your thumb down the pencil until it is at the bottom of the vase. This is now one unit of measurement in space.

Your pencil is your ruler. You are measuring ratios and then transferring them to the paper. (Note: my ratios look slightly different from what Sandy was seeing because I drew the picture later, from a slightly different angle.)

6. Put marks on your paper where you want the top and bottom of the vase to end up. This is now one unit of measurement on your paper. It doesn’t have to be the same size as your unit of measurement on your pencil.

7. Go back and line your pencil up again with the vase so that it fills the pencil from the point to your thumb. Now raise the pencil so you are measuring the flowers. Are they as tall as the vase?  Twice as tall? Half as tall? When you’ve determined this, add another mark to your paper to indicate where the top of the flowers should be. This should be the same ratio on paper as it was in space. But one unit on your pencil does not need to be one unit on your paper. What you draw can be much bigger than what you measure, as long as they are proportional.

Recheck the height with your pencil and then flip it to see how the width of the vase compares. It’s that simple. 

8. Go back and recheck the measurement on the vase height. Then just flip your pencil sideways and see how wide the vase looks in comparison to its height. Is the object as wide as it is tall? Twice as wide? Half as wide? Once you’ve determined this, go ahead and put horizontal marks on your paper to represent the width of the vase.

9. Turn your pencil to the side and observe that the flowers are about 2 or 2.5 times as wide as the vase (depending on where you’re standing).  Make those marks on your picture.

It really doesn’t matter where you start measuring or what order you measure in. You will figure out a system that works for you.

10. Once you have the proportions of the objects marked out, mark in the big shapes with a light pencil and then start breaking them down into smaller shapes. You are well on your way to drawing the object. 

Once you have the measurement hash marks in place, draw in the big shapes and start breaking them down into smaller shapes. The rest is just details.

Your assignment is to practice this. The more you practice accurate measurement, the better your painting will be. Next Monday I will talk about using angles and negative space to measure.

Monday Morning Art School: start with drawing

Before you can paint successfully, you have to learn to draw.
I love drawing in church, especially when there are sleepy teenagers. This drawing started with simple analysis of shape.

One of the problems with writing about ‘how to do art’ is that you’re speaking to all levels of experience. Today we’re going right to the beginning of measurement. Almost everyone can get the details of a drawing right. Where they go wrong is with overall proportion. Drawing is, first and foremost, a technical exercise in seeing size relationships. Get that right, and the details hardly matter.

All objects can be broken down into simple shapes and angles.

You’ve all seen artists holding a pencil up to an object. What they’re doing is rough measuring. It’s simple to do, but tough to photograph. Hold your pencil up like a ruler in front of the object you’re drawing. Move it around to see the relative height and width of the thing. For example, the toy truck below is about 1.5 times as wide as it is tall. Figure that out by holding your pencil first along the vertical access, then along the horizontal access, and comparing where the lengths stop along the pencil.

It’s not just an affectation; it’s really how artists measure.

A common beginner error is thinking that you have to transcribe the lengths exactly to the paper. The drawing can be any size you want. Start by figuring out how big you want the object to be on your paper, and make two hash marks to represent that. Then, if your object is half as wide as it is tall, figure out that relationship and mark it too.

Start by measuring out the simple shapes and angles.

You can also use your pencil to figure out the other important thing in drawing: the angles of lines. Formal perspective is important, but not as important as learning to see angles. If you develop the ability to see angles, you’ll have better natural perspective than if you try to fit up what you see to a theory.

Next, rough in the values. That means the lights and darks.

Do your measuring with one eye closed, especially if you’re working in a tight space. Art books will tell you to measure with your arm straight out. That’s not always practical. Instead, try to have the pencil the same distance away from your eye each time you take a measurement. I do that by noting how my arm is cocked.

Today’s exercise is based on a tissue box I drew in church. It had lovely angles. However, what you see in the photo isn’t what I saw while working. A drawing from life will never match what the camera records. Cameras lie just as much as artists do.

Begin to refine and strengthen the light and dark shapes.

All drawing starts with simple shapes. After laying them down, I check and correct them. I do this by analyzing each large shape. Where does the back of the box intersect the tissue column? Is the curve of the cutout fat enough? I discovered that my cube wasn’t really tall enough, so I added some to the bottom. 

The next step is to establish some overall values.  â€œValue” just means how light or dark something is. This box was sitting on a south-facing windowsill behind a person who was casting another shadow. Thus, the window-frame behind the box was in deep shadow, but not nearly as dark as the photograph. I roughed in those darks first. They helped me know how to shade the box properly.

If you’re using graphite or charcoal, you can blend with your finger. Otherwise, use a stump, a tortillon, or a bit of rag.

Next, I set shadows on the tissue box itself. I am more concerned with the column of tissue, so with each pass, I spend more time on that.

Finally, I did some blending, using the handiest tool I carry: my finger. You should use a stump or tortillon on work you care about, but in a pinch, your finger works great. But don’t blend pigments other than graphite or charcoal with your finger; they may contain toxic metals.

Voila! I have a tissue box drawn and my pastor is just winding down his peroration.
Note that I never bother much about my mark-making. It can take care of itself. I’m mostly interested in applying accurate values. I did this drawing with a mechanical pencil, which will never be as luscious as a good graphite stick, but it survives banging around in my purse week after week.
Some general rules:
  • Draw everyday objects. The better you get with these, the better you’ll be with complex subjects. There’s amazing beauty in everyday things.
  • Draw any time you get the chance. I did this drawing in church, and I didn’t miss a word. Drawing and language don’t use the same channels of your brain.
  • Measuring is the most important part of drawing. Keep checking and correcting sizes.
  • Start with big shapes and break them down into little shapes. If the big shapes are right, the smaller parts will slip into their spots just fine.
  • Value is relative. How dark something is, is only important in terms of how dark its neighbor is.
  • Constantly recheck shapes and values as you go.

Monday Morning Art School: How to draw almost anything

There’s now a Facebook group for you to post your homework, folks. 
You’ve all seen artists holding a pencil up like the clip art below. What they’re doing is rough measuring. It’s simple. Just hold the pencil up like a ruler in front of the object you’re drawing. Move it around to see the relative height and width of the thing. For example, a vase may be twice as tall as it is wide. That’s all you’re figuring out; you can make the vase any size you want on the paper.
It’s not just an affectation.
You can hold your pencil up to figure out the other important thing in drawing: the angles of lines. I could give you a formal perspective lesson before we start drawing, but it’s not as important as learning to see angles. If you develop the ability to see angles, you’ll have better natural perspective than if you try to fit up what you see to a theory.
I used my pencil as a measuring tool to get the relative sizes and angles right.
The tissue box I was drawing in church yesterday had lovely angles. However, what you see in the photo isn’t what I saw while working. A drawing from life will never match what the camera portrays. Cameras are not as subjective as artists, but they lie just as much as we do.
You should do your measuring with one eye closed, especially if you’re working in a tight space, as I was. Art books will tell you to measure with your arm straight out. I find that uncomfortable. Instead, I just shoot for always having the pencil the same distance away from my eye as I work.
Then I checked the sizes and angles and corrected them. The box was taller than I originally thought.
All drawing starts with simple shapes. After laying them down, I check and correct them. I do this by analyzing each large shape. Where does the back of the box intersect the tissue column? Is the curve of the cutout fat enough? I discovered that my cube wasn’t really tall enough, so I added some to the bottom.
After I was reasonably confident I had the shapes right, I added some overall values.
The next step is to establish some overall values.  â€œValue” just means how light or dark something is. This box was sitting on a south-facing windowsill behind a person who was casting another shadow. Thus, the window-frame behind the box was in deep shadow, but not nearly as dark as the photograph. I roughed in those darks first. They helped me know how to shade the box properly.
I added shadows to the box itself, and developed some detail.
Next, I set shadows on the tissue box itself. I am more concerned with the column of tissue, so with each pass, I spend more time on that.
Finally, I did some blending, using the handiest tool I carry: my finger. You should use a stumpor tortillonon work you care about, but in a pinch, your finger works great.
Blending using the side of my finger.
Note that I never bother much about my mark-making. It can take care of itself. I’m mostly interested in applying accurate values. I did this drawing with a mechanical pencil, which will never be as luscious as a good graphite stick, but it survives banging around in my purse week after week.
Time to go home!
Some general rules:
  1. Draw everyday objects. The better you get with these, the better you’ll be with complex subjects. There’s amazing beauty in everyday things.
  2. Draw any time you get the chance. I did this drawing in church, and I didn’t miss a word. Drawing and language don’t use the same channels of your brain.
  3. Measuring is the most important part of drawing. Keep checking and correcting sizes.
  4. Start with big shapes and break them down into little shapes. If the big shapes are right, the smaller parts will slip into their spots just fine.
  5. Value is relative. How dark something is, is only important in terms of how dark its neighbor is.
  6. Constantly recheck shapes and values as you go.

Why do we draw? (Part 3)

Two pieces of silverware and a coffee cup: a tricky thing to draw. But when you’re done, you’ll have the basic tools to draw anything.
Yesterday’s lesson on the pencil and thumb method was easy to teach in person, but difficult to write out in steps. Today’s lesson, on using angles, is easier to write, but will be a little trickier to master.
This has to do with how our brains are wired, not how “talented” you may or may not be. We simply don’t ‘read’ angles and negative space when we’re not focusing on them. This is why we use our pencil as a visual aide. It forces our brains to pay attention.
The good news is that you can rapidly teach your brain to notice angles and negative space.
Once again, close one eye and focus on the pencil, not the object you’re measuring. Hold the pencil along an imaginary plate glass window in front of you, and tilt it to match the angle you’re measuring. Then reproduce the line on your paper.
If at first you screw up, it’s probably that you’ve canted one end of the pencil away from you. Straighten it up and try again.
Once you’ve mastered measuring with the pencil and thumb method and learned to see and copy angles on to your paper, you can draw anything from portraits to animals to landscapes to figure. I promise.
Start by measuring the basic shapes using the pencil and thumb method we learned yesterday. Mark off the  heights and widths of all the basic shapes.
Use your pencil to determine the angles at which the silverware, the sides of the cup, and the handle are traveling. Draw them in as straight lines. This takes a little practice, so be patient and take your time looking at each one.
Use your measuring and angle hash marks to block in the major shapes.
Often, you can see distortions, objects that are too close together, etc. more easily in the negative space than you can in your drawing of the positive objects. It’s best to check this before you go on to finish your drawing.
You can use angles to check your work. Here I checked the angle from the right tine of the fork to the handle of the cup, and the angle across the top of the two pieces of silverware.

 Message me if you want information about next year’s classes and workshops.

Why do we draw? (Part 2)

Teachers often tell their students to hold the pencil fully outstretched. I disagree, because moving it up and down and sideways makes you move in an arc, as Sandy demonstrates, above. 

Many people tell me they would like to learn to draw, but they live too far away to take my class. Often they are going through some kind of crisis. From long experience, I know that drawing is cheaper than therapy, it always calms anxiety, and a tablet of paper and pencil are so small and benign that they can be carried anywhere.

I can teach most people the rudiments of life drawing in a single class session. Drawing is a series of actions, rather like dance. The best way to teach it is to sit next to the student and demonstrate the steps. Still, a half loaf is better than none.

Drawing starts with measurement. Get that right, and everything else is just details.

Instead, hold your pencil loosely and comfortably, as if there were a plate glass window along which you were running it. You will have to recheck your measurements frequently, but you should be doing that anyway.
1. Put yourself a few feet from the object you want to draw. Make sure you’re comfortable.
2. Hold your pencil between your thumb and fingers as shown. Most art teachers tell you to do your measurements with your arm completely outstretched; I prefer to have my arm loose and to visualize an imaginary plate glass window I’m running my pencil along.
3. Close one eye and focus on the pencil.
4. Holding your pencil upright and straight, align the point of your pencil with the top of the vase.
5. Slide your thumb down the pencil until it is at the bottom of the vase. This is now one unit of measurement in space.
6. Put marks on your paper where you want the top and bottom of the vase to end up. This is now one unit of measurement on your paper. It doesn’t have to be the same size as your unit of measurement on your pencil.
7. Go back and line your pencil up again with the vase so that it fills the pencil from the point to your thumb. Now raise the pencil so you are measuring the flowers. Are they as tall as the vase?  Twice as tall? Half as tall? When you’ve determined this, add another mark to your paper to indicate where the top of the flowers should be. This should be the same ratio on paper as it was in space.
8. Go back and recheck the measurement on the vase height. Then just flip your pencil sideways and see how wide the vase looks in comparison to its height. Is the object as wide as it is tall? Twice as wide? Half as wide? Once you’ve determined this, go ahead and put horizontal marks on your paper to represent the width of the vase.

9. Turn your pencil to the side and observe that the flowers are about 2 or 2.5 times as wide as the vase (depending on where you’re standing).  Make those marks on your picture.

10. Once you have the proportions of the objects marked out, mark in the big shapes with a light pencil and then start breaking them down into smaller shapes. You are well on your way to drawing the object. 
Tomorrow I will talk about using angles and negative space to measure.
Your pencil is your ruler. You are measuring ratios and then transferring them to the paper. (Note: my ratios look slightly different from what Sandy was seeing because I drew the picture later, from a slightly different angle.)

Recheck the height with your pencil and then flip it to see how the width of the vase compares. It’s that simple. 
It really doesn’t matter where you start measuring or what order you measure in. You will figure out a system that works for you.
Once you have the measurement hash marks in place, draw in the big shapes and start breaking them down into smaller shapes. The rest is just details.

Message me if you want information about next year’s classes and workshops.