 |
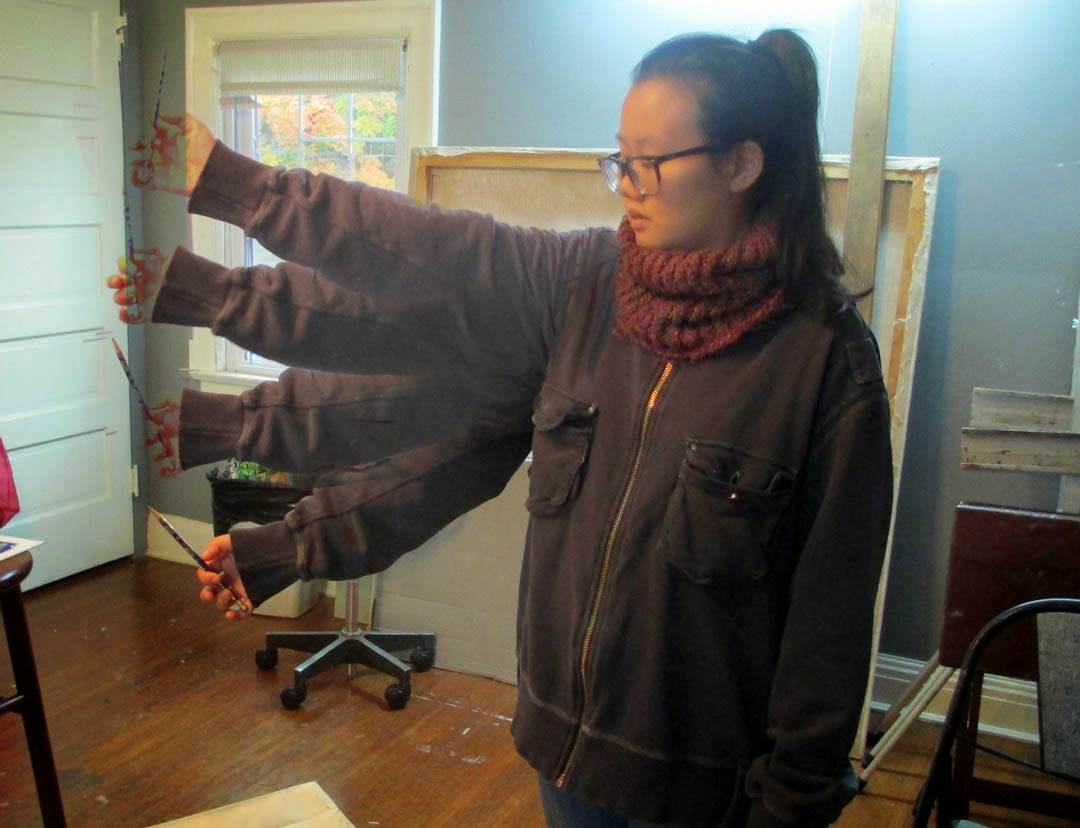
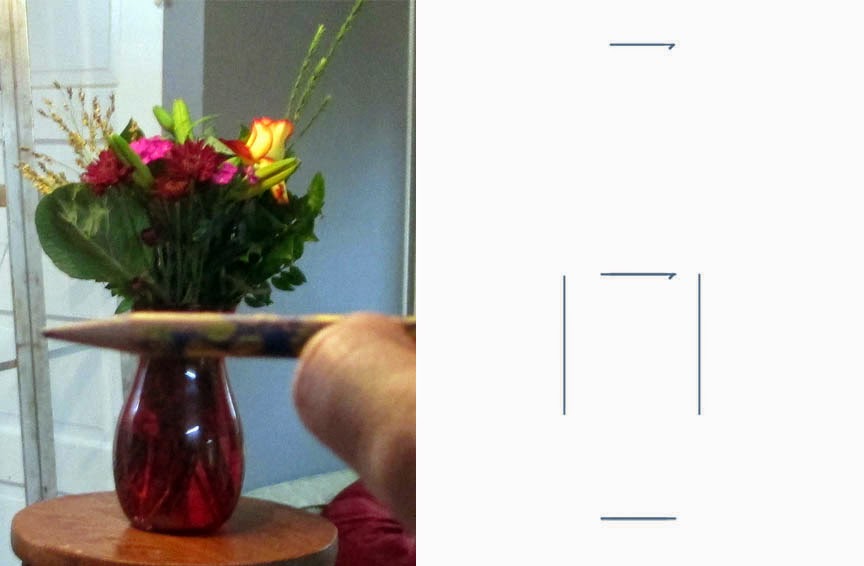
| Teachers often tell their students to hold the pencil fully outstretched. I disagree, because moving it up and down and sideways makes you move in an arc, as Sandy demonstrates, above. |
Many people tell me they would like to learn to draw, but they live too far away to take my class. Often they are going through some kind of crisis. From long experience, I know that drawing is cheaper than therapy, it always calms anxiety, and a tablet of paper and pencil are so small and benign that they can be carried anywhere.
I can teach most people the rudiments of life drawing in a single class session. Drawing is a series of actions, rather like dance. The best way to teach it is to sit next to the student and demonstrate the steps. Still, a half loaf is better than none.
Drawing starts with measurement. Get that right, and everything else is just details.
 |
| Instead, hold your pencil loosely and comfortably, as if there were a plate glass window along which you were running it. You will have to recheck your measurements frequently, but you should be doing that anyway. |
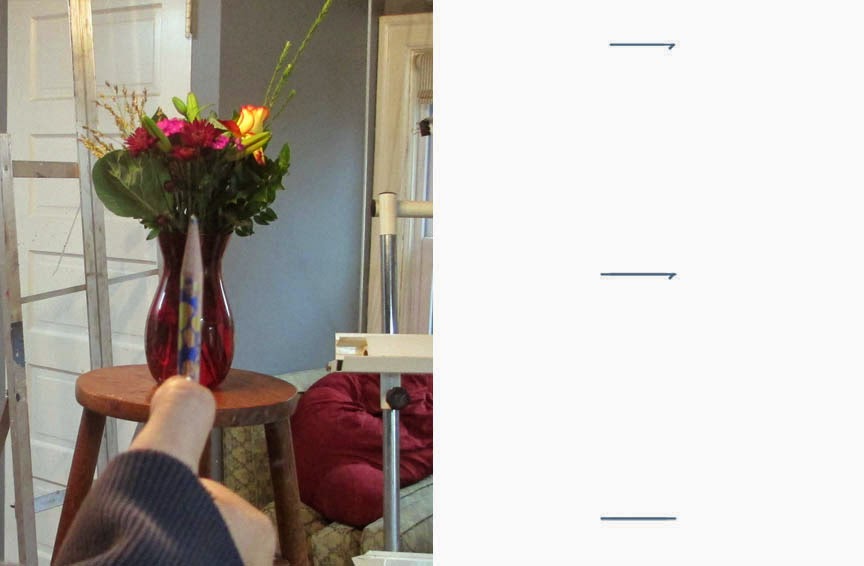
1. Put yourself a few feet from the object you want to draw. Make sure you’re comfortable.
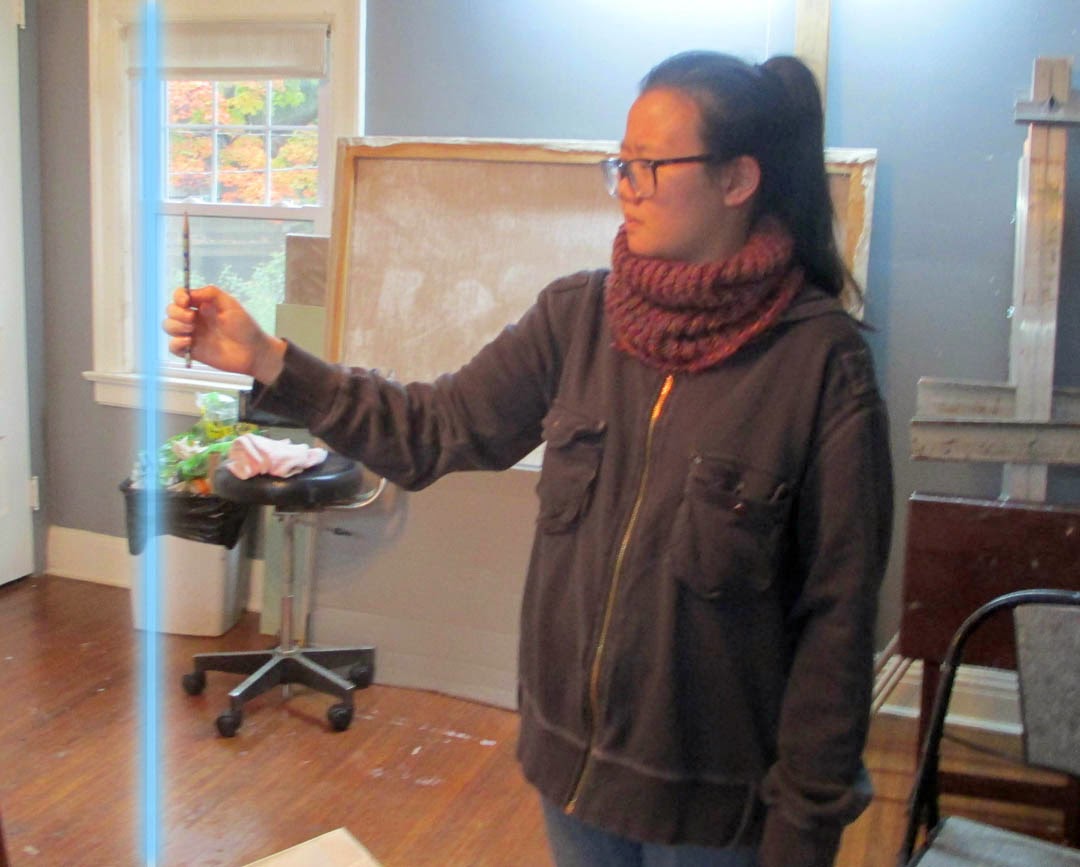
2. Hold your pencil between your thumb and fingers as shown. Most art teachers tell you to do your measurements with your arm completely outstretched; I prefer to have my arm loose and to visualize an imaginary plate glass window I’m running my pencil along.
3. Close one eye and focus on the pencil.
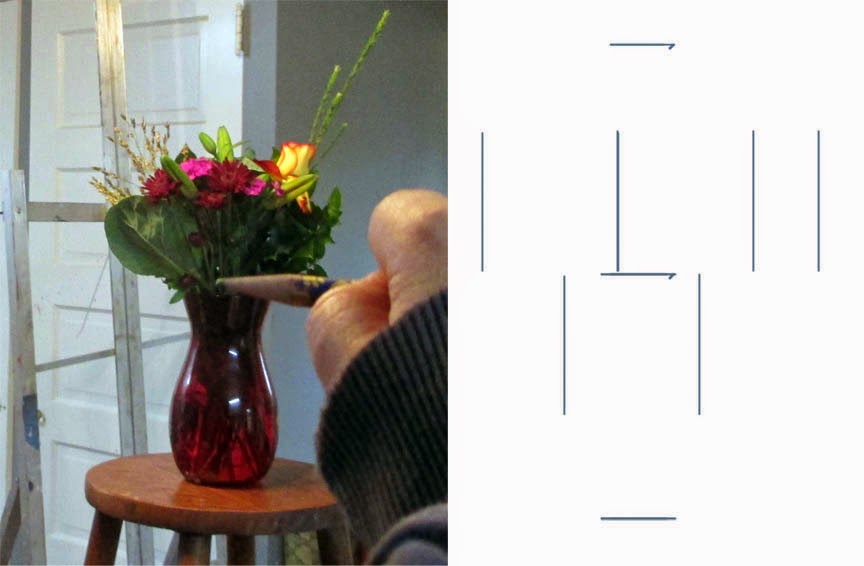
4. Holding your pencil upright and straight, align the point of your pencil with the top of the vase.
5. Slide your thumb down the pencil until it is at the bottom of the vase. This is now one unit of measurement in space.
6. Put marks on your paper where you want the top and bottom of the vase to end up. This is now one unit of measurement on your paper. It doesn’t have to be the same size as your unit of measurement on your pencil.
7. Go back and line your pencil up again with the vase so that it fills the pencil from the point to your thumb. Now raise the pencil so you are measuring the flowers. Are they as tall as the vase? Twice as tall? Half as tall? When you’ve determined this, add another mark to your paper to indicate where the top of the flowers should be. This should be the same ratio on paper as it was in space.
8. Go back and recheck the measurement on the vase height. Then just flip your pencil sideways and see how wide the vase looks in comparison to its height. Is the object as wide as it is tall? Twice as wide? Half as wide? Once you’ve determined this, go ahead and put horizontal marks on your paper to represent the width of the vase.
9. Turn your pencil to the side and observe that the flowers are about 2 or 2.5 times as wide as the vase (depending on where you’re standing). Make those marks on your picture.
10. Once you have the proportions of the objects marked out, mark in the big shapes with a light pencil and then start breaking them down into smaller shapes. You are well on your way to drawing the object.
Tomorrow I will talk about using angles and negative space to measure.
|
||
| Recheck the height with your pencil and then flip it to see how the width of the vase compares. It’s that simple. |
 |
| It really doesn’t matter where you start measuring or what order you measure in. You will figure out a system that works for you. |
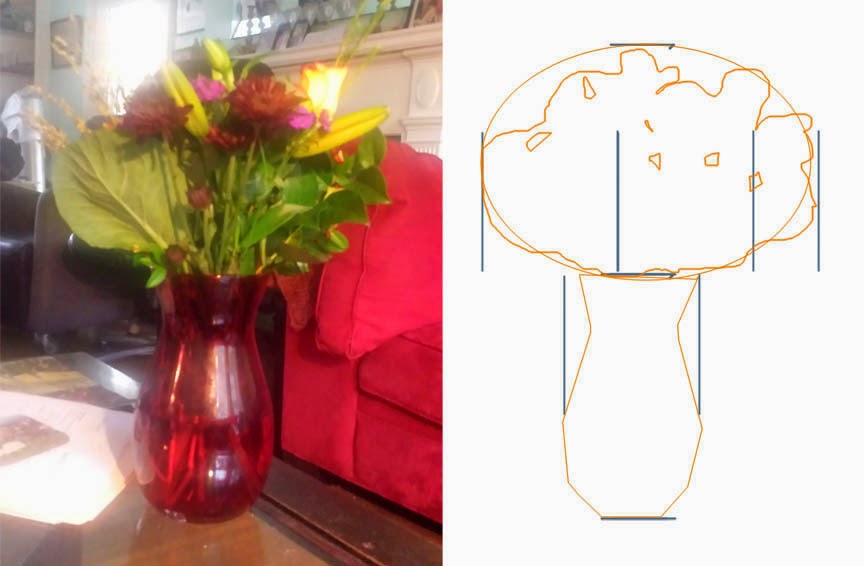 |
| Once you have the measurement hash marks in place, draw in the big shapes and start breaking them down into smaller shapes. The rest is just details. |
Message me if you want information about next year’s classes and workshops.