Monday Morning Art School: that sinking feeling

Over time, the dark passages in an oil painting can grow hazy. In watercolors, the beautiful, jewel tone on the palette can look flat and dull after the paper dries. Thatā€™s ā€˜sinkingā€™ color, and an ounce of prevention beats a pound of cure.

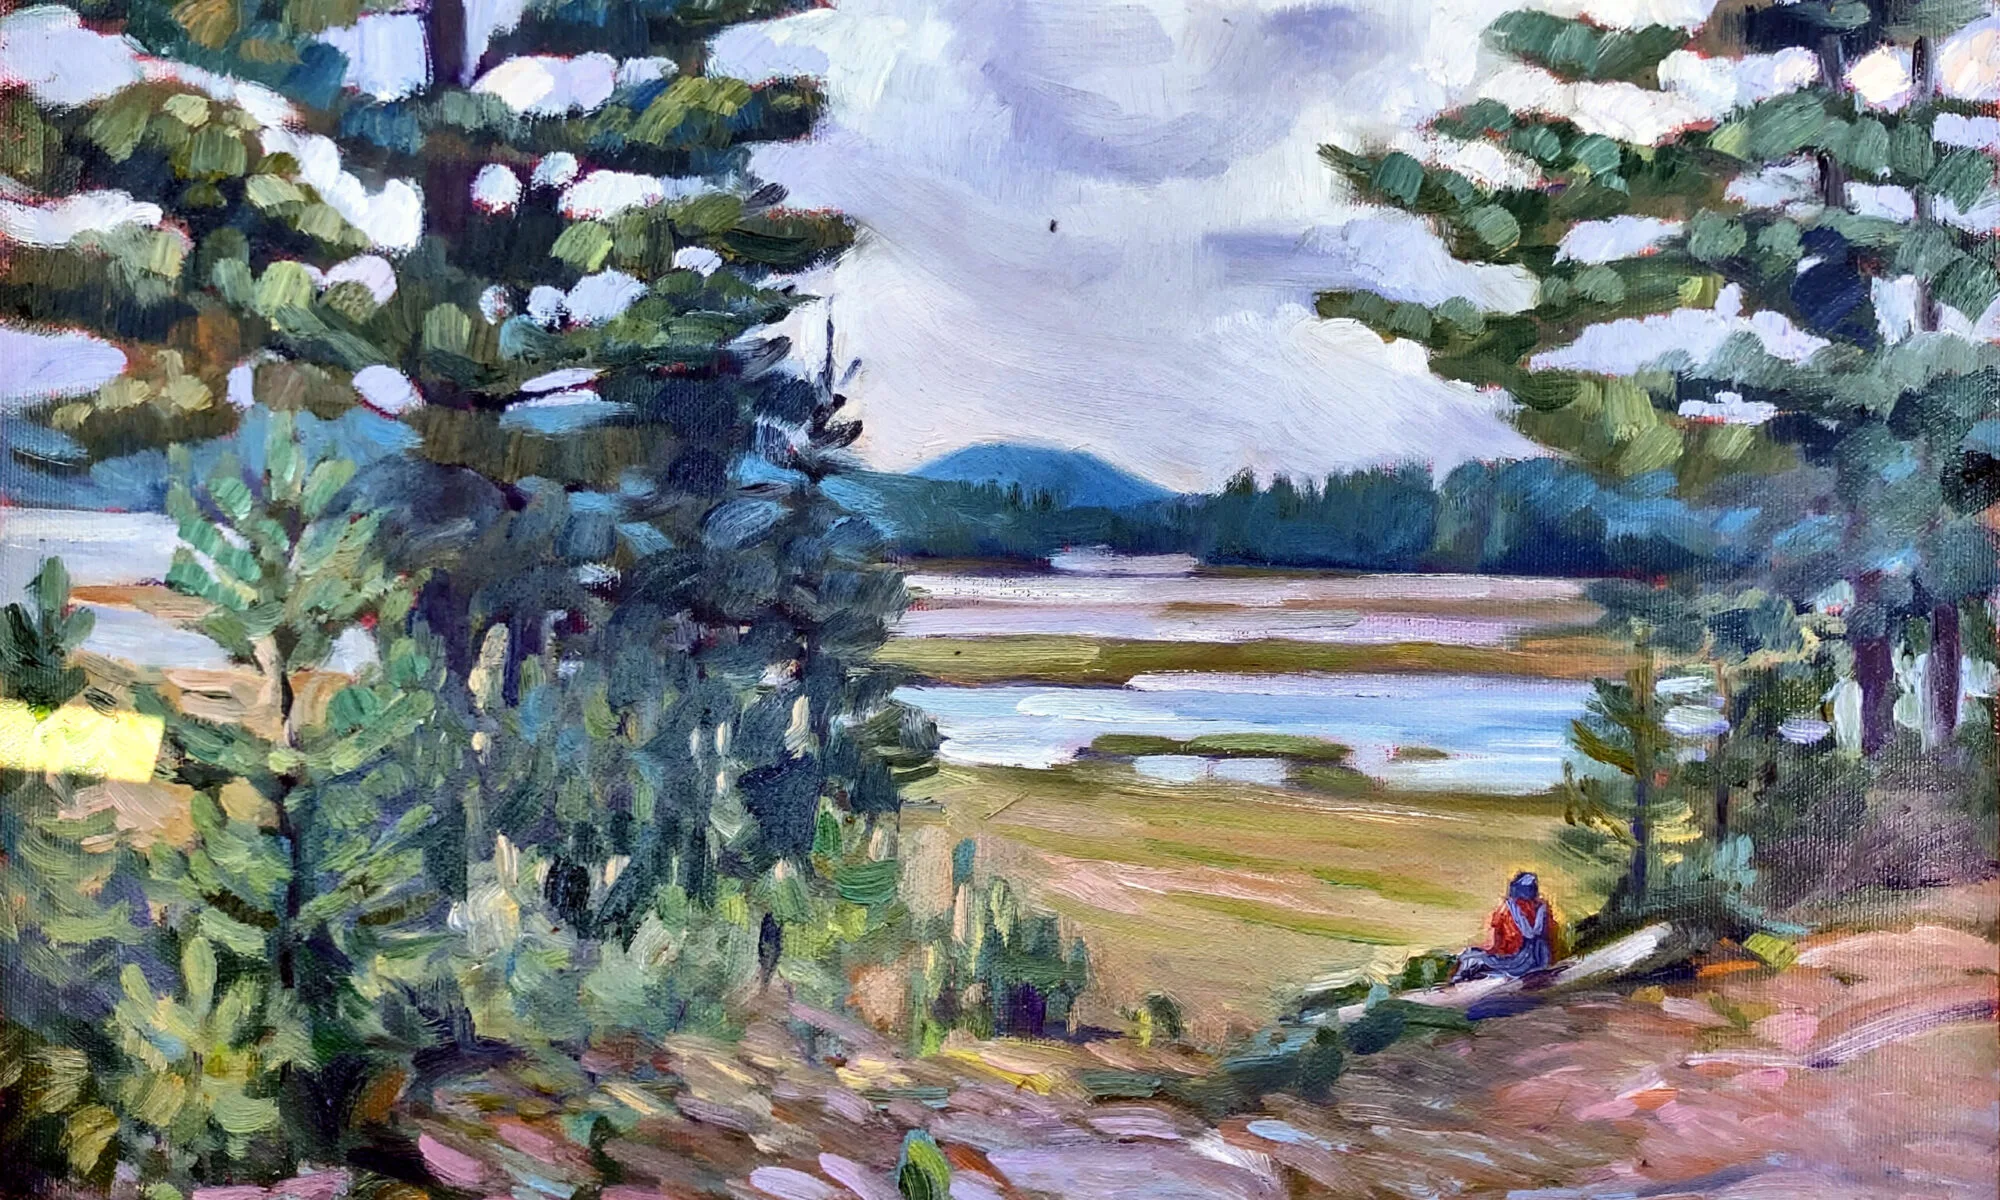
Clear Morning on Bunker Hill, 24X36, $3985 framed.

Oil painting: Sinking is caused by the displacement of the oil in the top layer. Itā€™s most obvious in dark passages, but thatā€™s only because the dusty haze is most visible there. It appears slowly over timeā€”a painting that was once exuberantly colorful is suddenly dull. The different drying times of pigments means that color will sink unevenly across the canvas, giving it an irregular, blotchy look. Details that were once subtly beautiful will disappear.

Sinking can be repaired by oiling out or varnishing, but this may need to be repeated to keep the painting beautiful. If a painting is sold, you have no idea if itā€™s losing its color. Itā€™s far better to do it right in the first place.

Tom Sawyer’s Fence, 14X18, $1275 unframed.

Sinking has three common causes:

Too much solventā€”the painter has not mastered the art of using unadulterated paint or painting mediums in the top layer. He relies too much on odorless mineral spirit (OMS) to get good flow. The OMS takes the place of the linseed oil binder and then evaporates. That leaves the pigment particles isolated, with no oil surround. Air doesnā€™t have the same refractive index as linseed oil, so a pigment that looks dark and beautiful in solution looks dull and grey when the binder disappears.

Not enough oil in the top layer of paintā€”this is why we keep repeating that old saw, ā€˜fat over lean.ā€™ Thereā€™s enough oil in modern paints to make a solid top layer, but only if applied in proper thickness. If you want to paint thin, you must cut your paint not with OMS but with an oil-based medium.

Over-absorbent groundsā€”acrylic gesso is more absorbent than oil gesso, but a well-prepared acrylic ground is fine. However, a very inexpensive board may not have enough ground to stop oil from seeping through. An aftermarket coating of gesso is a good cure. Non-traditional grounds like paper and raw fabric need very careful preparation.

Bunker Hill overlook, full sheet watercolor, available. One of the advantages of Yupo is that there is no sinking.

Watercolor: ā€œThe difficulty in watercolors is not that it is ā€˜unforgivingā€™, as amateurs widely misbelieve: it is that it begs for fussing,ā€ wroteBruce MacEvoy. That fussing takes the form of overworking passages. Alla prima, or ā€˜on the first strikeā€™ is vital in watercolor.

We want the pigments to stay on the top of the paper, rather than sink into it where they canā€™t be seen. The cellulose fibers of watercolor paper were laid down in a stiff mat so that pigments will sit nicely on top. Reworking wet-on-wet, scrubbing, and other repairs cause the fibers to unravel, creating a microscopic forest of random threads. Paint sinks into its crevices. The color is duller and, worse, blotchy.

The deck of American Eagle, from my sketchbook from Age of Sail workshop

Most watercolor paper is coated with gelatin or other sizing. This controls its absorption of paint. When you do a preliminary wash of color, youā€™re wetting the paper along with establishing primary shapes. If this wash layer is allowed to dry completely before the next layer is applied, the water and paint mix with the sizing and create a new layer, comprised of binder, sizing and pigment. That new, dense sizing layer can help hold successive layers of paint on the surface.

But if you ā€˜lickā€™ the wet paper constantly with your brush in an attempt to control minor flaws, you interrupt this process. Unless the paper dries completely between approaches, each pass with the brush lifts more paper fibers. That disturbance increases the capillary action that draws the pigment deeper into the paper. Overworked passages look dull and fuzzy.

Of course, the type and quality of the paper you use matters. Hot press paper is more tightly-compacted, making it more tolerant of overbrushing. Cold-press paper has less sizing and looser fibers. It tolerates less fussing.

What you can and canā€™t change

Thought and practice moves our painting style, but itā€™s incremental, just like the Mary Day docking.

Winch (American Eagle), oil on canvasboard, by Carol L. Douglas, 12X16, $1449 framed.

Windjammers are slippery little devils. I should know that by now. You think you understand the rhythm of their comings and goings and you find one or two likely candidates and commit to painting them. Then you look away for a moment and you find a subject slipping away from her berth, heading out to sea.

That happened to me on Monday, when Iā€™d stopped to paint before my dentist appointment. (ā€˜Quickieā€™ has an entirely different meaning to artists than to the rest of the world.) Iā€™d limned in the ketch Angelique, and the light and shadows were notated, but as I sadly watched her slide out of her berth, I knew she wouldnā€™t be back for days.

ā€œYou didnā€™t take a photo, did you?ā€ asked Ken DeWaard. He knows most of my bad habits, thanks to my friend Terry spilling the beans. I could almost paint Angeliquefrom memory, but that never ends well. I shook my head ruefully, and begged him for a picture. ā€œIā€™m just enabling you,ā€ he muttered, but he sent it to me anyway.

Lobster fleet at Eastport, oil on canvas, 24×30, $3478 framed.

There was still the fine flat transom of the Lewis R. French to paint. She celebrated her 150th birthday this year, and thatā€™s something to celebrate. We both set to again, but not five minutes later, Mary Day hove into view. She was heading for the berth directly in front of us. Normally, that would be a good thing, but it would obliterate the rest of our view.

Mary Day doesnā€™t have an engine; sheā€™s pushed into place by a tender. Itā€™s fascinating to watch 90ā€™ of wood and sails delicately slide into her berth, guided by a tiny gnat of a boat. Since our subjects had vanished into the rhythm of a working harbor, we had no choice but to sit back and enjoy the spectacle. We talked about color and mark-making.

Striping (Heritage), oil on canvasboard, 6X8, $435 framed.

I hold that mark-making is as personal as handwriting. Once youā€™ve taught someone how to form their letters, you have very little control over the finished product. Iā€™m shocked, sometimes, to see how much my handwriting resembles my motherā€™s. Thatā€™s a real mystery, since Iā€™m a lefty and she was right-handed.

As a teacher, I do influence my studentsā€™ marks. ā€œDonā€™t dab!ā€ Iā€™m wont to say, although Iā€™m well aware that Pierre Bonnard dabbed to great effect. Heā€™s the exception that proves the rule. Dabbing, in the hands of beginners, looks amateurish.

Mostly, I ask them to experiment with all the different things a brush can do and then find their own ways of using them. Once theyā€™ve found that place, itā€™s pointless to try to shake it up too much. (This is why I donā€™t encourage palette-knife painting in my classes; it short-circuits this process.)

Pleasure boats, oil on canvasboard, 12X16, $1159 unframed. Even though this is not ‘my style’, it’s still one of my favorite paintings.

ā€œThere are things that are immutable, and itā€™s pointless to try to change them,ā€ I said to Ken as we watched Mary Dayā€™s crew work. ā€œFor example, I canā€™t be 6ā€™5ā€ and you canā€™t have my curly hair.ā€

ā€œBut there are things you can change,ā€ said Ken. Heā€™s right, of course. Our choices of brushes, canvas and pigments all influence our paint application, just as choosing a gel pen makes us write differently than with a pencil. Thought and practice moves our painting style, but itā€™s incremental, just like the Mary Day docking. Rush that by copying someone else, and you risk being a parody.

I donā€™t know a single serious artist who thinks he or she is painting wellā€”even the ones who are highly successful. Weā€™re all on a quest; our vision is constantly changing. But through all that, we have something thatā€™s immutable. For lack of a better term, Iā€™ll call it our styles.

My students make me proud

Lemme show you some picturesā€¦

Linda DeLorey, from a class assignment on painting snow.

Iā€™m turning into one of those old ladies who carries photos around in her phone and shows them to total strangers. However, theyā€™re not pictures of my kids or grandkids (or even the dog). Instead, theyā€™re my studentsā€™ paintings. Iā€™m very proud of them.

Amy Thomsen, from a class assignment on painting trees.

People are embracing distance learning, even in the evening after a long day of work. I donā€™t know if thatā€™s because of the continuing reach of COVID, because itā€™s winter, or because the limits of geography are lifted.

David Broerman, from a class assignment on painting snow.

Itā€™s turning out to be as much a group of friends as my summer plein air classes. On Monday night, talk turned to baking, a long digression that ended with Mark going to his refrigerator for his sourdough starter. My Tuesday class includes sisters who live across the country from each other. Itā€™s all far warmer and personal than I ever imagined.

Mark Gale, from a class assignment on color substitution.
Lorraine Nichols, from a class assignment on color substitution.

Iā€™ve written extensively about learning how to teach with Zoom. If thereā€™s been a gift from 2020, itā€™s getting me over the hurdle of video. I used to loathe being on camera; now I donā€™t even notice it. Thereā€™s been lots of trial and error and Iā€™ve upgraded my cameras and monitor. That was worthwhile. With the proper equipment the video barrier seems to evaporate.

Lori Capron Galan, from a class assignment on reflections.

I have Mary Byrom to thank; she’s the one who coached and cajoled me past my resistance. That’s why I pay the favor forward to other teachers when I can.

Carol Durkee, from a class assignment on color substitution.

Beth Carr, from a class assignment on color substitution.

Zoom has made me a better teacher. Instead of teaching reactively, Iā€™ve been forced to be far more proactive in designing lessons. Teaching without geographical boundaries means Iā€™m getting serious students. Theyā€™re working extremely hard, and every one of them is improving.

Sharyn Brusie, from a class assignment on reflections.

That’s resulted in a long syllabus that will be the basis of a book, should I ever sit long enough to get some writing done (my New Year resolution.) 

Janice Vierke, from a class assignment on reflections.

We have a Facebook group where my students share recent paintings. I’ve nabbed some for you; I think they speak for themselves. There isnā€™t enough room in this blog to feature all of them, so Iā€™ll catch up with the rest of them later. In return, I promise to not corner you at the grocery store and show you pictures of my grandkids, cute as they are.

Carrie O’Brien, from a class assignment on reflections.

Patty Mabie, from a class assignment.
Kathy Mannix has sold two paintings since starting my classes earlier this year. Amazing.

Mary Silver lives in the Texas hill country, where snow is generally just a happy dream.

Monday Morning Art School: different strokes

The best way to learn about your brushes is to experiment.Your brushwork contributes immeasurably to the quality of your painting. Don’t dab or be diffident; plan your strategy and then execute it with boldness.

A spalter or mottler is a most useful watercolor brush.

On Friday, I gave you a guide to buying brushes. What are you going to do with these brushes now?

OIL and ACRYLIC

In the following illustrations, I’ve tried to keep the amount of solvent the same (except with the fan brush).

Above is a sable flat brush by Rosemary & Company. It can put down a very smooth surface and offers a lot of control, but it doesn’t carry the quantity of paint that an equivalent bristle brush will. I save sable for glazing or blending.

This is a hog bristle flat brush. The paint it lays down is both rougher and more impasto than the sable.

Flat brushes make an immediate, energetic mark. They’re excellent for fast, powerful surface work, long sweeping strokes, and blocking in shapes.

Used on their sides, they also make great lines, far more evenly than a small round can do.

Two rounds of very different sizes. A round is a more lyrical brush than a flat, and is a classic tool for painterly surface marks. It can be used to make lines that vary from thin to thick. A pointed round is used for fine detail. Bristle rounds tend to lose their points very quickly, however.

The great advantage of a filbert is the variety of brushstrokes you can get from one brush. This is great for single strokes that taper, such as in water reflections. Its rounded edges are good for blending. Set on its side, it makes nearly as good a line as a flat.

A bright is a less-flexible version of a flat. It’s great for short, powerful strokes or situations where you want a lot of control.

A fan brush probably has no place in a plein air kit, but I carry one anyway. I use it for blending, as on the left, although some people like using it to make whacked out marks as on the right. The problem is, it can carry very little paint, so its marks tend to be either gooey, as above, or very abrupt.

In my studio, I just use a clapped out soft-haired brush to blend.

Many plein air painters also carry liners and riggers, which are useful in paintings that are built up smoothly. I donā€™t paint that way, so I seldom use them. Another brush that is good for detailed work is an angled brush. I don’t have one of them, either. You can do almost any work you can envision with just the brushes I’ve shown you above.

WATERCOLOR

Watercolor brushes are softer than oil-painting brushes. The most expensive are natural bristles, and the difference is usually worth paying for. Natural bristles combine strength with suppleness and hold more paint than synthetics. Unlike oil-painting brushes, your watercolor brushes should last a lifetime, so buy the best you can afford.

In general, watercolor brushes drop more pigment the more vertically they’re held. You can use this to move from a filled area to a broken one in one brush stroke. In all the following examples except for the mop, I’ve held the brush both ways. A good general rule is to carry the vertical brush slowly and in a controlled manner; pull a horizontal brush more rapidly to get the least amount of paint contact with the paper.

Made with the spalter brush at the very top of the page.

The brush I used for the photo montage at the top of the page is a 2″ flat synthetic mottler or spalter brush. I like this shape for both oils and watercolor. It’s a relatively inexpensive brush that gives a beautiful wash. It’s useful for covering large areas quickly, but with precise edges.

A flat gives you good even washes. Used on its side, it can give you a controlled line.
A bright is a shorter version of a flat. More punch with less pigment.

Flats and brights give you nice flat washes, but can be used to make expressive lines as well. Brights have more control and carry less paint, just as they do in oil painting. Turn them on their sides to make a controlled line. Twisting the brush while painting gives an infinite variety of shapes. So too does varying the ratio of paint and water.

You can’t do either of these things in any other medium.

Because of the way watercolor bleeds, its brushes can be used in ways not possible in any other medium–a long blend of different pigments, or by painting a shape in clear water and then dropping pigment into it.

Round brushes give more lyrical lines than flats do.

I don’t normally carry riggers with me in either watercolor or oils. (They’re meant to paint perfect lines, and my world-view apparently doesn’t have many perfect lines in it.) Most of my line work is done with rounds. They do not give as much control on long lines, but they are very expressive.

A mop brush gives a perfect wash, but it does so much more as well.

Squirrel mops are the most uniform wash brush you can use. It’s virtually impossible to make them skip, so use them where a lovely flat wash is a goal. But a good mop can also point, hold vast amounts of paint and sweep across the paper in style.

I think Guillo the dog ate my sea sponge.

Natural sea sponges are multi-purpose painting brushes. Use them to apply or remove paint. They can be as subtle or bold as you wish.

The brushes you really need

You donā€™t need to spend a fortune to paint.

Channel Marker, 9X12, oil on canvas, available.

OILS and ACRYLICS

Expensive brushes are not the place to throw money for the beginning oil or acrylic painterā€”good quality paints are far more important. Still, brushes do change how the paint sits, and you need proper tools.

For alla prima painting in oils, you want long-handled hog-bristle brushes. They are less expensive than softer hairs like sable. I like Princeton 9700 series and Robert Simmons Signet hog bristle brushes.

Princeton also makes synthetic brushes that are good value for moneyā€”the 6300 series. Anything softer really isnā€™t appropriate for alla primapainting in oils. Acrylic paints will tolerate a little more flexibility, but avoid anything labeled for both watercolor and acrylicā€”theyā€™re too soft. Princeton has a good chart of fiber stiffness, here.

Home Port, oil on canvas, available.

An assortment of rounds and filberts, a few large flats and an optional fan brush should suffice. More than a handful is overkill. Most workhorse alla prima painting happens between sizes #6 and #12, with a few smaller brushes for detail work, and larger brushes for bigger canvases.

If you like painting itsy-bitsy lines, invest in a rigger and a #1 round. I get more mileage out of spalter brushes, which are large, inexpensive flats for covering lots of area fast. I also keep a few soft sable brushes for glazing and blending.

Parrsboro Sunrise, 11X14, oil on canvasboard, available.

Bristle brushes tend to form a flag (a v-shaped split) at the end over time. If the brush is made properly, with good interlocking bristles, it will have a natural resistance to fraying. However, oil and acrylic brushes canā€™t tolerate letting paint dry into them, or being left standing on their bristles in solvent. You can wash brushes with Murphyā€™s Oil Soap, saddle soap (nice), specialty brush soaps, Fels Naptha, or even shampoo or detergent in a crunch. The important thing is that you do it promptly, before your paint has a chance to set up.

First, remove the solids by swishing them around in solvent. Then, put soap on a rag and work it into the bristles from the ferrule down to the bristlesā€™ end. Be sure youā€™re washing the inside bristles, not just the surface. Repeat until the suds run clean. Shake excess water out, shape the brush slightly with your hand, and let it air dry.

Sometimes it rains, oil on canvasboard, available.

WATERCOLOR

Brushes are far more important in watercolor. I like Rosemary & Co. but they are very expensive. I recommend Princeton Neptune brushes for new painters. A Ā½ā€ flat, a 1ā€ wash brush, a #6 quill and a #8 round will get you started. If youā€™re going to invest in a mop, squirrel is better than synthetic. A set of short synthetic flats (or mottlers, as theyā€™re sometimes called) in Ā¾ā€, 1ā€ and 1Ā½ā€ will round out your collection.

Riggers and liners are tiny brushes for making very fine lines. Theyā€™re more useful in watercolor than they are in oils, in my experience. I buy the cheapest ones I can find because Iā€™m always wrecking their points.

Lastly, you should have a scrubberto take out mistakes. You can buy them purpose-built, or you can just use an old hog-bristle brush.

Never leave your brushes standing in water, even as you work. Cleaning watercolor brushes is far easier than cleaning oil brushes. Hold them under the tap and let the pigment wash off with the flow of the water. I have never washed my brushes with soap, but if you find your synthetic brushes have stained, you can use a small amount of bar soap on them. Squeeze the water out and reshape the heads. Thatā€™s all there is to it.

Monday Morning Art School: scaling up a painting

It may seem time-consuming, but with big paintings it saves a lot of work in the long run.

My watercolor sketch. It’s gridded on a piece of plexiglass laid over the drawing.

On Friday I wrote about losing my painting reference and going to great lengths to find substitutes. The human mind being so fickle, writing that post made me suddenly realize what and where my original reference was. I came downstairs to my studio convinced that I would wipe out the interloping boats and go back to my original drawing.
I drew the mast positions in with charcoal and a straight-edge before starting to paint. That way their angle will match my sketch.

However, when I looked at the canvas again, I realized it wasnā€™t that bad. Different from my original intent, certainly, but not bad. I walked the dog and pondered. By the time I was home again, Iā€™d determined that I should just paint both iterations. It was possible to differentiate them enough to make two different works out of them, both speaking to the flying sensation of sailing.

That meant gridding up a second version. This time I decided to go with the original aspect ratio of the sketch, rather than cropping it. I liked the yawl Iā€™d truncated the first time around.

Straight lines, curves–it doesn’t matter. Just find the point at which they intersect the grid, mark those points, and work from there. I usually do this in monochrome but since I was working from a watercolor sketch, I just massed color.

I have a projector, but I find that gridding is more accurate and takes less time. Knowing how to do it is imperative for large projects, but it can be surprisingly useful in small paintings, too. Whenever you have trouble going from your thumbnail to the canvas, gridding is your go-to answer.

Boats v.2, laid out 24X36 in just a few hours. Later today I can actually paint them.

I realize many artists are math-phobic, but there are times when a bit of arithmetic can save you a world of pain.

First, work out whether the aspect ratio of your sketch is the same as the canvas. This is the proportional relationship between height and width. Sometimes this is very obvious, such as a 9X12 sketch being the same aspect ratio as an 18X24 canvas. But sometimes, you’re starting with a peculiar little sketch drawn on the back of an envelope. You can use a trick you learned back in elementary school.

Remember learning that 1/2 was the same as 2/4? We want to force our sketch into a similar equivalent ratio with our canvas.

Letā€™s assume that youā€™ve cropped your sketch to be 8ā€ across. You want to know how tall your crop should be to match your canvas.

Write out the ratios of height to width as above.

To make them equivalent, you cross-multiply the two fixed numbers, and divide by the other fixed number, as below:

Use your common sense here. If it doesn’t look like they should be equal, you probably made a mistake. And you can work from a known height as easily as from a known width; it doesn’t matter if the variable is on the top or the bottom, the principle is the same.

The next step is to grid both the canvas and sketch equally. In my painting above, my grid was an inch square on the sketch and 4″ square on the canvas, but as long as you end up with the same number of squares on both, the actual measurements don’t matter. You can just keep dividing the squares until you get a grid that’s small enough to be useful. For a small painting, that could be as simple as quartering the sketch and the canvas. I use a T-square and charcoal, and Iā€™m not crazy about the lines being perfect; I adjust constantly as I go.

The last step is to transfer the little drawing, square by square to the larger canvas. I generally do this in a dark neutral of burnt sienna and ultramarine. On Friday, however, since Iā€™d already done a grisaille and a watercolor sketch of the subject, I just transferred large blocks of color. It may seem time-consuming, but with big paintings it saves a lot of work in the long run.

Things I didnā€™t know, or canā€™t figure out

Some days I feel like the Oldest Living Member of this club; other days, Iā€™m shocked at the things I donā€™t know.

Home Farm, by Carol L. Douglas, is available through the Maine Farmland Trust Gallery.

Thereā€™s a rule for mixing acrylics and oils:  you can go over acrylic with oils, but you canā€™t go over oils with acrylics.

Acrylic paints and gesso have been available since the 1950s. In art-conservation terms, thatā€™s no time at all. However, thousands of oil paintings have been done over acrylic gesso and imprimatura. Since these bottom layers are separate, future conservators will be able to peel off the acrylic and reline the paintings.

Fog Bank, by Carol L. Douglas, is available through the Maine Farmland Trust Gallery.

Iā€™m more dubious about underpainting in acrylics and doing the top layers in oils. I used to see this in the last millennium but then it fell out of style. I was shocked to see a student doing it this summer. I think itā€™s bad practice on two counts:

  1. Good painting technique is intended to last for centuries. We donā€™t really know how those two paint systems will interact over the long haul.
  2. Thereā€™s no reason for it. Proper alla prima technique will give you good, clean, immediate color using conventional oil paints for all the layers.

But thatā€™s based on my gut, not on science. If anyone has a scientifically-based opinion, Iā€™d love to hear it.

Beaver Dam, by Carol L. Douglas, is available through the Maine Farmland Trust Gallery.

Most of us paint on acrylic-primed canvas these days, but Centurion(and others) make excellent oil-primed canvases and boards. These must be toned with oils because of that no-acrylic-over-oil rule. This year, a student at my Schoodic workshop primed her boards with Gamblinnaphthol red. Luckily, she also brought other boards, because the oil-primed ones never dried in time. This week, she showed me that they were still tacky.

It wasnā€™t the weather; Maine has been in a drought all summer. And her paint application looked fine to me. An internet search gave me no clues. Readers, if you have any ideas, please share them.

Over the summer, two students pointed out that they canā€™t buy Prussian Blue in acrylics; itā€™s only available as a hue. I contacted Golden Paints. Their expert told me, ā€œPrussian Blue pigment is highly alkali-sensitive. Waterborne acrylics are alkaline by nature. So, this pigment is not stable in waterborne acrylic binders. This is why we make a Prussian Blue Hue in our acrylic lines. The same is true of Cobalt Violet.ā€ Since I eschew hues, I now recommend phthalo blue instead. Iā€™ve been painting for longer than Golden has existed, and I never noticed that.

On Monday, I challenged readers to a water-media exercise over the next 45 days. One of my oil-painting students asked me for recommendations for gouache. I use Turnergouaches, but never thought about why, since itā€™s not my primary medium. I texted a few painter friends for recommendations. Among their suggestions were M. Graham, Winsor & Newton and Holbein, but nobody was passionate about it. If you are, Iā€™d love to hear from you.

Sea Fog, by Carol L. Douglas, is available through Folly Cove Fine Art.

Meanwhile, I suggested a limited palette of colors and hog-bristle brushes. The beauty of gouache is that you can use it on almost any substrate. I just paint in my sketchbook.

Speaking of that challenge, several people asked where they should post their resulting paintings, so I created a group on Facebook. This is an open group and you donā€™t need to be my FB friend to join. I invite you to post your paintings and comment. We all learn from each other.

Jennifer Johnson (who started this) told my Tuesday Zoom class that she had been doing these exercises over the weekend. ā€œIā€™m already seeing a difference,ā€ she said. Her brushwork is freer, and she feels more confident about her colors. I knew it would make a difference!

I have one more workshop left this season: Find Your Authentic Voice in Plein Air in Tallahassee, Florida, November 9-13. There are enough students to go, but there are still openings, so Iā€™d be excited if you signed up.

From there on in, itā€™s all Zoom, Zoom, Zoom until the snow stops flying. My Tuesday morning class is sold out; there are still openings for Monday night Zoom classes.

Monday Morning Art School: softly, softly

The edge is where everything is happening. There are many ways to control it.
Brad Marshallā€™s painting of coral in Maui (unfinished).

Edges are where one shape ends and another starts. This might mean a border between two things, or it might be a fold or shadow within an object. Either way, there are many ways to approach edges. One way to control the line is the lost and found edge.  Softness is another.

My friend Brad Marshall is working on a painting of a coral reef right now, and itā€™s a stellar example of keeping it soft. He graciously allowed me to use his work here.
Brad Marshallā€™s color block-in. Heā€™s soft right from the start.
Weā€™ve talked a lot about the importance of line in painting. Sharp edges with high contrast draw your attention. But to be effective, they require other passages where edges arenā€™t as crisp. In the case of this reef, Brad was seeking a special optical effect of being underwater, where things are blurry and greenish-blue.  
Looking at the screen on which youā€™re reading this, youā€™ll note items in the periphery of your vision. The screen is in focus, but the items on the edges are blurred. This is how our eyes workā€”we have a highly developed cone of vision, and some peripheral vision to keep us oriented. You can take that same principle into your painting, to direct the eye into looking at what you want it to notice.
ā€œPainted midground coral (except for that little one in the crevice. Keeping edges on soft. A little lighter and darker to push it forward from the background,ā€ said Brad.
Brad started his painting softly because of the subject. But itā€™s also important because the coral at the bottom of the canvas has the potential to be the strongest draw. Itā€™s lighter in color, and itā€™s closer to the viewer. But Brad, being a pro, isnā€™t going to be suckered into that rookie mistake. By keeping the painting very soft at the beginning, he is able to control where and what he concentrates on.
This is a studio painting being built in layers. That gives Brad ample time to work with thin paint handled wet-on-wet. In addition to his brushwork, he developed softness by carefully controlling value and hue shifts. Even in his central motifs he started with an underlying natural blur.
ā€œHere is a close-up detail. I wanted to give it a soft-focus look.ā€
In oil painting, soft edges can be made by dragging a brush from one color to another, or painting directly into another color. Oil paints are absolute champs at blending and softening. So too is watercolor: washes and wet paper will assure you that edges stay soft until you want them to be defined.
Gouache and acrylic (correctly applied and not just mimicking watercolor) are not nearly as useful for blending. However, you can achieve the same effect of softened edges by employing optical blending.
In fact, since the 19th century, many oil painters (myself included) have generally eschewed the broad range of blending that oil paints offer. Weā€™ve been influenced by Impressionism. We use flat blocks of closely analogous color to get the effect of blending without the brushwork.
Cliff Rock, Appledore, 1903, Childe Hassam, courtesy Indianapolis Museum of Art
Consider the Childe Hassam painting, above. He used optical blending to create the effect of blurriness that Brad is getting with brushwork. Note that the top of the rock outcrop is the same value as the sea. Your eye doesnā€™t notice the edge any more than it would have had he blended the edges with a brush.
Hassam used a staggering array of brushwork in his painting to create a variety of edges. However, none of it was done with traditional blending. Looked at closely, each color is distinct from its fellows.

Donā€™t be so quick to judge

If itā€™s not love at first sight, maybe itā€™s because youā€™re doing something right.

Captain Linda Striping, oil on canvasboard, by Carol L. Douglas
One of my old painting pals frequently scrubs out paintings that she feels are going wrong. ā€œLook, Iā€™ve saved a good board,ā€ sheā€™ll say. My surplus plein air paintings, if stacked in one pile, would be about the same height as me. Theyā€™re almost all on expensive boards, so I see her point. Nevertheless, I think scrubbing out is generally a terrible idea.
Art growth is all about taking risks. The bravest paintings are sometimes the ones you hate as youā€™re doing them. Thatā€™s particularly true if your experiments are about mark-making. Most of us would rather have someone elseā€™s brushwork; ours is somehow too self-revelatory. Thatā€™s not to say that mark-making canā€™t be taught or learned. Just like handwriting, it starts with general rules and ends up being very individual.
Sea Fog, oil on canvasboard, by Carol L. Douglas
I have a student who paints lyrically until he reaches the top layer in his paintings. Then he feels the need to apply a higher level of finish. It squeezes the energy right out, and obscures his basic ebullience.
(This is not, by the way, the same thing as ā€˜overworking.ā€™ Thatā€™s a bogeyman used to scare beginning painters into not figuring out how to finish a painting. Paint is far more forgiving than most people think, and nothing on your canvas is so precious as to be irreplaceable.)
Scrub a painting out or obsessively overpaint, and you may murder a new idea before itā€™s even hatched. Iā€™ve lost count of how many times I have set a painting aside in disgust, and then looked at it a few years later and realized it was very good. Thatā€™s one reason I keep all those surplus plein air paintings.
Captain Doug on the ratlines, oil on canvasboard, by Carol L. Douglas
Weā€™re not good judges of our own work as weā€™re doing it. The disconnect between what weā€™ve envisioned and what actually happened is too pronounced. You may set out to paint the iridescence of lustreware, and fail miserably. You are so focused on that failure that you never notice that the color, structure and paint handling in your work is simply stunning. Thatā€™s where a teacher can be helpful, and why positive criticism is so useful. But time itself is a great healer. It allows you to stop seeing the painting from inside your own head.
All this assumes that you have a painting protocol that you follow, one which includes significant design steps. A poorly-designed painting is really the only thing you can do thatā€™s unsalvageable. Your process ought to include thumbnails, notan studies, paint studies, or value drawings. Many people waste lots of time producing mediocre paintings because theyā€™re too impatient to design carefully. But if the design is good, you have to work hard to wreck a painting.
Tricky Mary in a Pea Soup Fog, oil on canvasboard, by Carol L. Douglas
Still, you often canā€™t tell until the end whether youā€™re going to pull it off or not. RebeccaGorrell once told me, ā€œI was really unhappy with it till the last half hourā€”a good recurring lesson.ā€ Sheā€™s so right. Paintings sometimes gel after a long hard fight. The only way youā€™ll know is by continuing to slug it out.

Super Easel

My Mabef tripod easel is older than my Prius, which is why I recommend it so often.

Two demos require two easels. Still in the value-study phase here. Photo courtesy of Jennifer Johnson.
I sometimes demo in watercolor and oils simultaneously, since I always have students in both media. I started as a way to kill time between watercolor layers. We all know how exciting it is to watch paint dry.
But it has another value, too, and that is to play up the intricate ways in which watercolor and oils are similar. We tend to focus on the differences, but weā€™re still working toward the same end in both media. Thatā€™s a composition that impels and compels the viewer.
There are challenges. Foremost is keeping the materials separated. I put the watercolor tools in one place (my chair) and the oil painting tools in another (my wagon) in the hope that I will not swish a watercolor brush through my Turpenoid or vice-versa. So far, itā€™s worked.
Whoops! That’s the first time I’ve ever done that!
My students tend to watch these demos from chairs, not standing. That requires that I keep my watercolor paper on the vertical. Itā€™s hard to get dark washes to stay where you put them, and sometimes I have to double-coat my darks. That creates an opportunity to talk up test marks.
Mentally, itā€™s a question of switching off one protocol and switching on the other. It looks reasonably seamless to the student, but I find that, halfway through my three-hour class, Iā€™m pretty tired.
Dave Blanchard calls this a ā€œhat trick,ā€ and pointed out that in fact Iā€™d done a triple demo yesterday, since Iā€™d drawn the original scene in charcoal on newsprint. That was so my ā€˜thumbnailā€™ was big enough to be seen by the group. I donā€™t do that when working on my own.
This hat trick is just a way to expedite demos so as not to waste my studentsā€™ time. Out of context, it would just be a stupid party trick. But it had an unexpected consequence yesterday. That was my Mabef easel falling into the water.
David Blanchard rescued my easel while I Instagrammed the experience. I’m useful like that.
Iā€™ve never lost an easel in the ocean before, although Iā€™ve tested the limitsā€”on the deck of a moving boat, for example, or standing in the water in a rising tide.
I stood there looking at it while it floated below me, thankful that it wasnā€™t my oil-painting easel, which would have sunk like a rock. Fran Scannell ran to check if any dinghy owners had left their oars shipped, while Jennifer Johnson went for my hiking poles. Dennis Pollock found one of those mysterious plastic pipes that are always on fishing piers, and he handed it to Dave, whoā€™d gone down the closest ladder. A moment later, my easel was back on land drying off. As you can see, Iā€™m good in a crisisā€¦ for absolutely nothing.
And the easel went right back to work as if nothing had happened, while its dumb chum, my oil setup, stood around. Photo courtesy of Jennifer Johnson.
This easel is about twenty years old. Itā€™s seen a lot of hard use and travel. Itā€™s cracked in several places and held together with duct tape. The carriage bolt no longer catches, making it hard to set up. But after its salt-water bath, it swelled up and was Supereasel again. It carried us right through the demo, and when I finished, it exhaled and fell over, limp.
ā€œItā€™s dried out again,ā€ someone noted.
I always recommend Mabef tripod easels as great value for money. Theyā€™re lightweight and versatile, able to lie flat for watercolor or stand up for oils. They now come with optional arms, which are a great feature. And now I know that they float patiently by the dock when you inadvertently drop them into the sea.