Monday Morning Art School: what is color?

Understanding color space is the most important thing an artist can do.

A little bit of everything, by Carol L. Douglas. That’s the incredibly cool light of a midsummer day.

Color is a word with radically different definitions depending on its use. In optics, it refers to

the unique way in which the cone cells in the human eye are stimulated by electromagnetic radiation. How an object reflects or emits light gives it its unique color.
In common parlance, we think of red, green or blue as colors. In art, however, those aren’t colors. Colors have three attributes, all of which you must understand in order to navigate color space successfully:
Value â€“ How light or dark is the pigment?
Hue â€“ Where does the color sit on the color wheel? All colors fall into one of the following hue families: red, orange, yellow, green, blue and violet. Within those families, however, are many subdivisions.
Chroma â€“ How much intensity, or “punch” does the color have?
Doe drinking in the woods, by Carol L. Douglas, has warm light and cool shadows.
Since color has three attributes, it exists in a three-dimensional color space. However, we’re used to looking at it in two dimensions, in the form of a color wheel. I think the Quiller watercolor wheel is the best color wheel, since it shows you where neutral pigments fall inside the hue families.
Still, the conventional color wheel doesn’t take value into consideration. Every pigment has its own natural darkness or lightness. Dioxazine purple, for example, is very dark coming out of the tube. Lemon yellow is very light coming out of the tube. That does not mean that dark colors are cool and light colors are warm, however. Consider burnt umber. It’s very dark, and it’s also very warm.
Winch (American Eagle),by Carol L. Douglas. There was definitely some warm light that winter day.
There’s a misunderstanding that mixing across the color wheel darkens pigments. Only with certain greens and reds does this work. Mixing across the color wheel gives you neutrals: grays and browns.
We call the hue families of green, blue and violet “cool” and the hue families of yellow, orange and red “warm.” Within each hue family, there are warm and cool variations. Gamblin has this nifty chart of warm and cool pigments so you can see where your paints fall.
White, black, and grey are chromatic neutrals. Raw umber is fairly neutral. Naphthol red and phthalo blue are very high-chroma colors. In general, modern pigments are much more intense than the mineral pigments of the Renaissance.
Cobequid Bay Farm, by Carol L. Douglas. Warm evening light translates to cool evening shadows.
It works to sort colors this way. I use a system of paired primaries which gives me a great, high-key mixing range. However, the whole idea of warm-vs.-cool is a painterly convention. It’s best to not have this discussion with a physicist, who will tell you that you have it backwards. He may be right, but that doesn’t mean he can paint.
I’ve written about the color temperature of light here, but there’s a simple rule that helps. The predominant shadows will always be the opposite (across the color wheel) from the color of the light. On a sunny day, the light will be cool and the shadows will be warm. At dusk the light will be golden and the shadows violet. Of course, there are exceptions to this rule, but it’s a good place to start.
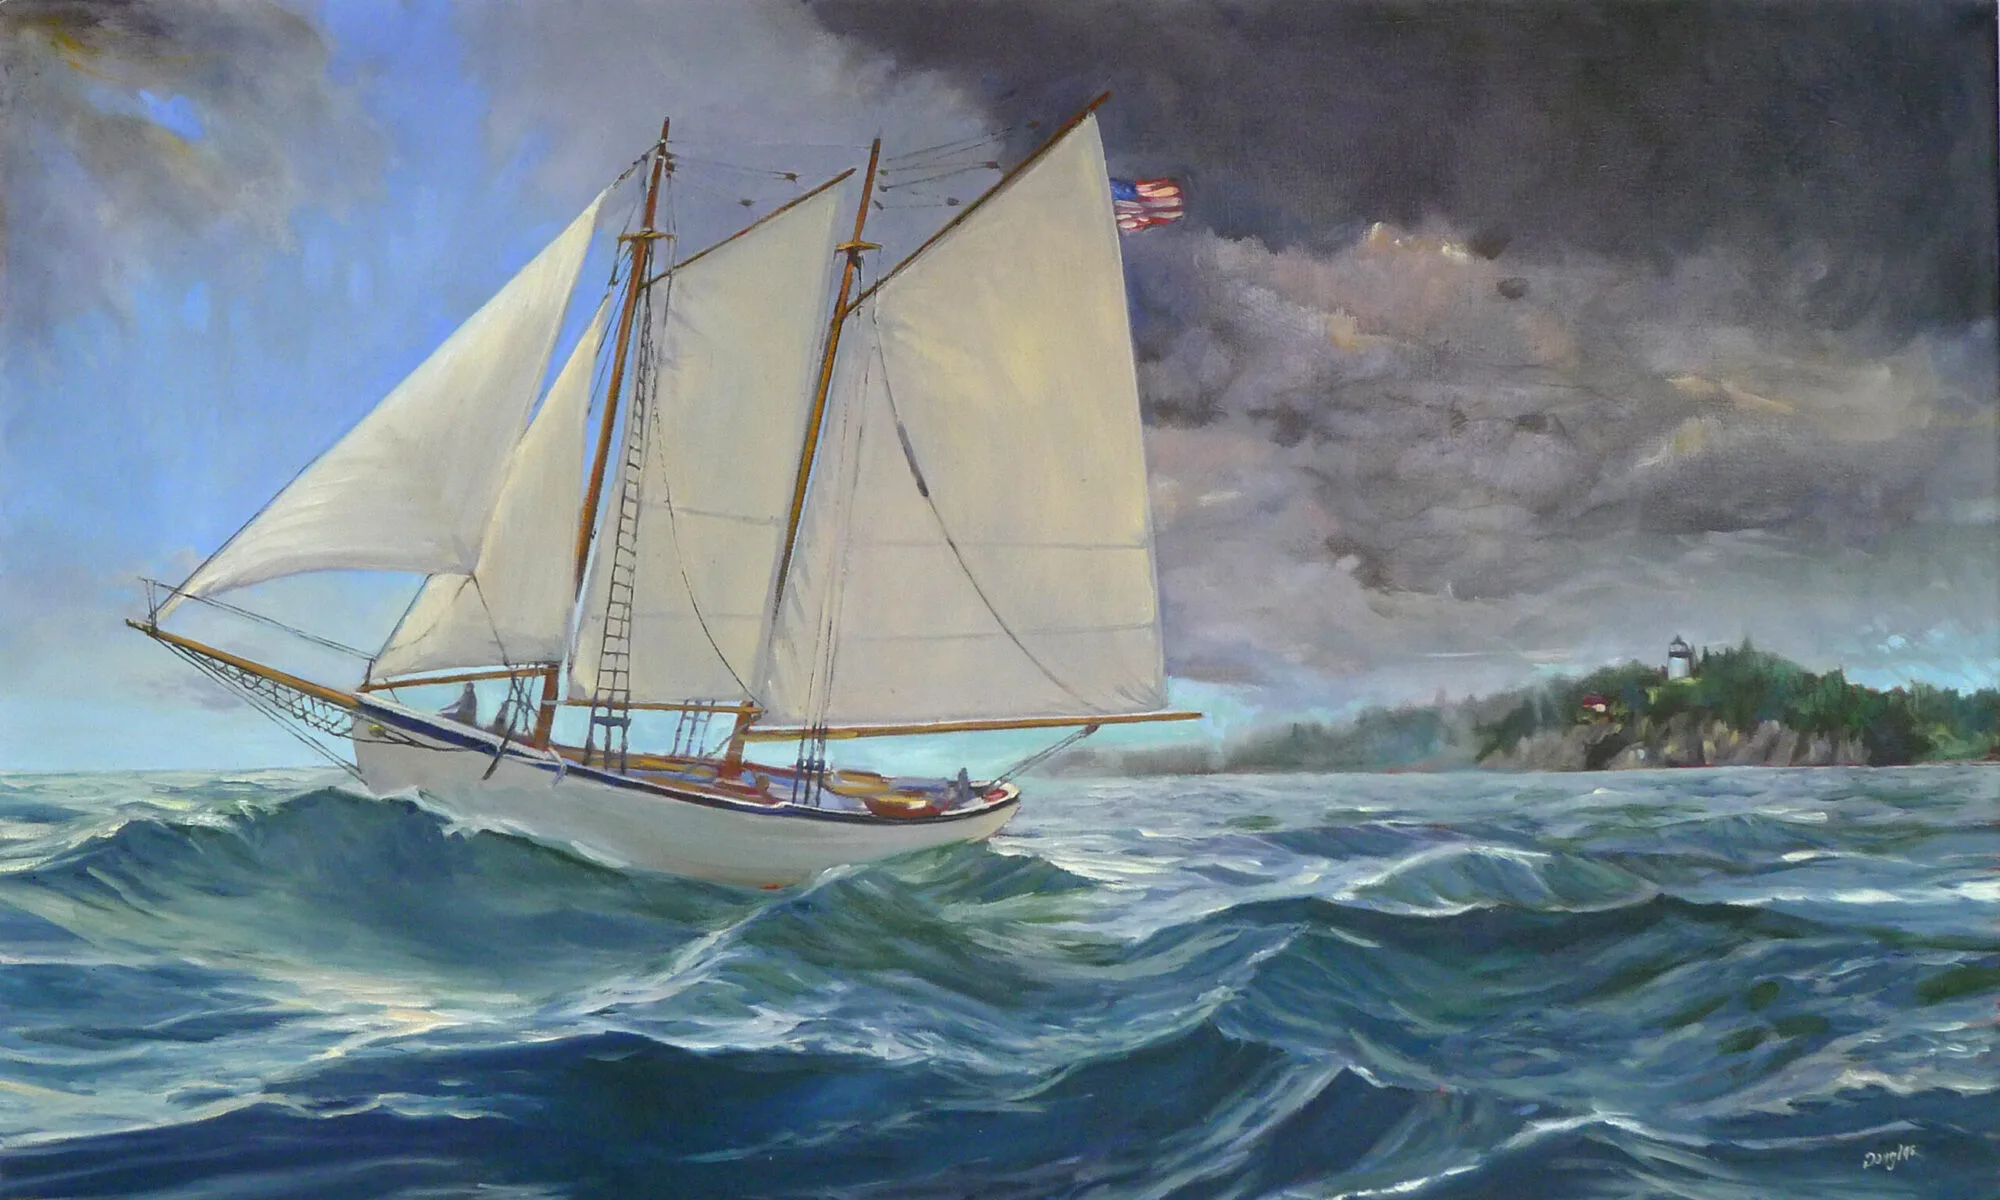
Breaking storm, by Carol L. Douglas, courtesy Camden Falls Gallery. I’m potting around on this boat this week, teaching watercolor. Wish you were here!
I strongly recommend this video from Gamblin, which organizes color space in three dimensions. It’s also full of information about the history of color.
There’s no internet (and darn little cell phone service) out in Penobscot Bay. After this post, my blog is going dark for the week. Don’t be alarmed! Assuming there are no pirates, I’ll be back next Monday.

Keeping the beat

What’s important in painting? Master the basics and the mark-making will take care of itself.


Mother of Pearl and Silver: The Andalusian, 1888–1900, James Abbott McNeill Whistler, National Gallery of Art, Washington, DC. This painting demonstrates the power of letting a single value dominate the composition. 

My husband has this thing he likes to tell young musicians: “Just do what you’re doing but do it in time.” That’s because they like to try things that are more complicated than their skill supports, and they end up losing the beat. He wants them to understand that the beat is what’s essential, not slick fingering.

Of course, young musicians are fascinated with ornamentation. For one thing, it’s actually easier than keeping the beat.
On Monday, I wrote, “I never bother much about my mark-making [in drawing]. It can take care of itself. I’m mostly interested in applying accurate values.” If it becomes your focus, mark-making can be the slick fingering that makes you lose the beat.
That’s not to say that mark-making isn’t important. But what’s essential in painting is:
Values: A good painting rests primarily on the framework of a good value structure. This means massed darks in a coherent pattern, simplified shapes, and a limited number of value steps. In a strong composition, one value generally takes precedence over the others. It in effect ‘sets the mood.’
Weymouth Bay, 1816, John Constable. This uses closely analogous colors to create cohesiveness in a painting of raw natural elements.
Color: Right now, we focus on color temperature, but that hasn’t always been the case. Every generation has had its own ideas about color unity, contrast, and cohesion. A good color structure has balance and a few points of brilliant contrast to drive the eye. It reuses colors in different passages to tie things together.
Movement: A good painter directs his audience to read his work in a specific order, by giving compositional priority to different elements. He uses contrast, line, shape and color to do this. If nothing’s moving, the painting will be boring.
Line: These are the edges between forms, rather than literal lines. These edges lead you through the painting. They might be broken (the “lost and found line”) or clear and sharp. Their character controls how we perceive the forms they outline.
Even the most linear of painters uses movement to direct the viewer in reading his work. The Grand Baigneuse, also called The Valpinçon Bather, 1808, Jean-Auguste-Dominique Ingres, the Louvre.
Form: Paintings are made of two-dimensional shapes, but they create the illusion of form. That is the sense that what we’re seeing exists in three dimension. While some abstract painting ignores form, a feeling of depth is critical in representational painting.
Texture: A work is called ‘painterly’ when brushstrokes and drawing are not completely controlled, as with Vincent van Gogh. A work is ‘linear’ when it relies on skillful drawing, shading, and controlled color, as with Jean-Auguste-Dominique Ingres.
Unity: Do all the parts of the picture feel as if they belong together, or does something feel like it was stuck there as an afterthought? In realism, it’s important that objects are proportional to each other. Last-ditch additions to salvage a bad composition usually just destroy a painting’s unity.
Loose brushwork does not mean lack of drawing or preparation. Vase of Sunflowers, 1898, Henri Matisse, Hermitage Museum, St. Petersburg, Russia.
Balance: While asymmetry is pleasing, any sense that a painting is heavily weighted to one side is disconcerting.
Focus: Most paintings have a main and then secondary focal points. A good artist directs you through them using movement, above.
Rhythm: An underlying rhythm of shapes and color supports that movement.
Content: I realize this is a dated concept, but it’s nice if a painting is more than just another pretty face, if it conveys some deeper truth to the viewer.
By the time you master these, scribing and mark-making will come naturally to you.

Monday Morning Art School: How to draw almost anything

There’s now a Facebook group for you to post your homework, folks. 
You’ve all seen artists holding a pencil up like the clip art below. What they’re doing is rough measuring. It’s simple. Just hold the pencil up like a ruler in front of the object you’re drawing. Move it around to see the relative height and width of the thing. For example, a vase may be twice as tall as it is wide. That’s all you’re figuring out; you can make the vase any size you want on the paper.
It’s not just an affectation.
You can hold your pencil up to figure out the other important thing in drawing: the angles of lines. I could give you a formal perspective lesson before we start drawing, but it’s not as important as learning to see angles. If you develop the ability to see angles, you’ll have better natural perspective than if you try to fit up what you see to a theory.
I used my pencil as a measuring tool to get the relative sizes and angles right.
The tissue box I was drawing in church yesterday had lovely angles. However, what you see in the photo isn’t what I saw while working. A drawing from life will never match what the camera portrays. Cameras are not as subjective as artists, but they lie just as much as we do.
You should do your measuring with one eye closed, especially if you’re working in a tight space, as I was. Art books will tell you to measure with your arm straight out. I find that uncomfortable. Instead, I just shoot for always having the pencil the same distance away from my eye as I work.
Then I checked the sizes and angles and corrected them. The box was taller than I originally thought.
All drawing starts with simple shapes. After laying them down, I check and correct them. I do this by analyzing each large shape. Where does the back of the box intersect the tissue column? Is the curve of the cutout fat enough? I discovered that my cube wasn’t really tall enough, so I added some to the bottom.
After I was reasonably confident I had the shapes right, I added some overall values.
The next step is to establish some overall values.  â€œValue” just means how light or dark something is. This box was sitting on a south-facing windowsill behind a person who was casting another shadow. Thus, the window-frame behind the box was in deep shadow, but not nearly as dark as the photograph. I roughed in those darks first. They helped me know how to shade the box properly.
I added shadows to the box itself, and developed some detail.
Next, I set shadows on the tissue box itself. I am more concerned with the column of tissue, so with each pass, I spend more time on that.
Finally, I did some blending, using the handiest tool I carry: my finger. You should use a stumpor tortillonon work you care about, but in a pinch, your finger works great.
Blending using the side of my finger.
Note that I never bother much about my mark-making. It can take care of itself. I’m mostly interested in applying accurate values. I did this drawing with a mechanical pencil, which will never be as luscious as a good graphite stick, but it survives banging around in my purse week after week.
Time to go home!
Some general rules:
  1. Draw everyday objects. The better you get with these, the better you’ll be with complex subjects. There’s amazing beauty in everyday things.
  2. Draw any time you get the chance. I did this drawing in church, and I didn’t miss a word. Drawing and language don’t use the same channels of your brain.
  3. Measuring is the most important part of drawing. Keep checking and correcting sizes.
  4. Start with big shapes and break them down into little shapes. If the big shapes are right, the smaller parts will slip into their spots just fine.
  5. Value is relative. How dark something is, is only important in terms of how dark its neighbor is.
  6. Constantly recheck shapes and values as you go.