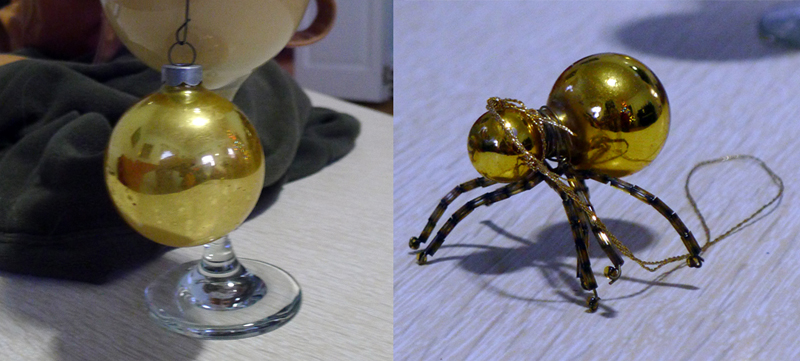
I was surprised to learn that a few of the things on my tree are vintage post-war Shiny Brite ornaments made by Corning. That’s not because I’m chic, but because I never replace what ain’t broke. Here’s a Christmas-tree exercise Sandy Quang and I first did in 2017. All it takes is a simple, round, reflective ornament, and you can draw yourself a very merry Christmas indeed.
Those of you who don’t believe in Santa Claus or haven’t found the ornaments yet can find other spherical objects: marbles, snow globes, billiard balls, or even some tiny planetary bodies, if there are any revolving around your house.

Sandy was my painting student and went on to get a BFA from Pratt and an MFA from Hunter. She’s also my goddaughter, so it was no surprise that she was hanging around my living room in the runup to that Christmas.
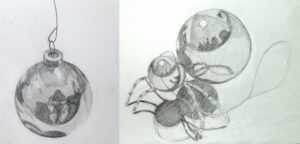
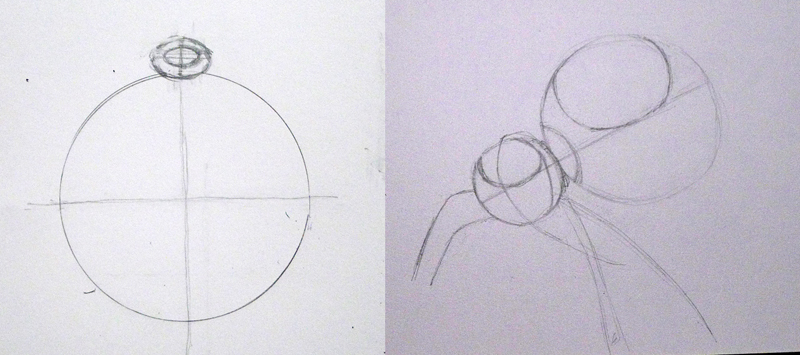
I asked her if she wanted to draw with me. As all my best students do, she had her sketchbook tucked in her backpack. I gave her first dibs and she chose the spider ornament; that left me with the plain globe.
I’ve written about drawing a pie plate, which is the fundamental skill underlying all column-shaped objects from cups and dishes to lighthouses. Each are a series of ellipses on a central axis. A circle is even easier to draw. And a sphere looks like a circle when it’s down on paper. What could be simpler?
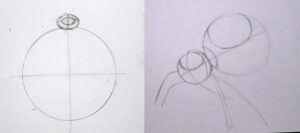
Both of us started with the axis of our drawing. For me, that was the vertical axis; for Sandy it was the axis holding her circles together. I mention this because when people say “I can’t draw!” they seldom realize how much of drawing is simple measurement. It’s best to learn this from life, since the measurement has already been done for you when you work from a photo. You can easily work back from life drawing to working with pictures, but it’s harder to go the other way.
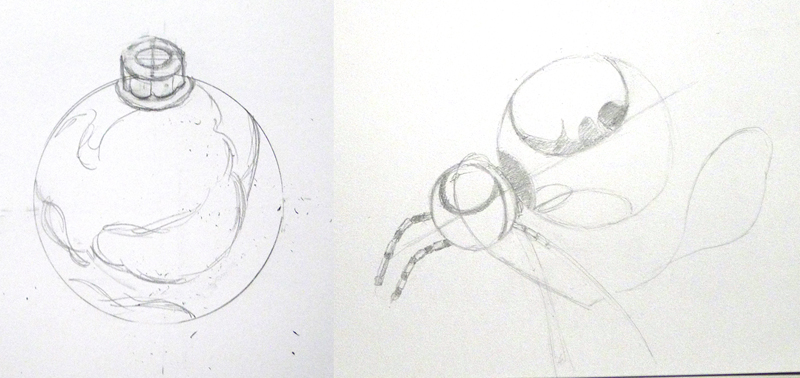
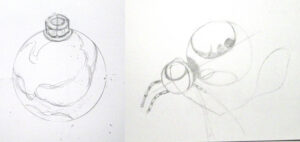
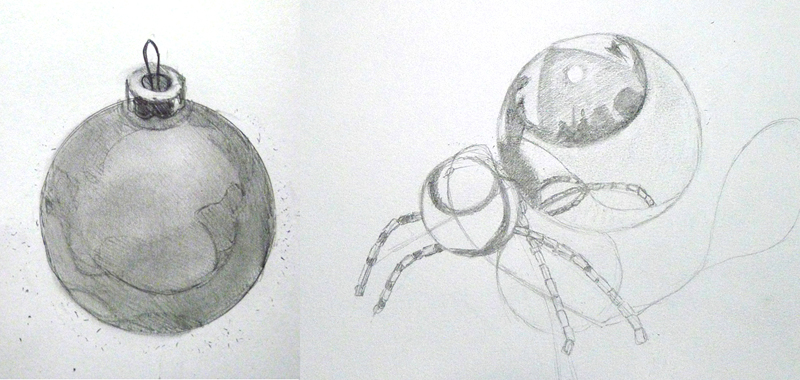
Next, we put the appendages on our spheres. For me, that meant measuring the ellipses in the collar, as I demonstrated in that pie plate post. For Sandy, it was the beaded spider legs. Sandy was starting to note the overall areas of reflection in her spheres.
Sandy and I chose different approaches in the next step, dictated by the paper we were working on. Because I had a smooth Bristol, I was able to blend my pencil line into smooth darks with my finger. Sandy could only work light-to-dark on the rougher paper she was carrying. This gives you the chance to see two different approaches to shading.
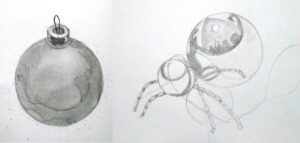
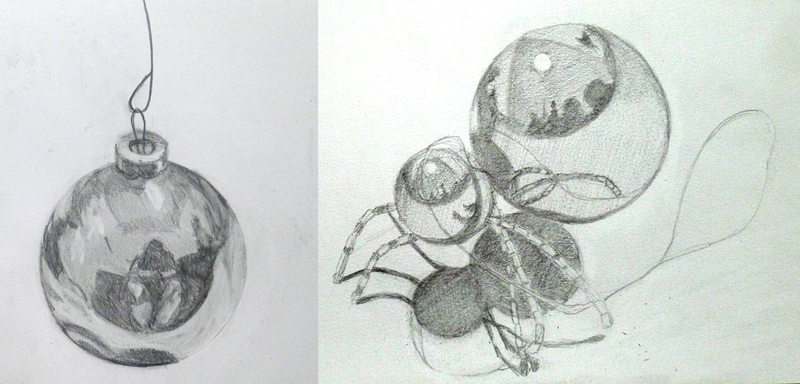
Sandy has a shadow under her final drawing because the ornament was sitting directly on my coffee table. I put the reflection of myself drawing in my ornament.
All drawing rests on accurate observation and measurement. Get that right and the shading and mark-making is simple. A very merry Christmas indeed!
What does this have to do with you?
Yes, I’m on a drawing tear, because it’s the single most important thing you can do to improve your painting in 2025. I still have room in my drawing class starting right after the new year; if you’re frustrated by your painting, start with the fundamentals.
This post originally ran in December, 2017. It’s been updated, of course.
Registration is now open for workshops in 2026! Reserve your spot:
- Advanced Plein Air Painting | Rockport, ME, July 13-17, 2026
- Sea & Sky | Acadia National Park, ME, August 2–7, 2026
- Find your Authentic Voice in Plein Air | Berkshires, MA, August 10-14, 2026
- New! Color Clinic 2026 | Rockport, ME, October 3-4, 2026
- New! Composition Week 2026 | Rockport, ME, October 5-9, 2026
Can’t commit to a full workshop? Work online at your own pace: