Monday Morning Art School: drawing the human hand

Hands are worth mastering because they speak about our experiences and character.

Study of a Woman’s Hands, 1490, charcoal and silverpoint, Leonardo da Vinci, courtesy Royal Collection, London

I wish I’d had the opportunity to study with one of the comic book greats like Jack Kirby or Steve Ditko. They had a gift for compressing human expression into explosive images. That’s especially true of their hands.

I look at my own hands every day. When I’m writing this blog and when I’m painting, they’re always in the periphery of my vision. The trained observer could read some of my history from my nails and calluses. Beyond that, our hands move expressively. The carpenter has power in his grip; the musician has grace.

Hands can be difficult to draw due to their complexity. However, it’s easy enough to get reference for your drawings. You’ve always got a spare hand hanging around. When I’m drawing in church, my right hand is often my model. Or, if you want to draw a two-handed or more complex pose, hire a model or take a reference photo. Hands shift shape as they move through their range. It’s difficult to get that right without photo reference.

Praying Hands, detail study for the Heller Altarpiece, 1508, India ink and wash, Albrecht Dürer, courtesy Albertina.

Start by understanding the bone structure. There are 27 fixed bones in the hands (plus an indeterminate number of sesamoid bones). A rookie error in drawing is to treat the thumb as if it sticks sideways out of the hand; instead, it sprouts from that nest of bones at the wrist called the carpals. The fingers don’t stick straight forward, either; instead, they’re arrayed like a bouquet of flowers. All movement in the hands starts at the wrist, not the fingers.

Our thumb is our most mobile digit, because its metacarpophalangeal joint isn’t locked down. Pay attention to that joint; it’s important in drawing. In our fingers, that joint is tied to its mates. Our little fingers and index fingers have some sideways mobility, but the poor suckers in the middle are pretty well stuck. However, our hands are designed to move in coordinated arches, which is why we can grip so strongly and accurately.

Metacarpophalangial joints, courtesy Wikipedia.

There are age- and sex-specific differences in hands. Older people develop arthritic bone spurs and knobbiness and lose the fatty deposits on the back of the hands. That means we can see their bones and blood vessels more clearly. The length ratio between the index and ring fingers are often different between men and women. Men tend to have less body fat, so their blood vessels in the hands are visible from a younger age.

Mark out the positions of each knuckle. The metacarpophalangeal joints (our first knuckles) form the major hinge of our hands. While they move in concert, they’re not always on the same plane, so mark their positions as circles. Do the same for the second and third knuckles. At this point, your drawing should look like a loose mishmash of circles. From there, limn out the shapes of the fingers in terms of simple geometry. The palm is a trapezoid, and the fingers are flattened rectangular or rounded shapes. The heel of your hand has volume, especially the plump part at the base of your thumb.

Study of hands, 1955, pencil, Andrew Wyeth, courtesy Swann Auction Galleries

Fingers aren’t flat. They’re more box-like than round, and they can be quite individual in their shape. But you must think of them as having volume and size, or you can’t visualize how they’re changing in perspective.

The last tricky thing you have to deal with are the fingernails. They’re curved, and mostly visible by the deep shadow they cast on their edges. Don’t make too big a deal of them or they’ll overwhelm your drawing.

Once you have the fundamental shapes and landmarks in place, drawing the lights and shadows is easy. The blocking on the knuckles makes the delicate shadows around them visible.
Monday Morning Art School: drapery

Drawing drapery isn’t a dated skill; it’s as fundamental to the t-shirts and skinny jeans we wear today as it was to the gowns, kirtles, jerkins, doublets and linen chemises of the 16th century.

Drapery study, Albrecht Dürer, undated.

I spent a lot of time painting the human figure at the Art Students League, but I never studied drapery, unless you count the drapes that might be behind a model or still-life. That’s typical, but unhelpful. In the real world, artists are far more likely to draw the clothed figure than the nude.

“The masters must be copied over and over again,” wrote Edgar Degas, “and it is only after proving yourself a good copyist that you should reasonably be permitted to draw a radish from nature.” In that spirit, I’ve illustrated this post with a series of drapery studies by the Renaissance master Albrecht Dürer. I suggest you copy them not on paper, but in creating a drape—and then draw from your draped copy.

Drapery study, Albrecht Dürer, 1506.

The t-shirts and skinny jeans we wear today are worlds apart from the gowns, kirtles, jerkins, doublets and linen chemises of the 16th century. Modern clothing is more formless and forgiving than ever. But the principles, regardless of the fabric, remain the same.

Wherever fabric is held down or comes into contact with the underlying support, it creates a pivot point. That point is a hub from which folds radiate. That’s easiest to see if you hold a towel in your hand and let it drape. Where you’ve pinched it is the hub from which all folds originate. If you hold the same towel in both hands and let it drape, you’ll see the collision of folds from two pivot points.

Drapery study, Albrecht Dürer, undated.

In clothing, there are often several points of contact, creating several different hubs. Across the back of a shirt, our two shoulder blades strain the cloth in opposition to each other. In jeans, our knees, ankles, derrieres and hipbones are all in contact with the fabric. Even in tight jeans, there will be folds, albeit subtle. Wherever the figure presses against the fabric, it makes a hub for folds.

A person and his clothing tend to move and act as one. Not only does our clothing conform to our bodies in the moment, it carries the memories of past movement. Think of the knees of your favorite jeans. That’s one reason it feels strange to borrow another person’s clothes, and why we develop old favorites we’re loath to get rid of.

This is my favorite of Albrecht Dürer’s drapery studies. Undated.

To draw folds accurately, you need to see them as having shape and volume. It’s useful to see each fold as having three surfaces: a top and two sides. The valley between folds is the base from which the folds arise. You may not always see both sides, because one might be folded back, but they’re always there.

It may be difficult to puzzle out whether you’re seeing the top or sides of a fold. The answer is really immaterial, as long as you’re drawing the fold as a three-dimensional object. Folds are infinitely variable, and sometimes the top will take the form of a sharp crease, or a side will disappear for a while. Even when that happens, bear in mind that you’re drawing a three-dimensional object. Folds are never simple lines drawn over the surface of fabric.

Like the rills on a hillside, folds have a way of transmogrifying into other shapes. They twist and turn and merge into other folds, or vanish entirely. It’s helpful to block out drapery as a whole before you start drawing. Just as if you were drawing a hillside, start by measuring the big shapes and checking angles.

In your first pass, don’t worry about subtleties of shading. Think of your this phase as a plan from which you’ll draw or paint. In other words, make it clear, concise, and accurate.

When you’ve finished, you can test the accuracy of your drawing by dropping a contour line across it. Imagine a bug crawling in a straight line from one side to another. Trace that line with your pencil. When your imaginary bug hits a fold, he’ll crawl into it and out the other side. If you get to a point where you can’t figure out where your bug should go, you’ve made a drawing error or been unclear. Go back and resolve that.

Monday Morning Art School: painting reflections

The ocean complicates matters by being bouncy, but it reflects light the same way as does glass or tinfoil.

Butter, by Carol L. Douglas, oil on canvasboard. Even something as transparent as Saran Wrap will have reflections.

Reflections are a distortion of the surrounding environment. That’s true whether you’re painting them in water or from glassware in a still life. Managing them is mainly a question of observation.

Imagine an ocean that is perfectly flat, and that you can walk on water. Looking at your feet, you can see straight down into the water. It’s not reflecting anything. Looking at a rubber ducky floating ten feet away, you’re looking at the surface at about a 26° angle. You’ll see a reflection of the ducky, the sky, and a glimpse of what’s under the surface. As you look farther away, the angle gets smaller and smaller, and all you see is the reflected sky.

Hard Drive, by Carol L. Douglas, oil on canvasboard.

Reflection involves two rays – an incoming (incident) ray and an outgoing (reflected) ray. Physics tells us that the angles are identical but on opposite sides of a tangent. This is why the reflection of a boat needs to be directly below the real object in your painting. You can add other colors into that area, but the reflection can’t be wider than the object it’s reflecting.

The reflection should be directly below the object. Don’t let it grow wider.

Water is transparent, but it has a shiny surface. Some rays of light make it through and bounce back at us from the sea floor. Reflections in glass work the same way. You can see through the glass in the surface that’s facing you, but the curving sides reflect light from around the room. Because glass is imperfect, these reflections will be distorted.

The ocean complicates matters by being bouncy. Even on the calmest day, the surface of water is never perfectly flat; it’s wavy or worse, just like a fun-house mirror. Waves are a series of irregular curves. How they reflect light depends on what plane you’re seeing at that nano-second. It seems like the easiest thing to do is to capture it in a photo and paint from that, but what we see in photos is sometimes very different from what we perceive in life.

My quick watercolor of waves, done from the deck of American Eagle during our Age of Sail workshop

Instead, sit a moment with and watch how patterns seem to repeat. They’re never exactly the same, since waves are a stochastic process (think random but repeating). But they’re close enough to discern general patterns.

Solid objects can also trip you up in their reflections. Consider the humble spoon. It’s concave. That distorts its reflections. There’s no point in trying to predict what you might see; it’s best to just look. Likewise, a mirror only reflects straight back at you if you’re in front of it.

Tin foil hat, by Carol L. Douglas. Oil on canvasboard.

It’s always best to paint the reflections at the same time you’re doing the rest of the painting, rather than adding them as an afterthought. They’re a fundamental part of the design.

Only smooth surfaces reflect light coherently enough to make reflections. That’s why burlap has no reflections. Sometimes, when water is being wind-whipped, it doesn’t have reflections either. To paint such a sea, keep the contrast low.

Ottawa House, by Carol L. Douglas, oil on canvasboard, available. The wind-whipped sea has very little contrast, but it does have texture.

Some people say that reflections should be lower in chroma than their objects, but I don’t think that’s true. Often, the ocean seems to concentrate color. Sometimes, the water will be lightest at the horizon; other days there will be a deep band there. However, the farther away, the more its colors shift toward blue-violet.

Monday Morning Art School: contre-jour

Contre-jour is a great effect for figure and landscape painting, but you can practice it in still life.

Tête-à-tête, by Carol L. Douglas, long since gone to its new home.

Contre-jour is French for ‘against daylight’ and it simply means a back-lit subject. The viewer is looking towards the light. When the sun is low, contre-jour results in silhouetting, as with a sunset. However, when the light source is high but still behind the subject, contre-jour can create wonderful rim lighting with prismatic color effects. Contra-jour minimizes details, increases contrast, and emphasizes simple shapes. It casts shadows forward, and these shadows are often as interesting as the subject itself.

The human eye has a much better response to wide ranges in lighting than does a camera lens. Our eyes adjust constantly to shifts in lighting, and our brains interpret this data on the fly. If, say, we’re in Rosslyn Chapel attempting to spy out the Green Man in the murky light above our heads, we have no trouble also seeing the well-lighted docent who’s giving the tour. It’s only in extreme lighting shifts that the eye and brain need time to catch up.

Sunset sail, by Carol L. Douglas, available through Folly Cove Fine Art. A sunset is an extreme example of contre-jour painting.

A camera (at least to date) hasn’t got this flexibility. Photos tend to be too dark in the dark passages or too light in the light passages. That’s not just an aesthetic problem; they simply don’t record data in those places, so there’s no fixing the problem in Photoshop.

That’s why it’s important to practice contre-jour in real life, not from photos. A photograph sets the relative light levels, and you’ll have a hard time overriding what you see, even if you’ve taken multiple exposures.

La repasseuse à contre-jour, 1874-1878, Edgar Degas, courtesy Wikimedia Commons

Ironically, that same inflexibility sometimes makes cameras better for recording images in silhouette, like sunsets. The camera doesn’t try to insert information that isn’t there. The most common error in painting sunsets is putting color in the foreground. That’s the brain telling the artist, “trees are green,” when all the visual evidence is to the contrary.

Contre-jour is a wonderful technique in figure painting, as it creates an aura of privacy and anonymity. I’ve included one example by Edgar Degas, but he used it repeatedly, creating a sense of dignity for his laborers, ballerinas, and bathing women. Contre-jour is also very effective in landscape painting, but if you can’t get out to paint en plein air right now, practice it with still life.

To paint contre-jour effectively, one must carefully attend to color. Take the time to check values and record them in the form of a sketch, because contra-jour lighting effects change more quickly than spotlighted scenes. That’s particularly true in the structure, shape, and density of shadows.

Belfast harbor, 14×18, Carol L. Douglas, $1275 unframed.

Value is obviously important, but so too are the subtle shifts in hue and chroma that tell you an object is in shadow. Except for extreme silhouette, backlit subjects are never uniformly dark. They catch rim light and reflected light.

Almost all scenes will include some translucent or transparent objects like flowers, glassware, and fabric. These let light through, and when placed in front of a dark background, they stand out. Your contra-jour still life can look very different in daylight than it does at night, so it might take some adjusting.

Don’t underestimate the power of shadows; they’re often the best part of a contra-jour scene. They can transform the often-neglected bottom of your canvas from predictable to riotous. For example, try shining a light through a vase of flowers and note the lovely shadows dancing across your table.

Monday Morning Art School: painting from photographs

There’s a world of difference between copying a photo and creating a painting using photos for reference.

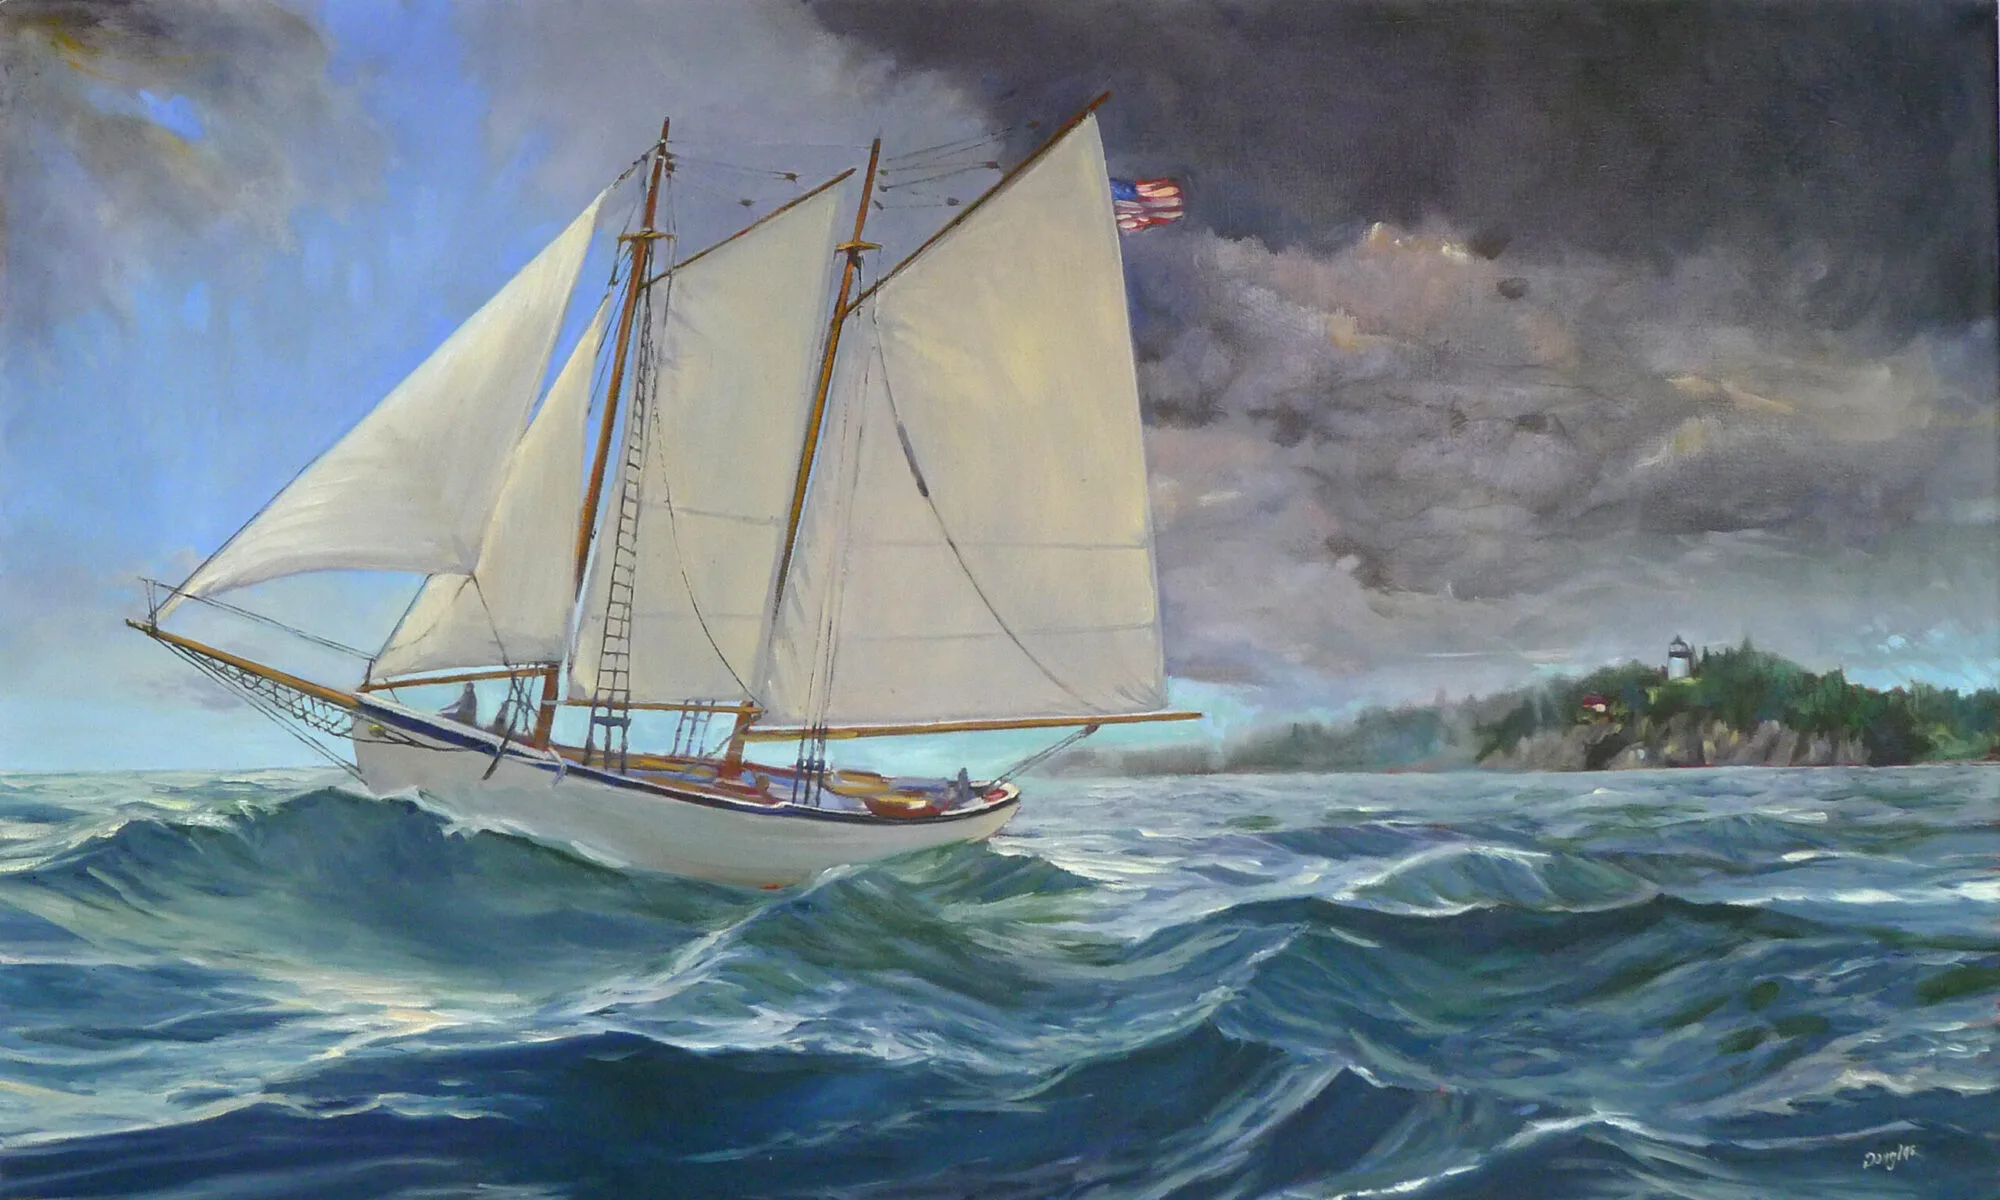
Skylarking 2, 18×24, $1855 unframed. It’s difficult to paint boats under sail en plein air, so mostly we use photographs for that.

It is not true that I never paint from photos; I just prefer painting from life. However, there are times (winter) and subjects (boats under sail, babies) that lend themselves to painting from photographs. Size is also a limiting factor; nobody can finish a painting much larger than 40×40 in the field without two stout oafs to stabilize the canvas.

What I don’t do is slavishly follow a single photo. Instead, most of my studio paintings are compilations of images.

All flesh is as grass, oil on linen, 36×48, $6231 framed.

Start with an idea. Let us say, for example, that you want to paint the “season of mists and mellow fruitfulness/Close bosom-friend of the maturing sun,” as John Keats put it. Symbols of that idea might include apple orchards, golden light, morning fog over the blueberry barrens.

Gather photos, from your own stash. I have tens of thousands of reference photos on my server; you probably have a few thousand on your phone alone.

Think of this step as similar to the interior decorator’s design board or a Pinterest board. Your goal is not to find a photo you’ll ‘paint from,’ but to find ideas you want to incorporate into your painting. I do this on my laptop (as most of you probably will) but there’s no reason it can’t be done the old-fashioned way, on a bulletin board.

After allowing these images time to percolate, identify the major motif of your painting. That’s its focal point. Then, do a sketch balanced around that motif. It’s helpful to set your reference material aside at this point, and let the sketch bubble up from your subconscious. If that doesn’t work for you, think about compositional armatures. Place your focal point accordingly, and work out from there.

Then it’s simply a matter of borrowing a bit from here, a bit from there, until you have a coherent, cohesive sketch.

Do not simply trace or grid a photo and expect to get a good painting from it. The whole point of painting is to allow room for your subconscious mind to enter the dialogue. You should be drawing from your photo until you have a powerful picture, then building on that drawing in your painting. If you can’t draw well enough to do this, then you need to improve your drawing skills, stat!

Vineyard, 30X40, oil on canvas, $5072 framed. This started life as the field painting below, and was painted again in the studio using the process outlined in this post.

If your goal is wild-animal portraiture, you should work with a good camera with a telephoto lens, but for most reference photos, a modern cell phone is sufficient. The images are large enough and the controls good enough that they outshoot most pocket cameras. There are situations, such as in Argentina, where I will bring a ‘real’ camera, but most of my photos are taken with my cell phone.

Other than for animals or glaciers, extreme telephoto lenses are not great for reference photos. They create pincushion distortion that can seriously muck up a drawing. Cell phones have wide-angle lenses. These create different problems, but they’re easier to correct in the drawing phase.

When I take photos for reference, I always leave in more background than I would have if I were shooting for the photo’s sake. I can always crop later, but there’s no way to add back in the missing information if I decide I need it.

Never try to replicate the out-of-focus background of a photo with a shallow depth-of-field. That’s not how human perception works, and it’s a dead giveaway that you simply copied a photo, rather than created a picture using reference photos.

Vineyard, 9×12, courtesy private collection

Try to keep the lighting the same in all your reference photos. In general, it’s wise to avoid high-contrast pictures for painting. When whites are bleached out and darks are black, we lose all the information that might have been in those passages, and they inexorably lead us to paint in excessive contrast.

While I use my own photos almost all the time, there are times when I use photos from the internet. It makes no sense for me to hunt down a Friendship sloop to check its rigging when the information is right there in someone else’s photo. It goes without saying that you shouldn’t be copying substantive portions of other people’s work without permission. However, you can use the internet for research into how a shoe might reflect light, or the color of cornflowers, or what the mist looks like in an orchard in April.

Monday Morning Art School: the color of earth

The earth pigments are our oldest colors, and they’ve served humanity well.

Dry Wash, oil on canvasboard, 12X16, $1159 unframed.

Years ago, I met an artist in Taos who told me that he never used the earths—siennas and umbers—in his paintings. I don’t remember his name, but I vividly remember his rationale. They were too close in color to the rocks of New Mexico. He did better to mix those warm shades.

That is very close to my own rationale for not having greens on my palette. The East is a predominantly-green environment. Using greens straight out of the tube is the best possible way to deaden your painting into a universal dull greenness without variety, sparkle or light.

Old Barnyard in New Mexico, oil on canvasboard, 12X16, $1159 unframed.

I’m teaching in New Mexico this week, so I have to adjust my own palette. My reliance on the earths has to ease up. However, my students are all from the south or east, meaning they’ll go back to a green landscape. I want them to take home the logic behind my palette, not an arbitrary rule.

The earth pigments are minerals that have been used in painting since prehistoric times. They’re primarily iron oxides and manganese oxides. We know them as the ochres, siennas and umbers. They’re extremely lightfast. In watercolor they granulate beautifully because of their large particle size. They’re relatively non-toxic* and they’re cheap. Those are all valuable properties to the painter, which is why they’re so widely used.

On the other hand, they look just like the earth because they’re made of dirt and rust (although we synthesize some of them today). They’re complex colors with lots of overtones. In mixtures they stubbornly retain traces of their own character. In a painting predominated by the natural reds and browns of the west, that can get pretty dull, pretty fast. If you want to know how a reliance on the earth pigments will turn out, see Rembrandt—great for Dutch interiors, not so good for American landscape.

Downdraft snow, oil on canvasboard, 12X16, $1159 unframed.

The world of greens cannot be simulated by something taken from nature. The pigments that give us green in nature—chlorophylls—are not lightfast. Instead, painters rely on an inorganic compound, chromium oxide green, which we know as viridian or chrome green. Chromium oxide is synthetic, but it does appear in nature as a rare mineral. It is relatively low-stain and inexpensive. It too granulates, which makes it valuable to watercolorists.

Chromium oxide green is a good workhorse pigment, far preferable to the deadening sap green that so many painters love. Sap green started as an unstable extract of buckthorn berries. What we buy today is a convenience mix based on phthalo green. That’s also true of the mixture marketed as ‘viridian hue.’ Paints based on phthalocyanine dyes are very high-stain and have a different color profile than the pigments they’re mimicking. That’s not to disparage the phthalo blue and greens; in themselves they’re lightfast, cheap, and have transformed the modern world.

Spring thaw along the upper reaches of the Pecos River, oil on canvasboard, 12X16, $1159 unframed.

Hooker’s Green is another convenience hue. It’s named after an English botanical illustrator, William Hooker, who first put Prussian blue and gamboge together to make a clear, light green. There’s nothing wrong with that mixture—but you should be able to make it yourself, not buy it out of a tube.

That’s true across your palette. You’ll have more flexibility and less expense if you stop buying convenience mixes and ‘hues’.

*Don’t ever fall for the idea that if it’s natural, it’s non-toxic. Mother Nature has hidden a lot of dangerous minerals in this beautiful earth, including cinnabar, galena, lead, asbestos and more.

Monday Morning Art School: accidental color

Color harmonies are easy enough for a kindergartener to understand, but devilishly difficult to apply in paint.

Landscape at Saint-Rémy (Enclosed Field with Peasant), 1889, Vincent van Gogh, courtesy Indianapolis Museum of Art at Newfields

In music, an accidental is a note that is not part of the scale indicated by the key signature. (The sharp, flat, and natural symbols mark them, so those symbols are also called accidentals.) Accidental notes make music more beautiful, complex and intriguing.

In art, we sometimes work within structured color in the form of color harmonies. But too strict a reliance on color harmonies may result in static painting. We need to deviate from these strict concepts with the addition of other color notes. I call these ‘accidental colors.’

Half-Length Portrait of a Lady, Francis Campbell Boileau Cadell

Color harmony isn’t a simple question of matching up complements or a triad. We respond to color emotionally and cognitively, just as we respond to music. We’re influenced by our age, gender, mood, culture, and our learned responses. Then there’s the question of context. Fashion has always played a big part in color awareness, as has the availability of pigments. In that the healthy human eye can perceive millions of variations of color, it’s impossible to quantify every possible combination.

The Yellow Curtain, 1915, Henri Matisse, courtesy Museum of Modern Art

When I was young, I learned that red was the color of rage, blue of calm. That was based on Wassily Kandinsky’s Concerning the Spiritual in Art. Kandinsky was under the influence of a 19th century cult leader, Madame Helena Blavatsky, and everything he wrote about color was total hokum, but it continues to be parroted to this day.

I mention this because there’s no real ‘science’ behind color harmonies as we currently perceive them, any more than there is behind the scales we use in Western music.

Moonrise by the Sea, 1822, Caspar David Friedrich

Still, there are color harmonies that appear to work, so we continue to use them. They’re easy enough for a kindergartener to understand, but devilishly difficult to apply in paint. Two errors I commonly see are:

  • Thinking that the color harmony you chose includes the only colors permissible in your painting, so you don’t put other colors on your palette;
  • Thinking that the colors you chose are the basis of mixing. That’s just an extreme extension of limited palette.

Winter comes from the Arctic to the Temperate Zone, 1935, Lawren Harris. I’m having a terrible time finding attributions this morning; I’m sorry.

Most masterworks include color notes that are outside the strict color harmony chosen by the artist. When they don’t, it’s to set a mood, for example with nocturnes and sunset paintings.

I’ve included five masterworks from different periods in this post. Your assignment is to identify the color harmony the artist was working within, and then find the accidental notes within the painting.

Monday Morning Art School: Precision

A good painting requires a good plan. What does that mean? 

This last weekend I was painting in the 14thannual Paint for Preservation for the Cape Elizabeth Land Trust. This always involves a big canvas, and this year was no exception: I painted 30×40.

I always start with a drawing in my sketchbook; when I’m working this large, the drawing becomes paramount. To look at my canvas from a distance meant climbing down into a small ravine and back up the next finger of rock, so I didn’t do it often. Accuracy in that situation requires planning. I transfer the drawing faithfully to my canvas, gridding if necessary. Then the sketchbook lies at my feet so I can consult it for values if necessary.

Foghorn Symphony, 36×40, by Carol L. Douglas, will be available through the Cape Elizabeth Land Trust in late August.

“You write numbers on it?” said Ken DeWaard, who’d stopped by with his morning coffee.

“Numbers and colors,” I said. That’s not my idea; it’s one I stole from an old guy named Vincent van Gogh, who often wrote the colors alongside his sketches. The sun at dawn on Saturday was a lemony yellow, and it would have been easy to remember it as richer and deeper. That would have overridden the sense of a transient sea-fog in the distance, which was causing the five lighthouses of greater Portland to play a fog-horn symphony.

Plein air events like Paint for Preservation have no do-overs. We’re required to put out a good painting. There are two options. You can paint more than one, and choose the best. That seldom works for me, since I’m no judge of my own work in the thrust-and-flow of an event. It’s also a lot of work.

Zeb Cove, 40×40, was my 2020 painting for CELT’s Paint for Preservation.

.
I go with the second, which is to paint one good one from the start, using all the tools at my disposal. Since a painting always goes wrong in the planning stages, I make sure my plan is solid, and then I stick with it.

What makes a good plan?

Precision of drawing

This means proper perspective and measurement. You might think this is irrelevant when the subject is rocks and the sea, but it’s as important there as with architecture. Drawing is the only clue about the distances involved. There’s a contemporary Maine style, which involves fast, loose brushwork, but it rests on a foundation of perfect drafting. In fact, bad initial drawing is a great way to end up with a tight painting, since you’ll constantly have to redraw with your brush.

Four Ducks, 30×40, was my 2019 painting for CELT’s Paint for Preservation.

Precision of composition

This means understanding the motive line, energy, and value structure of your painting from the beginning. A 30×40 painting will take from 8-12 hours to finish. The tide will have gone through one full cycle, and the sun will beat its way across the sky as you’re painting. In order to retain the light structure you started with, you must lay it out in advance—and then you must stick with it.

Precision of color

Nothing makes for a muddier painting than constantly restating colors because you didn’t get them right on the first try. Make a grisaille, and check your mixed colors against it.

Rocky, 36×36, was my 2018 painting for CELT’s Paint for Preservation. I’m detecting a theme here.

To mix color properly, you must be absolutely conversant with the pigments on your own palette. This requires practice. The goal is au premier coup, or to nail it on the first strike. That goes not just the for darks, but every color in the picture. Even a painting with wonderful shadows and lights will have many middle tones, often closely related in value. These are actually the most difficult colors to mix accurately. If you have a painting that isn’t working, ask yourself if it has a full tonal range, or is it simply hitting the highs and lows. 

Monday Morning Art School: how to get the most out of a workshop

The important thing you bring to class is not your prior painting experience, but your attitude.

I’m at Schoodic Institute in Acadia National Park this week, teaching my annual Sea & Sky workshop. The following is what I tell my students on the first day:
To teach painting effectively, one must not only know how to paint, but be able to break that down into discrete steps and effectively communicate those steps to students. That’s straightforward, right?
What isn’t so straightforward is how one prepares to be a good student. Learning is a partnership, and students always bring attitudes, personality and preconceptions to the mix. Unless a class is marketed as a masterclass, you don’t need to worry overmuch about your incoming skill level. However, some rudimentary drawing experience will make you a stronger painter.
Photo courtesy of Jennifer Johnson.
More important is intellectual openness. This means the ability to receive correction and instruction without being defensive. (I’ll freely admit I came late to this myself.) The greatest teacher in the world is useless if you’re not prepared to hear what he or she has to say.
Nobody ever paints well when they’re integrating new ideas; it’s far easier to stick with the same old processes even when they don’t work particularly well. They’re familiar. Students should come to class expecting to fail, and even to fail spectacularly. “When I take a class, I produce some of the worst crap in the world, but I will have experimented,” one artist told me. The people who produce pretty things in class are often playing it safe. They’re scared of pushing themselves past what’s comfortable.
Are you worried that you’ll lose your style if you do it the teacher’s way? Your inner self will always bounce back, but hopefully you’ll have learned something that enhances that.
What we teach is a process. The primary goal is to master that process, not to produce beautiful art in any style. If that happens, it’s a bonus, but the real takeaway ought to be a roadmap you can follow long after your teacher is gone.
Photo courtesy of Jennifer Johnson.

The student has some basic responsibilities to his fellow students. He should be on time and bring the proper equipment and supplies. Furthermore, he should be polite, friendly, and supportive to his fellow students. The importance of this latter cannot be overstressed. An overly-needy or unfriendly student can ruin a workshop for everyone, as there’s no getting away from him.

I’ve written before about the pernicious practice of negative feedback, but it’s pervasive in our teaching culture. It takes a while for students to get the hang of recognizing their successes. Before we talk about what needs fixing, we need to trust each other. One way we learn distrust is the idea that, in a critique, we are required to say something unfavorable. Only talk about what’s broken if, in fact, it’s actually broken.
Photo courtesy of Ellen Trayer.
It helps progress to be optimistic, excited and motivated. I’m blessed with an unusually great class this session, and one of the things that distinguishes them is that everyone really wants to excel in painting. They all have a strong work ethic.
Lastly, I think a good student brings a measure of self-advocacy to class. I’m listening hard, and I’m watching carefully, and I still sometimes miss things. I like it when people bring problems or concerns to my attention. It makes me a better teacher.

Monday Morning Art School: basic color harmonies

Understanding basic color harmonies will help you integrate color in your painting.


Split the color wheel in half like this and you have your cool tones on one side, warm ones on the left.
Color is comprised of three elements: hue, value and saturation. We see value first, but our emotional response is largely dictated by hue.
There are some common color schemes, or chords, found in nature and by extension, in art.
The idea isn’t to be slavishly attached to these schemes, but to use them to perceive and point up color relationships in nature. What combinations are in ‘good taste’ and the reactions a color elicits are largely cultural responses. Nobody but me goes nuts about mauve today, but 170 years ago, it was all the rage.
With all color schemes, one hue should dominate.
Complementary
Complementary color scheme

These are colors that lie opposite each other on the color wheel. The most famous example is Christmas’ red and green.
This is a vibrant, high-contrast scheme. It’s the basic schematic for the color of light, where shadows are always the complement of the light color. If the light is a warm gold, for example, its shadows will be cool blues.
Analogous
Analogous colors

Analogous color schemes use colors that lie next to each other on the color wheel. Using analogous colors can make what might be a garish scene (a sunset, for example) more serene.
Equilateral Triad
Equilateral colors

This uses colors that are evenly spaced on the color wheel. The most well-known example is the primary combination of red-blue-yellow.
Triadic color harmonies can be quite vibrant, even without high-saturation colors.  
Harmonic triads
A harmonic triad counting clockwise from the green

This variation counts 3-4-5 in either direction on the color wheel. Start with a key color, and count from there. This is a sophisticated variation on the equilateral triad.
Split-Complementary

Split complementary omitting the complement of blue

This is the color scheme I go to intuitively. It’s a variation of complementary colors. It substitutes for the complement or includes the complement’s adjacent hues. It’s as visually compelling as a complementary color scheme, but allows for much more variation in the accent colors.

Split complementary including the complement of green

Double complements
A symmetrical (square) double-complement color scheme
An asymmetrical (rectangle) double-complement color scheme.

The rectangle or tetradic color scheme uses four colors arranged into two complementary pairs. The colors can be in a rectangle or in a square.