Monday Morning Art School—basic protocol for oil painting

An efficient plan for fast outdoor painting in oils.
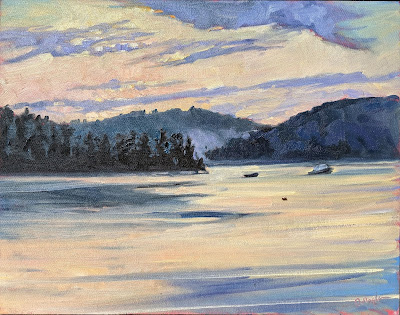
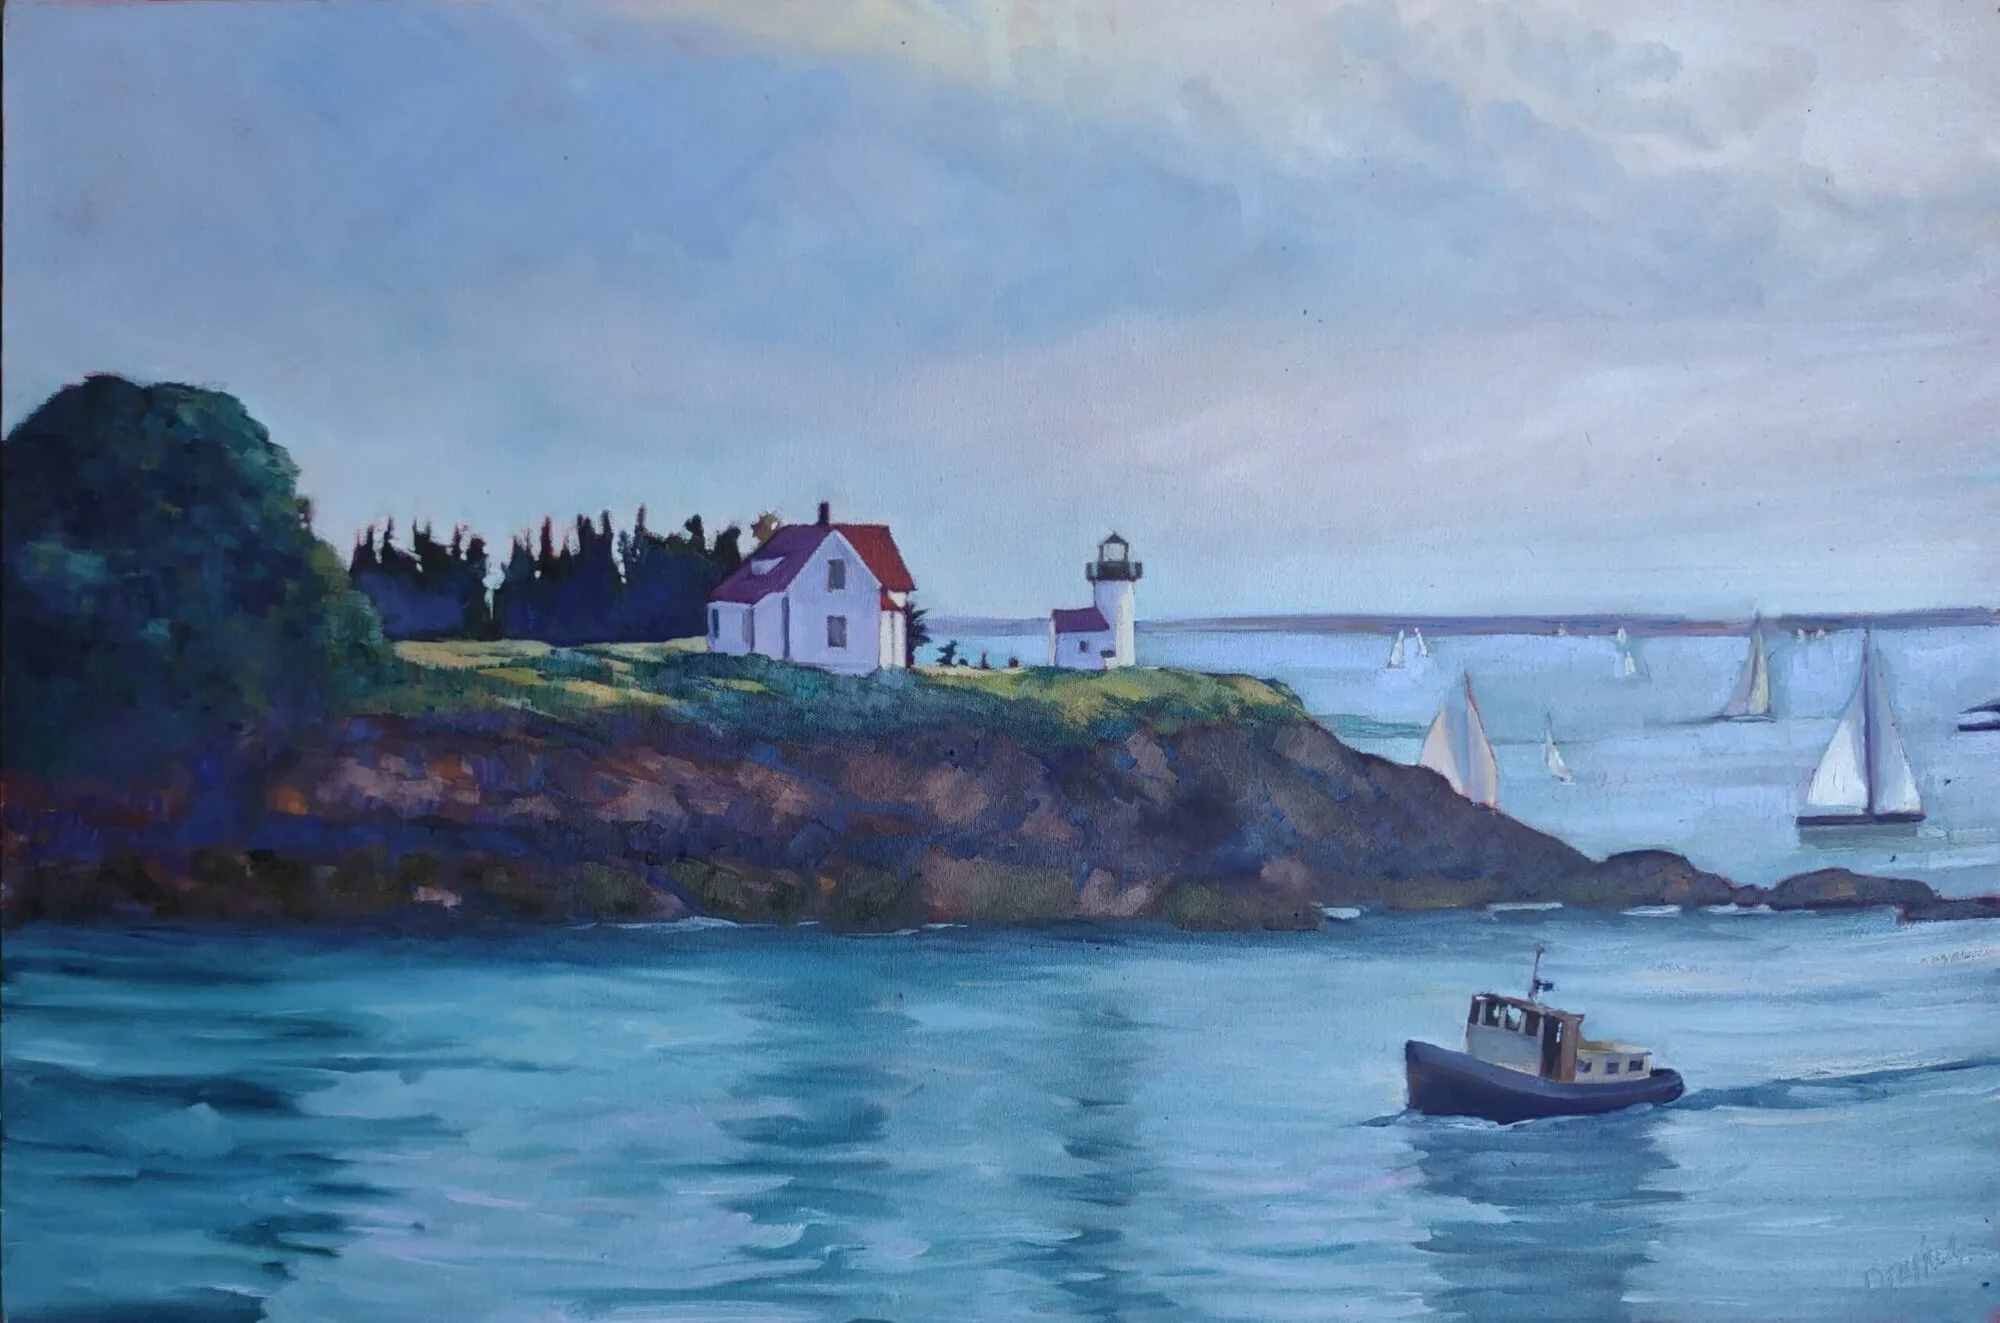
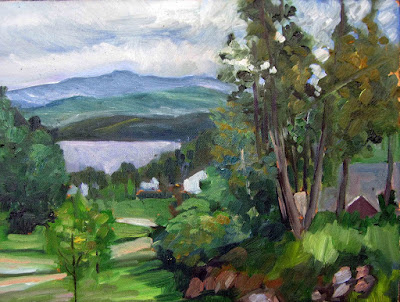
Perkins Point, by Carol L. Douglas. All the paintings in this post were done for Castine Plein Air last week.

Often people ask me how we manage to get so many paintings done during an event. We avoid what my friend Brad Marshall called “flailing around.” That means those times when you seem to lose your way. We’ve all done it, when apparently everything we know falls out of our memory. I’ve written a simple protocol to avoid this. If you always work in this order, you’re less likely to flail around. Feel free to print this and tape it inside your paint box.

Glacial erratic, by Carol L. Douglas

1. Set up your palette with all colors out, organized in a rainbow pattern; may be done before going out.

Putting your pigments in the same spots each time speeds up your process. And putting out all of them when you start ensures that you develop the painting based on what you see, rather than on what’s at hand. Be sure to replace a color when you run out, not when you think you’ll next need it.

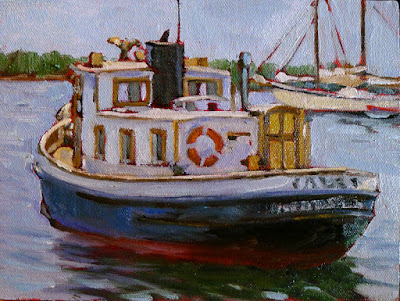
Lil’ Toot, by Carol L. Douglas
2. Value drawing of the scene in question, in your sketchbook.
If you do this on your canvas and then paint over it, you won’t have it to refer to when the light changes or you need to restate your darks. Keeping it in your notebook means it’s always accessible.
3. Crop your drawing, and identify and strengthen big shapes and movements.
If you start by filling in a little box, you only allow yourself one way to look at the composition. Instead, draw what interests you first, and then contemplate how it might best be boxed into a painting.
Tenney cottage, by Carol L. Douglas
4. Transfer drawing to canvas with paint as a monochromatic grisaille.
This allows you to draw with a brush and check your composition’s values.
5. Underpaint big shapes making sure value, chroma and hue are correct. Thin with odorless mineral spirits (OMS), turpentine, or whatever solvent you generally use.
This underlayer should be thin, but not soupy, so it can accept top layers without making mud. You don’t want added oil or medium in this layer as it can lead to cracking in the future. How much OMS? That varies by the day, but just enough that you can drag your brush without scumbling.

Sunrise, by Carol L. Douglas
6. Second layer: divide big shapes and develop details. A slightly thicker layer.
This is the body of your painting, without a lot of detail. Use almost no OMS, and no painting medium or linseed oil. It’s still too early for impasto. For some painters, this is combined with the last layer.
Water Street, by Carol L. Douglas
7. Third and last layer: use medium and more paint, adding highlights, detail and impasto.
This is the final layer, the one with painterly flourishes. Controlled use of medium here results in an even, bright, tough final surface.

Next week: a basic protocol for watercolor painting.

Monday Morning Art School: mixing greens

The rookie error for summer is to paint all foliage using the same basic color. You lose more points if it’s sap green.
Hazy mountain afternoon: Keuka Lake, by Carol L. Douglas. Available.
I have a student who reacts to my pulling out black paint by making the sounds of a rattlesnake at me. She’s been fully inculcated into the idea that black should be banned.
Michael Wilcox published a famous watercolor pigment guide called Blue and Yellow Don’t Make Green. Most of what it tells you can now be found on the internet, but it’s where I first got the idea to add back the banned black.
His point was that there are many routes to the same destination, and that to really mix colors, you need to understand what pigments you’re using, not work from trade names for colors. Consider sap green, for example—a staple of many plein air painters’ toolkit. It’s really a convenience mix made of a phthalo blue and some kind of yellow. The same is true of Hooker’s Green.
Chart courtesy of Victoria Brzustowicz
The single-pigment (‘true’) greens available are chromium oxide green, viridian, and cobalt green. Chromium oxide green is a lovely, heavy, natural green. Unfortunately, it outweighs everything it’s mixed with. Viridian and cobalt green are lovely, but expensive. Beware viridian hue—it’s just another phthalo in disguise.
By now, foliage has settled into a deeper, more uniform tone. The rookie error of August is to paint all your greens using the same basic color, modulating lighter or darker for highlights and shadows. You’ll have much more life in your trees if you know all the different ways you can get to leafy green. One of the most useful greens is black plus cadmium yellow lemon (or Hansa yellow).
Mixed greens, in oils.
The best way to navigate the colors of foliage is to avoid greens out of a tube altogether. A system of paired primaries gives you more options, avoiding the acidity of phthalo, the weight of chromium oxide green, or the soul-sucking darkness of sap green.
In my experience, bad paint mixing causes paintings to go wrong faster than anything else. Constantly over-daubing to modulate the paint color distorts the original drawing and makes a grey mush. If you’re confident of the color, you can apply it fast and accurately.
I make my greens on a matrix, which I’ve shown you both mixed (at top) and on a chart (below). I’m leaving for Castine Plein Air, but if I were teaching, I’d be drilling my students on green this week.
Swatches by Jennifer Johnson
First mix greens according to the chart, and then modulate your resulting greens with tints (meaning a mix of white and a color). The specific tints are unimportant, but the most useful one for landscape is a mix of white, ultramarine and quinacridone violet, making a pale lavender. It is great for atmospheric perspective.
Note that blue/black pigments are much stronger than the yellows. You need about half the amount of blue or black as you do yellow.
Your assignment is to hit paint swatches as closely as you can. 
The second exercise involves stopping at your local hardware store for a few paint swatches. These are Benjamin Moore brand, but you should be able to find similar ones elsewhere. There are two off-whites: one cool and one warm. There’s yellow, green, and two soft blues. Your assignment is to mix until you think you’ve hit the exact color. Then put a dot of it on the card to see how close you got. (If you’re working in watercolor, the dot goes on paper instead.)
Jennifer’s neutral swatches, up close.
I also have my students make neutrals using combinations of ultramarine blue with burnt sienna and raw sienna. I use ultramarine blue and burnt sienna as my standard dark-neutral, because it can go to the warm or cool side depending on how it is mixed. Raw sienna plus ultramarine is my go-to starting point for granite and the sands of our northern beaches.

Monday Morning Art School: Add back the banned black

A color exercise that can be done with anything from a dime-store watercolor kit to a professional palette.
The Servant, by Carol L. Douglas
Back before black was banned from the palette, we had shades and tints. Shades are made by adding black to a pure color. Tints are an admixture of white to a pure color. Shades aren’t an effective way to make something darker, but they often make nice new hues.
What we consider acceptable in color-mixing is style-driven, just like everything else. For example, see the Permanent Pigments Practical Color Mixing Guide of 1954, below. It’s all about making shades and tints. That’s a hint about why mid-century paintings looked so grey. A little shading goes a long way.
A mid-century guide to mixing colors.
Today’s exercise is to make a paint chart playing the warm tones on your palette against the cool tones. Both of these examples were done in class by students. My definition of warm vs. cool has shifted over time. Ten years ago, I included quinacridone violet among the cools; last month I had my student stick it in among the warms. That’s because warm-vs.-cool is an arbitrary designation.
The chart in watercolors.

The instructions are a little different for solid-media students than for watercolorists. In either case, start by marking off your paper or canvas with 1” squares, allowing enough room for the cool colors on the left and the warm colors across the top.

Watercolorists (and users of fluid acrylics) just need to mix the colors. Oil painters need to tint their colors with a little bit of white. I’ll get to that below.
In watercolor, the column on the far left should be pure pigments straight from the tube: blues, greens, black, and violets if you want to call them cool. The row across the very top should also be pure pigments, but in the warm tones: reds, oranges and yellows.
The boxes in the middle of the chart are all mixtures. For example, the second-row-second-column box on Sheryl’s chart is black+raw umber. The third-row-second-column box is ultramarine blue+raw umber. The bottom right box is sap green+quinacridone violet, and so on.
The greatest difficulty for watercolor painters is to try and keep the color balance equal. Pigments differ in density, and it’s hard to control dilution. Still, try to use the same amount of each in your mixtures.
Sheryl was doing something my friend Poppy Balser calls “licking the paper.” (That’s partly because she was using a very cheap paper.) That means she was fussing after she put the first brushstroke down. That gave her final chart a mottled appearance. Try to get the mixture down in one brushstroke and leave it.
The chart in oils.
Solid media (oil, gouache, and acrylic) painters have a slightly different assignment. They need to add white to their mixtures. I always add it on the cool side of the chart, by mixing a large clump of the cool-plus-white colors and using that to work across, modulating the warm colors. Working this way, your second-row-second-column box will be (black+white)+raw umber. The third-row-second-column box will be (ultramarine blue+white)+raw umber, and so on.
Note that there is one three-way mixture on the left column. I do not typically paint with a tubed violet, so row five started with a mixed violet to which I added white. If you use a dioxazine purple, it belongs here.
Your last task for this week is to use color temperature, rather than value (lightness or darkness) to define the volume of a sphere, as in Sheryl’s example, below. Her shadows are warm, and her light is cool. Experiment with reversing that as well.

The shape of this sphere isn’t defined with value (lightness or darkness) but with a shift in color temperature. Try it!

This blog post was originally published on November 13, 2017. I’m traveling today.

Monday Morning Art School: drawing a boat

This exercise is like learning perspective. You’ll never draw this way in the real world, but practicing it will improve your harborside skills.
Cadet, by Carol L. Douglas

I tell my students that it’s best to paint a boat from the deck of another boat or a floating dock. If you can’t, then keep your distance. The tides in Rockport average about 12 feet. That means that if you stand on the public landing painting the lovely and graceful Heron, her angle is going to shift more than 20° over six hours. That’s an impossible perspective shift to manage.

There aren’t tides on lakes, obviously, but the waterline-view of a boat is still often the loveliest view.
Two figure eights. The top one is going to be stern-facing; the bottom one is going to be bow-facing. Thus the lines on the right are straight for the sides of the transom, curved for the bow. I made the bow loop slightly bigger because in practice the bow is likely to be higher.
I learned to draw boats based on figure eights. This is simple. You can master it in the studio before you go out to tackle the real thing. Since the bow of a boat is generally higher than the stern, I draw that end of the figure eight higher. The figure mustn’t be two circles, but you can make it as short or long as you wish. There’s no reason the two loops must be equal, although you should try it that way first. It’s easiest to do this when you’re not trying to be overly precise.
The fattest points of your figure eight are going to be the stern and bow of your boat. The keel curves in the front, so that line is drawn as a curve. The stern may curve in a fantail or be a flat transom. That varies by the boat.
The next step is to erase the extra lines and add a little shading. I took the liberty of adding a little extra height to the bow on the bottom.
In the top example, I put the transom forward; in the bottom drawing I put the bow forward. The important thing to realize is that the figure-eight is just like an optical illusion: it can go either way. Once I draw the curve or cut off the transom, I just erase the extra lines and gussy it up with some shadows. 
In the very old days, small boats were sometimes clinker-built, meaning they had overlapping planks that made for beautiful curving lines beloved of artists. If you see those planks on a modern boat, they’re molded. I halfheartedly faked them in on my drawing, because I no longer entirely believe in them.
The actual direction of the boat is like an optical illusion; it can flip either way. The Scrumpy’s notch is a little crooked; sorry.
Drawing boats like this is like drawing perspective. You need to know how to draw 2-point perspective but you’ll never really draw those rays on your canvas while you’re working. It’s an exercise that teaches you a principle that you then incorporate into your work.
Dinghy, by Carol L. Douglas, shows how fast that can be done in practice. This was a workshop demo.
The same with this kind of boat drawing. The take-away lesson is this: as long as you have the relative heights of the pieces of your boat right, it can swing on its anchor all afternoon without significantly messing up your painting. Block it in with initial measurements and let it go from there. The parts will stretch out or grow shorter, but their heights will always remain the same. 
Once you see it as a process of squeezing and lengthening the horizontal shapes while leaving the heights the same, drawing moving boats is easy.
That liberates you from worrying when your boat—as it will—wanders around its mooring. I did the little sketch above to demonstrate that.
This was first published on February 12, 2018, but some things bear repeating.

Monday Morning Art School: the need for green

A fast, easy route to mixing plausible summer greens.

Overlooking Lake Champlain, by Carol L. Douglas. Every green in this painting came from the matrix below. And, yes, there’s a scrape in it. It tumbled off a bluff.

The need for green came early to class this year, paradoxically because it’s been cold this spring. There’s little green peeping out in nature, even here on the coast.
Last week in class we worked on salvaging failed paintings. That meant pulling out work from summers past. Most of them included some greens, so we had to mix a green chart.
A basic mixing chart for greens, made by my friend and student Victoria Brzustowicz.
We are only weeks away from painting greens again, in all their light, airy delicacy. Even now, the osier and willows have red and yellow in their branches. By June, we will be wrapped in a blanket of immature foliage ranging in color from pale emerald to pink. It’s a good time to brush up on some color theory.
By August, the color will have settled into a deeper, more uniform tone. The only way to navigate this is to avoid greens out of a tube. A system of paired primaries gives you more options, avoiding the acidity of phthalo green, the weight of chromium oxide green, or the soul-sucking darkness of sap green.
If you look carefully at supposedly-uniform foliate, you will see patches where the color leans toward khaki, yellow, teal, violet and orange. They are what gives life to greens, just as accidental tones give life to human skin.
Michael Wilcox published a watercolor pigment guide called Blue and Yellow Don’t Make Green. Of course they do, but his point was that there are many routes to the same destination. One of the most useful landscape greens is black and cadmium lemon or Hansa yellow. Of all the greens I mix, this and ultramarine with yellow ochre are the two I use the most.
The above chart, mixed in oils. It works just as well in water-based media.

In my experience, bad paint mixing causes paintings to go wrong faster than anything else. Constantly over-daubing to modulate the paint color distorts the original drawing and makes a grey mush. If you’re confident of the color, you can apply it fast and accurately.

Above is the matrix of greens I’ve used for almost twenty years. The range of results is infinite. It depends on the proportions you choose and the brand of paint you use. However, blue/black pigments are always much stronger than their yellow mates. In any mixture, you need about half the amount of blue or black as you do yellow. This has nothing to do with color theory. It’s because darker pigments have more staining power than do lighter pigments.
Victoria Brzustowicz made this color chart based on my workshop palette. Here is a printable PDF.I crossed out the red on the chart because, while I do use it in the studio, in most field painting it’s unnecessary.
Once you’ve finished mixing that matrix, it’s time to tie it to the bigger palette. I encourage students to arrange their paints as above because:
  • It’s efficient;
  • It allows you to mix without thinking;
  • It encourages you to use the full color range in every painting;
  • It prevents the beginner’s error of modulating with white or black;

You can modulate your greens using tints of your other colors. For atmospheric greens, modulate with blues and violets. For warm, lighter greens, modulate with warmer tones.
Mount Hope Cemetery in the Spring, by Carol L. Douglas
Above is a photograph I took several summers ago. Your mission is to use the green chart I’ve made and mix tones similar to the different greens in the photo. If you get the mixing right, painting this scene will be a snap.

Painting outside in the cold spring weather

Your paints will work fine; you just need to dress properly.
Deer in snow, by Carol L. Douglas. I included this because I hit one on Saturday. She bounded off, but she’s gonna have a headache.
Normally, plein airstudents take it easy in the dead of winter, but not my current class. They’ve trooped faithfully to my studio through the worst weather. It’s still five days until Spring, but they’re all anxious to get outdoors.
Uninsulated spaces are pretty common in Maine, where the houses are attached to barns and sheds. One of my students has his studio in one of these outbuildings. In summer, it’s delightful, but in the dead of winter he switches to watercolor so he can work in his kitchen. Now that it’s warming up again, he wants to get back to oils, but even with a woodstove, he’s unlikely to raise the temperature much above the low forties. “Do you have any tips for me?” he asked.
Upper Reaches of the Pecos River, by Carol L. Douglas
It’s actually easier to stay warm outside, as long as the wind isn’t blowing. Even an overcast day will have some solar gain, whereas an unheated barn can get pretty damp and cold.
The most important part of your body to insulate is your feet. Standing in one place is far more taxing than walking around in the cold. A piece of carpeting on the ground or floor will help. Always wear insulated snow boots or snowmobile boats. Don’t have them? Get some oversize Wellies and several pairs of wool socks. Yes, you’ll waddle, but agility isn’t the issue here; insulation is. (This is a “do as I say, not as I do,” statement. I’m always going out in the wrong boots.)
I wear nitrile-palm fishing gloves to paint. They’re warm enough for all but the worst days, when I add a chemical hand warmer. And dress in layers, as you would for any winter activity.
If you’re working in pastel, you have no material-handling problems at all.
Will your paint work? Yes!
I regularly store my palettes outdoors in wintertime. I can pull them out of the snowdrift (assuming I can find them) and start painting immediately. Oil paints in a linseed oil binder don’t freeze until they reach -4.27° F or -20.15° C.
Even when we get below that point, oil paint seems to thaw with no problems. The oil binder doesn’t change color, viscosity or clarity, and nothing separates.
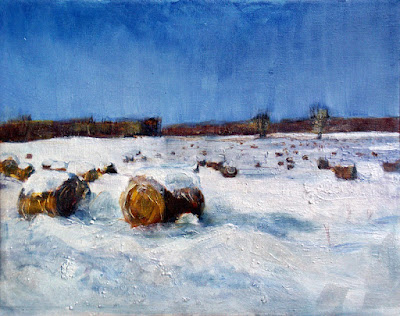
Haybales, Niagara County, by Carol L.Douglas. This was painted at -10° F., and the lumps are frozen paint. In addition, my cell-phone battery and my car battery both died from the cold. I must have been crazy.
In the summer, I move my palettes to a freezer. Most home freezers are set at about 0° F, so the paint is very chilled but not actually frozen. The cold temperatures slow down oxidation, which makes the paint stay open longer. (I had a dedicated chest freezer for my paints, but my husband insisted on filling it up with food. Now I keep my palette in a waterproof stuff sack so that it doesn’t contaminate our future dinners.)
As long as you’re above -4.27° F, your paints will work more or less normally. They may get slightly thick as you get close to 0°; just increase the amount of solvent very slightly and they’ll be fine.
Twilight on my stone wall, by Carol L. Douglas
If you use watercolor, you can add grain-alcohol, vodka or gin as antifreeze. A good rule of thumb is that you can add up to 20% booze to your paints before they get tipsy. But not all pigments can handle their liquor. Be prepared for excess paper staining, or different precipitation rates than you’re used to with plain water.
I know of no way, sadly, to keep acrylics from freezing. 
With any medium, you’re unlikely to have precise control of your brushes when you’re bundled up and your hands are in gloves. Work loose and don’t sweat the details.

Monday Morning Art School: the warm and cool of it all

Mixing paints is simple if you understand how pigments work.
Tilt-a-Whirl, by Carol L. Douglas. Painted plein air.
Let’s start with some simple review of the color wheel. Red, blue and yellow are the primary colors. Across the wheel from a color is its complement—the color that completes the circle. The complement of a primary color is always a secondary color. A secondary color is one made by mixing two primary colors.
The color wheel.
In theory, you can paint with just four pigments: red, blue, yellow and white. For beginning painters this is sometimes a good idea, because it’s the fastest way to learn color management in a hurry. It simplifies the thought process so you have only one decision to make at a time, and it is easier to get a more unified color scheme.
But there is a big limiting factor, and that’s the impurity of pigments. They all have overtones that muddy them up in certain mixes. That’s why your local paint dealer uses many, many more pigments than just red, blue, and yellow.
The takeaway lesson here is that different pigments may look similar out of the tube, but they reflect light (and thus mix) very differently. From Scientific Examination of Art: Modern Techniques in Conservation and Analysis, 2003, National Academy of Sciences.
Claude Monet’s palette shifted over time, but included these paints:
  • Chrome yellow
  • Cadmium yellow
  • Viridian green
  • Emerald green
  • French ultramarine
  • Cobalt blue
  • Madder red
  • Vermilion
  • Flake white
  • Ivory black (before 1886)

These are sets of paired pigments. That means he has a warm and a cool of each color. Gamblinmakes a modern version of this impressionist palette. It includes:
  • Cadmium yellow light
  • Cadmium yellow medium
  • Cadmium red light
  • Alizarin permanent (actually anthraquinone red)
  • Ultramarine blue
  • Cerulean blue hue (actually phthalo blue plus white)
  • Viridian
  • Ivory black
  • Flake white replacement (or titanium white)
Paired primaries.
Both Monet’s and Gamblin’s palettes are paired primaries plus green, white and black. I use paired primaries as well, omitting the green but adding in some other earths. (Here are my supply lists for oils,  acrylics, and watercolors.)
The distinction between warm and cool colors has been important in painting since the Impressionists. Warm colors are said to be hues from red through yellow and cool colors are said to be the hues from green through violet. Each hue around the color wheel also has a warm and a cool version.
  
There’s no factual hot or cold point because this is a poetical description that works, rather than a scientific fact. Much of what we believe about the psychology of color is hocus-pocus, but it’s true that if the light is what we call “warm,” the shadows are what we call “cool,” and vice versa.
When we say that lemon yellow is cooler than cadmium yellow deep, we mean that if you are trying to mix a greenish yellow, you’ll get a clearer shade with the lemon than you will with the cadmium. The warm-cool language is just a convenient way of saying that.
Different pigments may look the same when squeezed out of the tube, but there the similarity ends. Pigments are impure, and you have to learn and work around those impurities.
Today’s lesson is an experiment in working through those color shifts. I want you to make the above color chart, using three sets of paired primaries:
  • Prussian blue—Ultramarine blue
  • Quinacridone violet—Cadmium orange
  • Indian yellow—Lemon yellow

The purpose of this exercise is to understand how paired primary pigments work together, so that you can make neutrals when you want them, and avoid mud when you don’t.

Draw the chart onto a canvas, and then mix across and down for each square. The left column and the top row should be pure pigments. Fill it in, then, just like the multiplication tables of your youth. For example, the intersection of cadmium orange and ultramarine blue should be a 50-50 mix of those two colors.
Unless you’re painting in watercolor, the result should be opaque.
Let me know if you have any questions. And have fun!

Monday Morning Art School: landscape from abstraction

Create a drop-dead painting from a so-so scene.
Wreck of the SS Ethie, by Carol L. Douglas
Certain places are fascinating for something other than their pictorial value. The angle, the light, and the setting aren’t conducive to a great composition. An example of this was the wreckage of the SS Ethie in Gros Morne National Park in Newfoundland. This is a lovely shipwreck story featuring a dog and a baby, but I’ve told it before.
I’d driven up the Great Northern Peninsula specifically to paint this wreck (and to visit the Viking site L’Anse aux Meadows.) When I arrived, I realized it was nothing more than a beautiful cove with a debris field spreading for thousands of feet along a rocky shore. There was no hulking wreck to paint, merely broken things lying around—much like my parents’ barnyard, in fact.
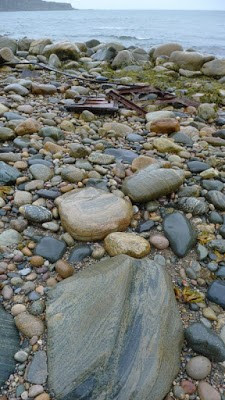
The actual debris field looks like this.
Hurricane Matthew was bearing down on us in the form of a blizzard, so I took photos and completed the painting elsewhere. However, I’ve used this technique successfully in plein air painting as well.
The cove itself is beautiful, and I could have painted a nice anodyne scene of it—lovely, but saying nothing about the wreck. I could have done a close up of one bit of machinery. Instead, I created an abstraction and fitted the details in to it. I do this whenever I’m feeling blocked, either because the subject matter isn’t fitting naturally, or because I’m too anxious.
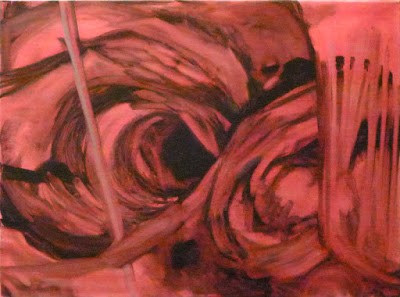
Initial abstraction for Ethie, based on the word Maelstrom.
To do this, I improvise a series of shapes on a large canvas, much as if I were going to paint a non-representational painting. The only guidance I give myself is a word. In the case of the wreck, the word was maelstrom. When I demonstrated this technique last week for the Bangor Art Society, the word was mourning. Another painting I did recently started with a phrase, Dwight’s school bus. It was nonsensical; my son walked to school. That word is generally inspired by place or events, and it’s surprising how often the painting ends up reflecting the word I started with.
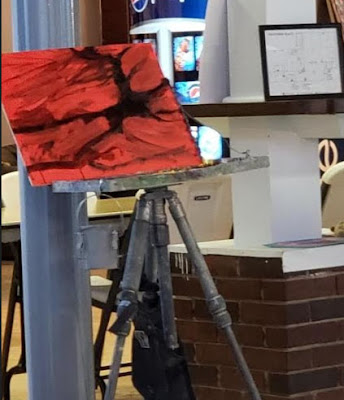
After the Bangor Art Society decided this was a tree, I turned it that way and started making it into one. Photo courtesy of Teddi-Jann Covell.
I start this process with a line. In the Bangor painting, it was a flat, thick line that crossed the canvas. In the Ethie painting it was rounded and rollicking. I never start this with a sense of up or down, and I often rotate the canvas while I work. This process can be the longest part of a painting. I’m searching for the composition from my subconscious, rather than from reality. Sometimes it’s based on my initial line and sometimes the line gets subsumed into something else entirely.
When the abstraction is done, I rotate the canvas to see how it might represent something real. At the demo, I asked participants to identify things they saw in my abstraction. Suggestions came fast and furious. I’d had them draw alongside me, so I then asked them to identify things they saw in their abstractions. Total silence. I asked them to trade with their neighbors and again the room was full of suggestions.
There’s a lesson here. We’re born with the capacity to recognize objects in abstract shapes; it’s part of what makes us intelligent and aware, and keeps us safe. A half-seen shape tells us, almost instinctively, when we belong on high alert. But we moderns tamp that down. We allow subliminal shapes to appear in our drawing, but then resolutely refuse to recognize them. That’s where turning the canvas is so helpful. The mind no longer sees it as ours, but as something new.
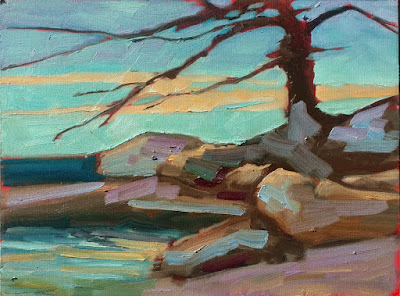
My demo painting for the Bangor Art Society. It’s not finished to a level I aspire to, but I was getting tired.
Once I find the objects in my abstraction, I hew to them fairly tightly, converting them into figurative art. But I don’t always solve all the corners of my paintings at the first run. After I’ve drawn in one thing, another suggests itself. And sometimes I change up passages on the fly.
“I feel like I had to understand a lot about light/shadow, perspective, and value before I could do an invented landscape with any authenticity,” a painter commented. This is true, but we all know more than we think we know. And painting from memory is a great way to expand one’s visual memory.
Furthermore, it’s not necessary to do this totally from memory. Try it outdoors, subbing in that rock over there or that tidal pool over there. You’ll end up with a sense of the place, rather than a literal transcription of the place. If you use photo reference, don’t start adding details until you’re well along in the design process. Remember that reality should always be subservient to design.
This reaching down inside yourself is difficult business. But it’s worth experimenting with. I hope you’ll try it and let me see your results.

Monday Morning Art School: practice seeing values

Value is the most important dimension of color. Here’s an exercise to help you see it better.
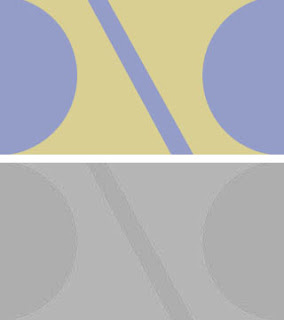
On the left, color strips. On the right, monochrome approximations of those colors. Photo courtesy of Kyle Buckland.

This week’s exercise is brought to you by outstanding painter and teacher Kyle Buckland. He graciously allowed me to share it with my class and you.

A simple value scale.

Value in color theory is how light or dark something is on a scale of white to black (with white being the highest value and black being the lowest value). It’s the hardest dimension of color to match, but it’s also the most important. It’s what we register first when we look at a painting.

“You can never do enough of this type of training the eyes,” wrote Kyle. He’s right.
I made you this approximation of Kyle’s stripes, or you can paint your own.
Kyle ran a series of colors across a sheet of paper, as above. You can either copy his technique and make your own stripes, or you can print the image I made, above. A PDF is here.
I printed this on a color laser printer on card stock. If you have an inkjet printer, you may need to spray it with fixative to prevent the ink from bleeding into your greys.
You’re going to make a series of stripes on the right, matching the value of the color on the left as closely as you can get with grey paint. Use acrylic if you have it; gouache or oils otherwise. If all you have is watercolor, you’re going to have to make a separate card and set it next to this one. 
Kyle converted his photo to black and white to demonstrate his close matches. Photo courtesy of Kyle Buckland.
When you’re done with this exercise, I’d like you to photograph it with your cell phone and camera and delete the color information; i.e. turn it into black-and-white. (On my cell phone, I go to picture editing and a b/w filter pops up automatically.)
Cameras can be wrong in value assignments. Both the yellow and green are way off.
Compare your stripes. If you’re way off, repeat this exercise until you’re more accurate. However, this comes with a caveat. The human eye is subjective and not everyone sees value the same way. Software is also in some ways subjective, since it was programmed by humans. In the sample above, yellow is obviously the highest-value color on the wheel. But Photoshop perceives it as darker than orange. Your camera and your eye may disagree.
Why is value so important? It creates a structure for the painting to flow through. If there are dark values in an organized pattern, synchronized with mid-range and light passages, your finished piece will draw the viewer in.

Monday Morning Art School: an exercise in color

This exercise teaches you to think of the three aspects of color as separate properties.
Water lilies (Yellow Nirwana), 1920, Claude Monet, courtesy the National Gallery, London. Much of Monet’s work was experimenting about the nature of color.

When we ask people, “what’s your favorite color,” we’re using the word color in a simple way, and we expect a simple answer. In fact, color has three basic characteristics:

Value â€“ How light or dark is the color? Blue-indigo is the darkest color, yellow is the lightest. Red and green fall somewhere in the middle.
Hue â€“ Where does it sit on the color wheel? All colors fall into one of the following hue families: red, orange, yellow, green, blue and violet. Within those families, however, are many subdivisions.
Chroma â€“ How much intensity, or “punch” does the color have? Grey is low-chroma; fuchsia is high-chroma.
For more detail, see here.
Complementary colors are opposite positions on the color wheel.
Analogous colorsare a set of colors that sit next to each other on the color wheel.
This exercise teaches you to hold value and chroma steady and manipulate only hue. It’s hard to make these judgments subjectively, so your samples may not look exactly like someone else’s.
Go to the paint store and select paint chips in two different color schemes—complementary and analogous. I want you to choose paints with the same value and chroma but the hue will be different.
Complements where the value and chroma are the same.
They don’t necessarily have to be high-chroma combinations. Here’s a pair of complementary hues which have less saturation (lower chroma):
An example of an analogous color scheme where the value and chroma are the same for all three hues:
Once you’ve selected the three paint samples, chop them up and arrange them on a little card as a design. Glue them down in a pattern that pleases you. Try to leave no space between the different colored tiles so your finished work looks something like this:
Above: my chops. Below: Photoshop’s evaluation of how close I came with the values. (Remember, Photoshop is interpreting as much as I am.)

I don’t care what kind of shapes you make or how complicated your design is. I just don’t want white showing between the sections.

If it proves difficult to get out, and you want to get started, you can always make your own paint swatches. But it’s fun to get them from the hardware store, cut them up and make patterns.