
In response to last week’s post, people asked me to write about framing your work. Even if you never plan to do it, you’ll understand why good framing is expensive.
Unless you are a skilled woodworker, don’t build your own frames. You need a miter saw, corner clamps, and a joiner of some kind. You’re unlikely to recoup the cost of your investment if you don’t already have those things, and you’ll waste time and materials learning. You can, however, buy precut kits from some moulding suppliers. That’s a good option if you don’t like the selection available in premade frames. (I do make my own frames at times, but I’d rather be painting.)
Measuring
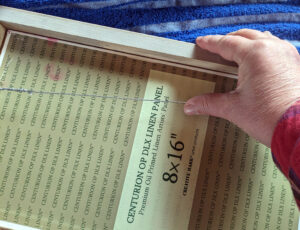
Premade canvases and archival painting boards come in standard sizes. These conveniently match up with premade frames. Years ago, I knew an artist who worked only in one size. Not only did it make framing a snap, she could tear down and pack a show in minutes. I can’t bring myself to do that, but I seldom deviate from what I can frame off-the-shelf.
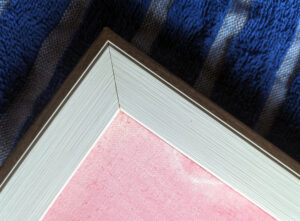
In addition to the nominal height and width of a frame, there’s the rabbit depth. That’s the depth of the recess at the back of the frame into which the board or canvas slides. Most plein air frames have a shallow rabbit, which means if you’ve painted on canvas, you might need offset clips to install the painting. A canvas framed like this will stick out from the wall.

Choosing a frame
Frame styles come in and out of fashion, and there are regional differences in what buyers want. I can’t tell you what will work for your painting, but it makes sense to go to local galleries to expand your thinking on the subject.
What do you need?
Acrylic or glass glazing is needed for watercolors, pencil, and pastel work. Watercolor and pastels are often framed with acid-free paper mats (although I prefer mine free-hanging). All works on paper need an acid-free backing board, to which the work is lightly adhered with acid-free tape.
Pastels need acid-free spacers, which are thin strips of mat board to keep the pastel from touching the glazing. (I make my own from scraps of matboard.) If you’re planning on shipping framed work, the glazing must be acrylic. In its museum-quality form, it’s more expensive than ordinary glass. There’s also non-reflective glass if you aren’t planning on shipping the work. For pastels, there’s one more expense: a static brush and/or anti-static acrylic cleaner.
In addition, you’ll need the following tools:
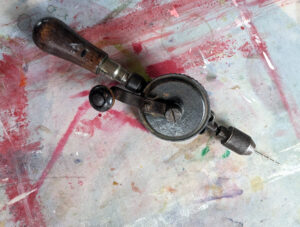
- A hand drill to start pilot holes. Using a power drill almost guarantees you’ll put your pilot hole right through the front of your frame, as you don’t have the fine control;
- 3/32” drill bit for hardwood frames;
- Wire nips;
- A point driver (never carry this in your carry-on luggage);
And the following consumables:
- D-rings;
- #6 x 1/2″ wood screws,
- Picture wire (the coated wire is superior, but I haven’t run out of the old stuff yet);
- Offset clips if your painting is deeper than the rabbit;
- Corner bumpers.
Framing your work
After cleaning the frame and glazing (with ammonia-free glass cleaner), place the frame upside down on a soft towel to avoid scratches. If you are using glazing, place it in the frame next, carefully avoiding new fingerprints. If using a mat, that goes in next, to be followed by spacers if necessary. Next comes artwork. If there’s any flexibility in this ‘sandwich’, you may need to double the backing board.
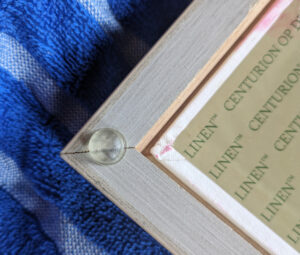
Next, drive points in. It’s not necessary to go overboard. I put one in about a 1-2″ from each corner and space them about 6″ apart. I tuck a business card in the bottom right corner. Before there were point drivers, people put paintings in frames using tiny brads. It’s a pain in the neck, so if you plan to frame work often, a driver is an excellent investment.
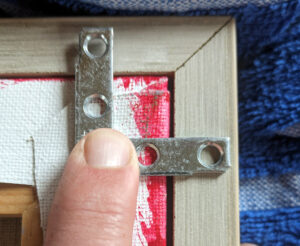
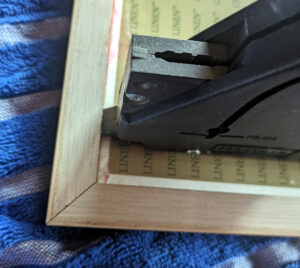
Offset clips are installed with the same #6 x 1/2″ wood screws that you will use for D-rings. These can be driven directly into the back of the canvas stretcher if needed. I sometimes use mending plates if the rabbit is the same depth as the canvas.
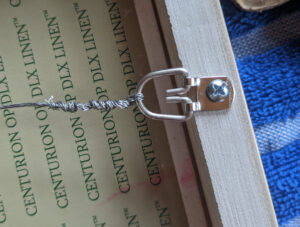
The D-rings should be mounted one-third from the top of the frame. (In other words, if the frame is 15″ tall, the D-rings should be 5″ from the top.) If the frame is hardwood, you’ll need to drill pilot holes for the screws. It’s easy to slip and drill right through the front of the frame, which is why I use a hand drill. If you’ll only ever use the drill bit for this purpose, you can put a masking tape cuff on the bit as a guide.
There are different D-rings for different picture weights. Do not use sawtooth hangers for professional artwork; many galleries will not accept them.
Your wire should be a loose S-curve the width of the painting. Make sure the wire is not too loose or the painting will dangle away from the wall. Wind the wire ends tightly and trim with your wire nips.
Attach bumpers to the two bottom corners. This will prevent the sliding that causes paintings to go cattywampus every time you brush by.
Registration is now open for workshops in 2026! Reserve your spot:
- Advanced Plein Air Painting | Rockport, ME, July 13-17, 2026
- Sea & Sky | Acadia National Park, ME, August 2–7, 2026
- Find your Authentic Voice in Plein Air | Berkshires, MA, August 10-14, 2026
- New! Color Clinic 2026 | Rockport, ME, October 3-4, 2026
- New! Composition Week 2026 | Rockport, ME, October 5-9, 2026
Can’t commit to a full workshop? Work online at your own pace:
Hey Carol,
There have been some alternatives to glass for watercolor….archival varnish, spray…. Possibly gaining some acceptance by the American Watercolor Society ( not sure) but I use it.
Dennis, I considered writing about watercolor finishes but decided this was already too long! Nice to hear from you.
Whats your source for precut mouldings?
I buy mine from Omega Moulding. You need to establish a commercial account.
Framing…arrrggggh! What used to be a $20 frame is now a $60 frame, and most shows don’t accept gallery wrapped canvas. Even Higbee is out of reach these days, and Judson’s sales have dropped from 40% discounts to 30%. What’s a painter to do?
Literally almost half my studio is dedicated to framing. It should be a course in college but they could not afford space and equipment. I learned on the job framing for a museum installation – a most valuable lesson.
Let’s not forget how to keep all these things sparkling clean and dent free. In an artists studio that is no mean feat. Then hand a piece over to an untrained, cavalier new assistant for a show and my skin crawls.
Arrghh.
Kudos for tackling a tough topic.