I have an aversion to frisket, or masking fluid, for watercolor. I’m unable to apply it elegantly. It wrecks brushes, leaves lumpy marks, and in general always seems like more trouble than it’s worth. Instead, I wet my paper carefully around the items to block out and then apply the paint using capillary action to direct it. That has its problems as well, so when Michael Prairie shared this method of applying frisket using an old-fashioned ruling pen, I was gobsmacked. (Mike’s an engineer, so it’s no surprise that he found a solution to this technical problem.) Without further ado, I’ll let Mike explain it:

I had my father’s old ruling pen (he was a machinist and did some mechanical drawings). It was beat up a bit, so I tuned it up. Here are a couple useful links that I found, one of which really helped me tune the tip:
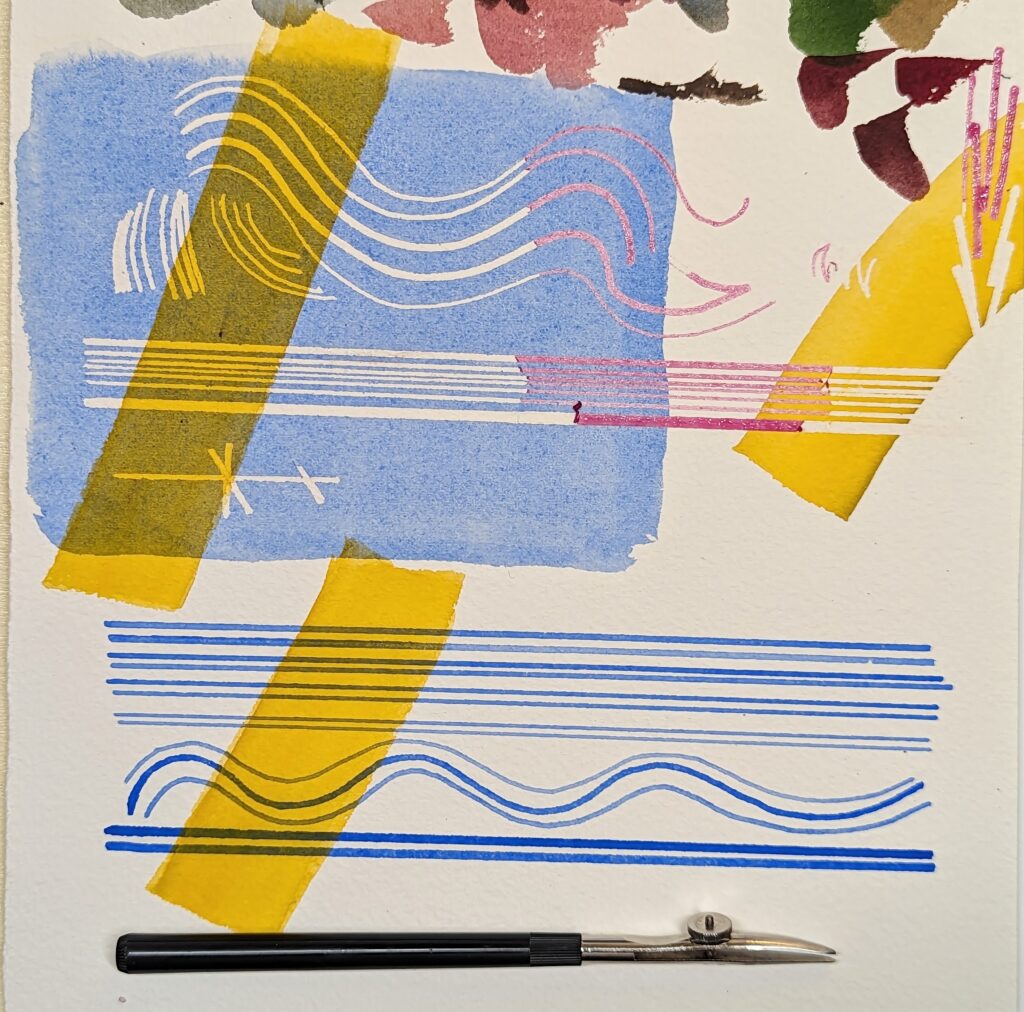
I can tint the fluid with a bit of watercolor pigment, and it hasn’t stained the paper. Some fluid is available in blue, but this lets you use different colors if you want.
The ruling pen works well with the watercolor paint itself. It is a great way to paint long lines of uniform thickness.
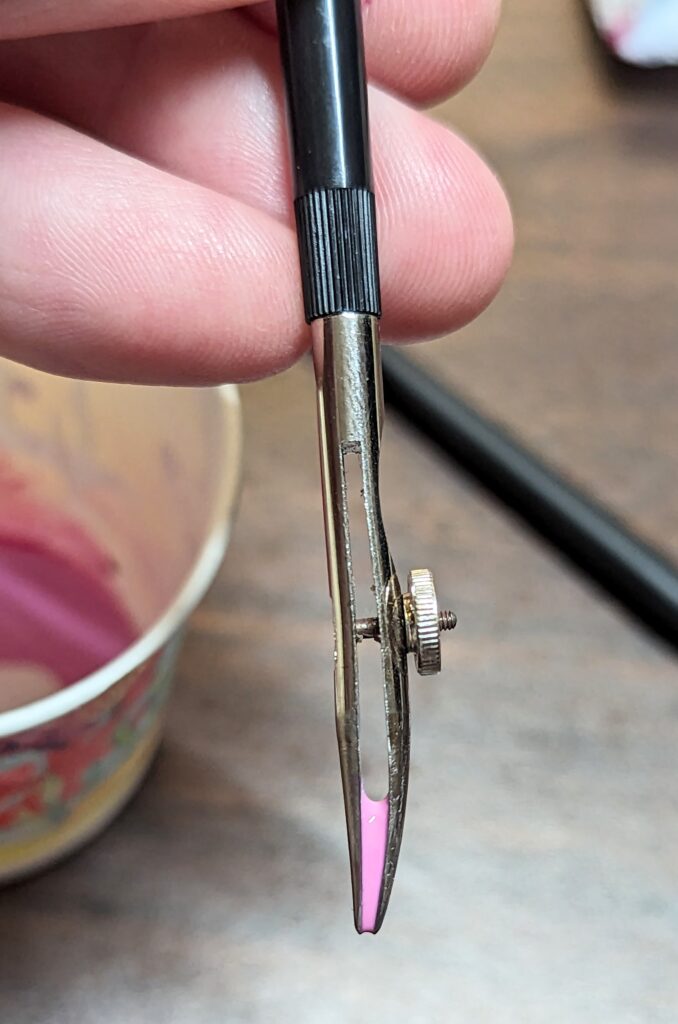
Dipping the tip in thick masking fluid and wiping the excess off outside of the channel works well, but with thinner watercolor paint it tends to wick out of the channel. For that, I found I can load the pen with a loaded watercolor brush by scraping it across the edge higher in the channel. I also got an eye dropper to load the pen, and that works well.
For using a straightedge to draw lines, the edge should be lifted above the paper so the fluid or paint does not wick under the edge. Some straightedges are designed with a notch (or a rabbet in woodworking parlance) for “inking,” but a couple layers of masking tape set back from the edge will do the trick.
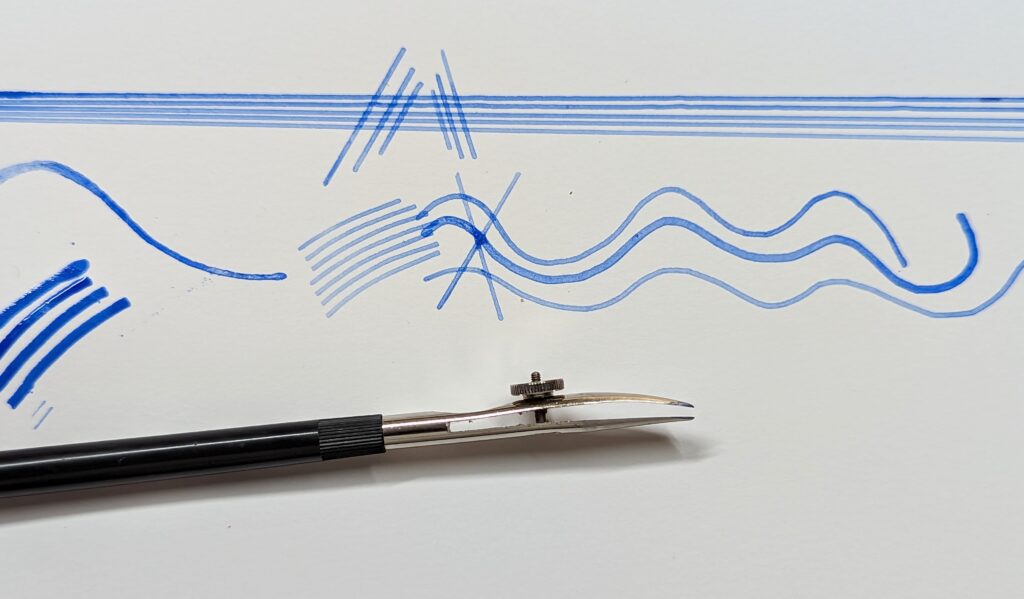
The ruling pen can be used freehand as well. With the tips tuned so they are sharp and parallel, the line will follow the direction of the two edges on the tip. If the pen is held without rotating the handle, the line will be straight, but if the handle is rotated while drawing, it can be steered to make smooth curves.
Some people use nibs (from fountain pens). I haven’t tried that, except for a crude nib I made with a plastic drinking straw. It worked okay for scrubby applications of masking fluid.
I ruined an old paintbrush by not dipping it in Dawn dishwashing soap first-and I don’t know what the soap will do to the paint if residue is left behind.
I also tried some silicone brushes and found that they were good for dropping small semi-controlled blobs of masking fluid and moving it around into desired shapes, but they don’t come close to what I can do with a ruling pen for straight lines.
You can get a ruling pen at Dick Blick, or a cheaper one at Amazon, but not all drafting tools are created equal. I didn’t want a cheap knock off, so I went to ebay where I found a used Staedtler Mars one for eleven bucks including the shipping. That means I will find my old one shortly, right?
Registration is now open for workshops in 2026! Reserve your spot:
- Advanced Plein Air Painting | Rockport, ME, July 13-17, 2026
- Sea & Sky | Acadia National Park, ME, August 2–7, 2026
- Find your Authentic Voice in Plein Air | Berkshires, MA, August 10-14, 2026
- New! Color Clinic 2026 | Rockport, ME, October 3-4, 2026
- New! Composition Week 2026 | Rockport, ME, October 5-9, 2026
Can’t commit to a full workshop? Work online at your own pace:
Coolio! To me, a rank beginner watercolourist, this explanation of masking fluid is clear and concise. I have a fine old drafting set with ruling pens so I’m going to try this!
Another hint is to make sure you hold the ruling pen straight up, perpendicular to the paper, when you use it.
Great advice. Almost all my ruling pen and rapidograph disasters happened due to slouching pen. Which is oddly similar to my posture…